Inspire Your Next DIY Project
Creating your own furniture can be a deeply rewarding experience. The sense of accomplishment from building something with your own hands is unparalleled. Our DIY Tote Storage Rack, constructed entirely from easy-to-source 2×4 lumber and plywood, is the perfect project for both novice and experienced woodworkers. Imagine transforming your garage into an organized haven where every tote has its place. This project not only enhances the aesthetics of your space but also boosts its functionality.

About the DIY 2x4 Tote Storage Rack
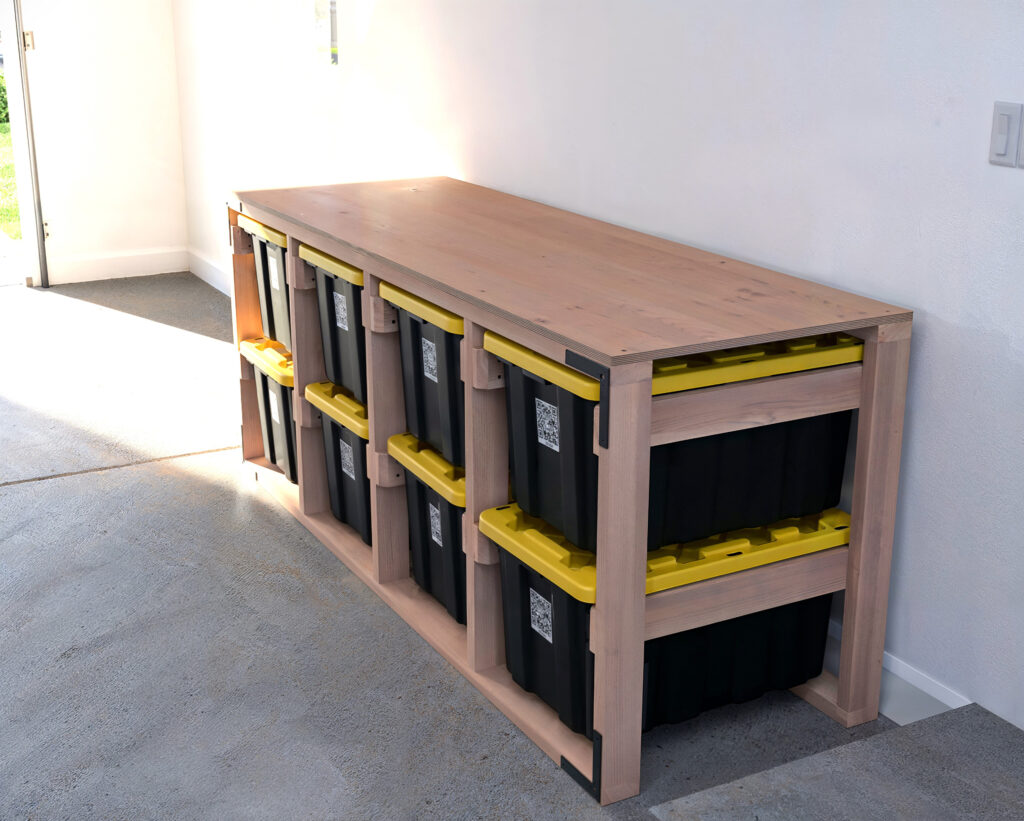
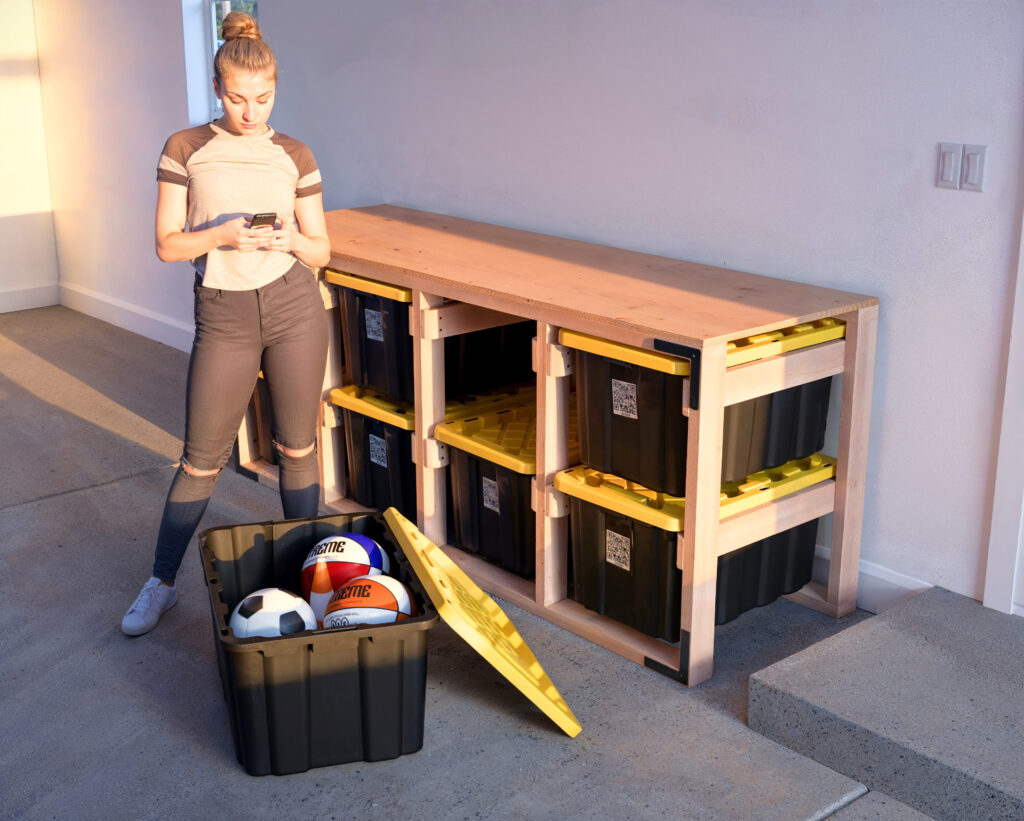
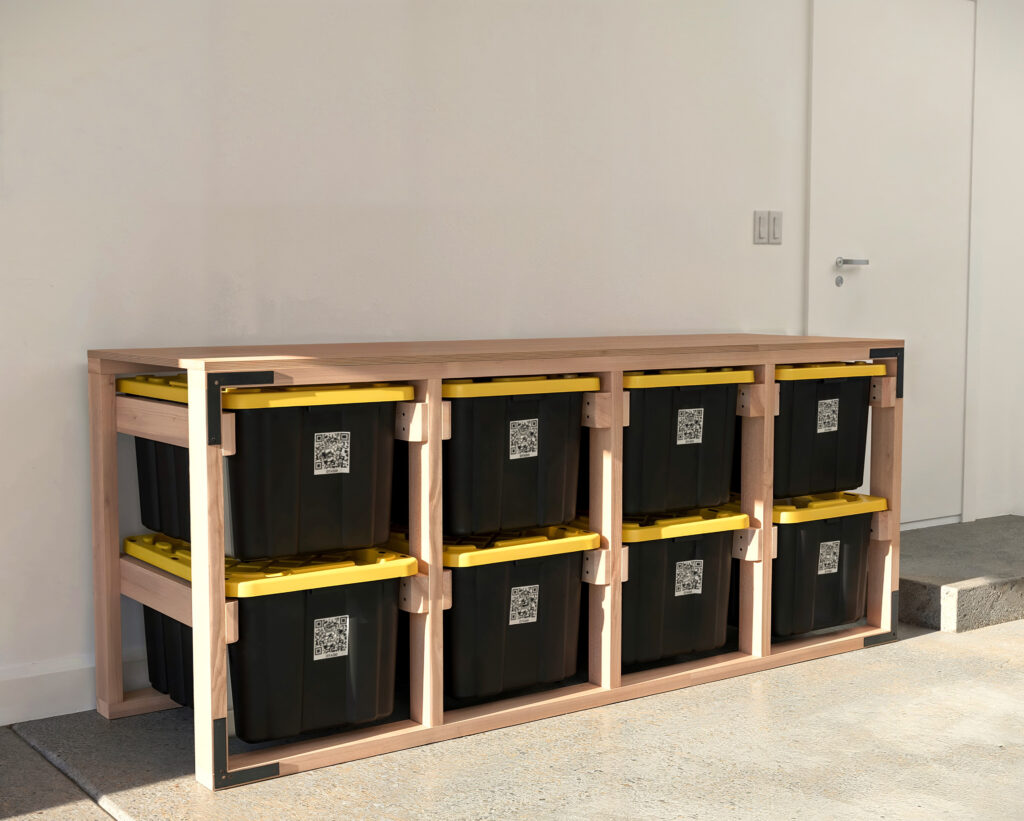
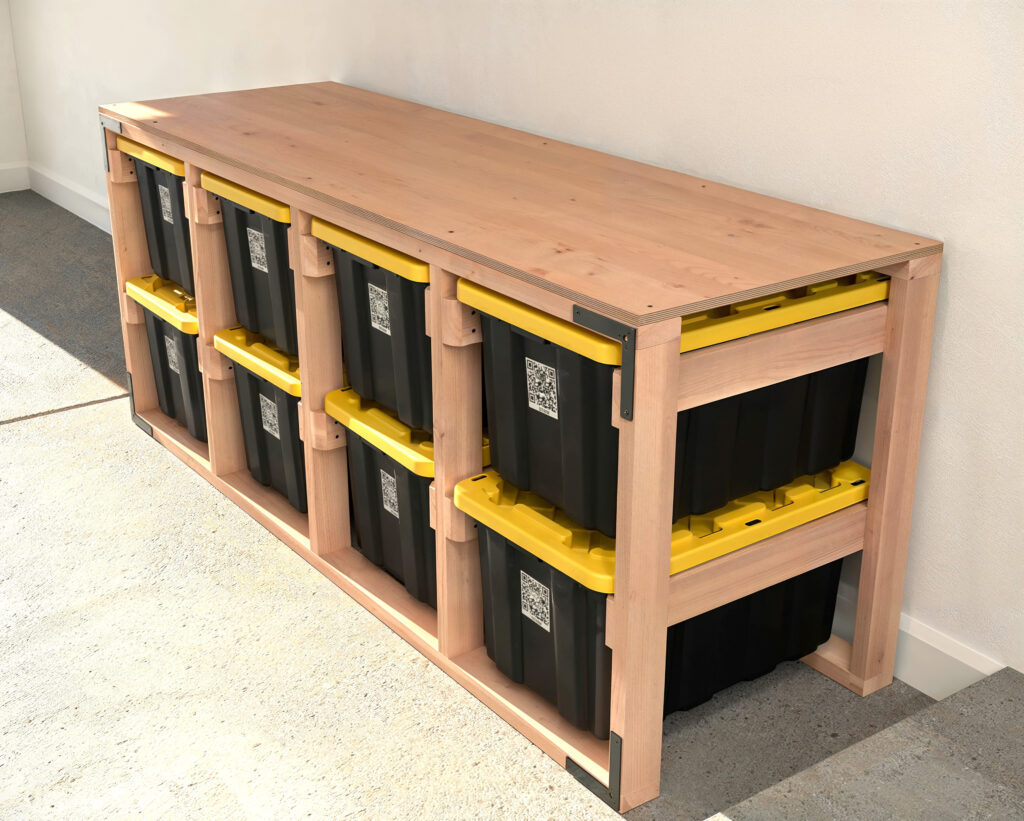
This 2×4 Tote Storage Rack is designed to hold eight 27-gallon totes, making it an ideal solution for organizing your garage or workshop. The rack is built entirely out of 2×4 lumber, which is readily available at home improvement stores like Home Depot, Lowe’s, and others. Featuring straightforward joints, it’s sturdy, easy to assemble, and attaches securely to your wall, ensuring stability and durability.
Features and Specifications:
- Dimensions: The rack measures 35-5/16″ tall, 30-1/4″ deep, and 91-3/8″ wide, providing ample space for 8 totes.
- Materials: Made from accessible 2×4 lumber, which can be sourced from most home improvement stores, and even reclaimed wood can be used.
- Design: The rack’s design allows for easy access to each tote, making it simple to retrieve and store items.
- Compatibility: I offer other designs and variations of the plan, and they integrate well together. They can be joined to make the perfect organized garage.
Why Buy the DIY Plan PDF?
When you download our DIY plan PDF, you get more than just instructions. You get a comprehensive guide that makes the building process smooth and enjoyable.
What You Get:
- Step-by-Step Written Instructions: Each step is clearly explained, making the process easy to follow, even for beginners.
- Step-by-Step Diagrams: Visual learners will appreciate our detailed diagrams that accompany each step.
- Tools List: A complete list of all the tools you’ll need, ensuring you have everything before you start.
- Materials List: Know exactly what you need to purchase, saving you time and ensuring you get the right materials.
- Lumber Shopping List: A detailed list that makes shopping for 2×4 lumber straightforward.
- Lumber Cut List: Precise measurements for each piece of lumber, reducing waste and saving you money.
- Color-Coded Diagrams: These make it easy to understand where each piece fits, eliminating confusion and ensuring accuracy.
- Beginner-Friendly Design: Our plans are designed with beginners in mind but also offer a rewarding challenge for more experienced woodworkers.
By purchasing our DIY plan, you’re investing in a project that will not only enhance your space but also your skills. Our guides are meticulously crafted to ensure your success and satisfaction.
Conclusion
Building your own 2×4 Tote Storage Rack is a fantastic way to organize your garage while honing your woodworking skills. Our comprehensive PDF guide provides everything you need to succeed, from clear instructions to detailed diagrams. Embrace the joy of DIY and transform your space today.
Download the plan now and start building your own storage solution. With our step-by-step guide, you’ll have a functional and beautiful tote rack in no time. Happy building!
Time to build
(varies with experience)
Cost
Estimated cost: About $90 for the rack, and the totes will cost approximately $80, bringing the total to $170. (Note: Prices may fluctuate.)
Skill level required
Beginner
Download The PDF Plan

DIY 27 Gallon Tote Storage Rack Plans (2x4).
What is included in the PDF download?
-Step-by-Step Written Instructions
-Detailed Images
-Cut List
-Lumber Shopping List
-Materials List
-Tools List
-Project Estimates
DIY 27 Gallon Tote Storage Rack (2x4) Dimensions

Recommend Tools & Materials
Available with the purchase of the DIY plan PDF.
Lumber Shopping/Cut List
Available with the purchase of the DIY plan PDF.
Step 1: Build the Rectangular Frames
First, you’ll need to build the rectangular frames for the face and back of the rack. These frames will serve as the backbone of the rack and house all the totes, so they need to be very sturdy.
Sub-step 1.1: Prepare the Lumber
- Gather Materials:
- Two 91-3/4 inch 2×4 lumber pieces.
- Five 31-9/16 inch 2×4 lumber pieces.
- Cut the Lumber:
- Ensure all pieces are cut to the correct lengths.
Sub-step 1.2: Assemble the Frame
Lay Out the Frame:
- Lay the two 91-3/8 inch pieces parallel to each other.
- Space the five 31-9/16 inch pieces evenly between the two longer pieces, as shown in the diagram.
Attach the Pieces:
- Apply wood glue to the ends of the 31-9/16 inch pieces.
- Secure each joint with 3.5 inch long screws.
- Tip: Use a countersink drill bit to ensure the screws sit flush and to prevent the wood from splitting. Always predrill the holes.

Sub-step 1.3: Reinforce the Corners
Add Corner Braces:
- Attach four 6-inch flat corner braces to the corners of the rectangular frame.
- Recommended Product: Use “10 Pcs 6″ Black Flat Corner Brace, L Right Angle Bracket Flat Mending Plate” from Amazon, as their predrilled holes are well-positioned for this application.
Secure the Braces:
- Follow the instructions provided with the corner braces to securely attach them to the corners of the frame.


Sub-step 1.4: Build the Second Frame
- Repeat the Process:
- Follow sub-steps 1.1 to 1.3 to build a second identical frame.
Tips for Assembly
Planing and Sanding:
- If you choose to plane the pieces, avoid planing off more than 1/8 inch from each side to prevent issues with the tote fitting. Sand the rest for a smooth finish.
Use a Speed Square:
- Ensure all joints are at right angles by using a speed square during assembly.
Measure Diagonally:
- To ensure the frame is square, measure the distance diagonally from corner to corner. Both diagonal measurements should be equal. If they are not, adjust the frame until they are. This ensures the rectangle is perfectly rectangular and even.
Countersinking:
- Use a countersink drill bit to make sure screws sit flush and to prevent wood splitting. Predrilling holes is crucial for a strong joint.

Step 2: Attach the Tote Supports
Next, you’ll need to attach all the tote supports. These are the 2×4 lumber pieces that will hold up the totes. Proper spacing is crucial to ensure everything fits perfectly.
Sub-step 2.1: Prepare Spacers
Gather Materials:
- Scrap plywood or wood pieces.
- Cutting tools.
Cut the Spacers:
- Yellow Spacer: Cut one piece to 10-7/16 inches x 30-1/4 inches.
- Teal Spacer: Cut one piece to 11-15/16 inches x 30-1/4 inches.
Optional: If you don’t have plywood, you can use a speed square or other scrap wood pieces cut to the correct lengths.

Sub-step 2.2: Cut the Tote Supports
Gather Materials:
- Sixteen 30-1/4 inch long 2×4 lumber pieces.
Optional: Trim the ends at 45 degrees for a decorative finish (this step is not required).


Sub-step 2.3: Attach the Tote Supports to the First Frame
Position the First Frame:
- Lay one of the rectangular frames flat on your work surface.
Attach the First Row of Tote Supports:
- Use the yellow spacer to position the first row of tote supports.
- Apply wood glue to the ends of each tote support.
- Secure the supports to the frame with 2.5 inch long screws.
Attach Subsequent Rows:
- Switch to the teal spacer for the remaining rows.
- Repeat the process of applying glue and securing with screws.
- Continue until you have attached a total of five rows (one with the yellow spacer and four with the teal spacer).


Sub-step 2.4: Attach the Second Frame
Prepare to Attach the Second Frame:
- There are two methods to do this:
- Method 1: Flip the entire assembly (the first frame with the attached supports) onto the second frame.
- Method 2: Place the second frame directly on top of the first frame with the attached supports. This method may require wood clamps to hold everything in place.
- There are two methods to do this:
Attach the Second Frame:
- Apply wood glue to all areas where the second frame will join with the supports.
- In this example I have chosen method 2.
- Position the second frame on top, aligning it carefully.
- Use wood clamps to hold everything in place.
- Secure the second frame with 2.5 inch screws, ensuring all connections are tight.
- Wipe off any excess glue.


Step 3: Add the Plywood Top
Now it’s time to add a plywood sheet on top of the tote rack. This will create a sturdy work surface for you.
Sub-step 3.1: Prepare the Plywood Sheet
Materials Needed:
- One plywood sheet measuring 91-3/8 inches x 30-1/4 inches.
- Ideally, use 3/4-inch thick plywood for a strong, durable surface.
- You can also use thinner plywood if you prefer, though it may not be as sturdy.
Sub-step 3.2: Secure the Plywood Sheet to the Tote Rack
Position the Plywood:
- Place the plywood sheet on top of the tote rack, ensuring it is centered and aligned with the edges.
Apply Wood Glue:
- Apply a generous amount of wood glue to the top edges of the tote rack where the plywood will sit.
Attach the Plywood:
- Secure the plywood sheet to the tote rack using 2.5 inch screws.
- Tip: Use a countersink drill bit to pre-drill holes for the screws, allowing them to sit flush with the surface.
Sub-step 3.3: Optional – Add Wheels for Mobility
Materials Needed:
- Four heavy-duty caster wheels.
Attach the Wheels:
- If you want the tote rack to be mobile, attach the caster wheels to the bottom corners of the rack.
- Ensure the wheels are evenly spaced and securely fastened with appropriate screws.
- Tip: Choose wheels with locks to keep the rack stationary when needed.

