Why build a DIY planter box?
There are many good reasons to build a DIY planter box. With a planter box you get all the benefits of a traditional garden with some amazing additional perks. You can control your soil better and move it around. With more control over the soil, you are also able to space out your plants better and not have parts of a garden go to waste. The planter box walls can serve as a barrier to keep out slugs, snails, and other pests. The Soil will not be errored in rainy conditions and is also not susceptible to chemical leaks as it is sealed off. Also a raised garden allows you to spend less time pulling weeds bent over.
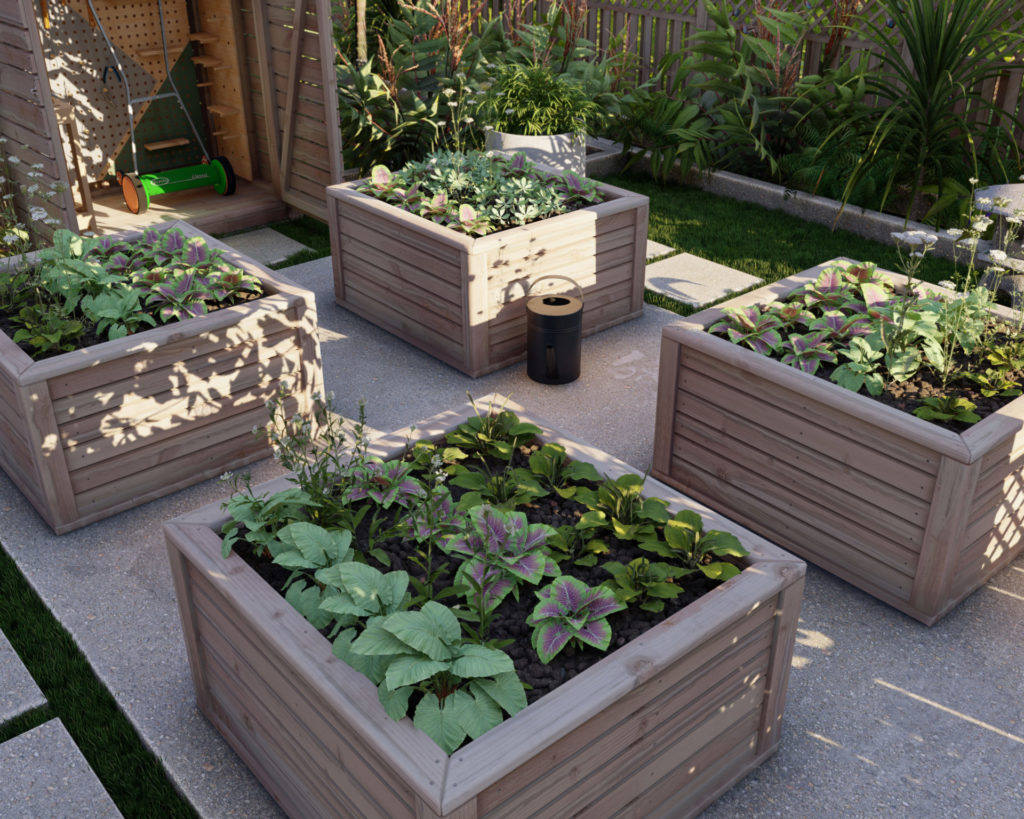
Planter boxes are also a great way to showcase your hard work. You can have your flowers, herbs, plant, and vegetables on display, raised off the ground. Planter boxes can ensure that you prized garden does not get lost among other plants.
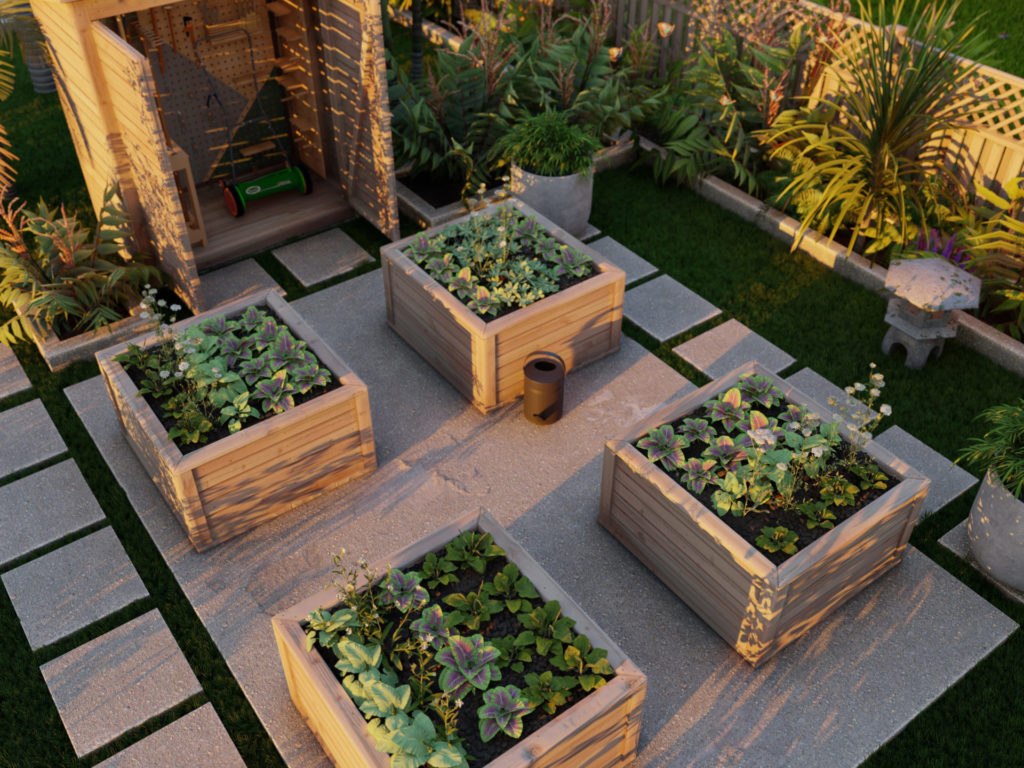
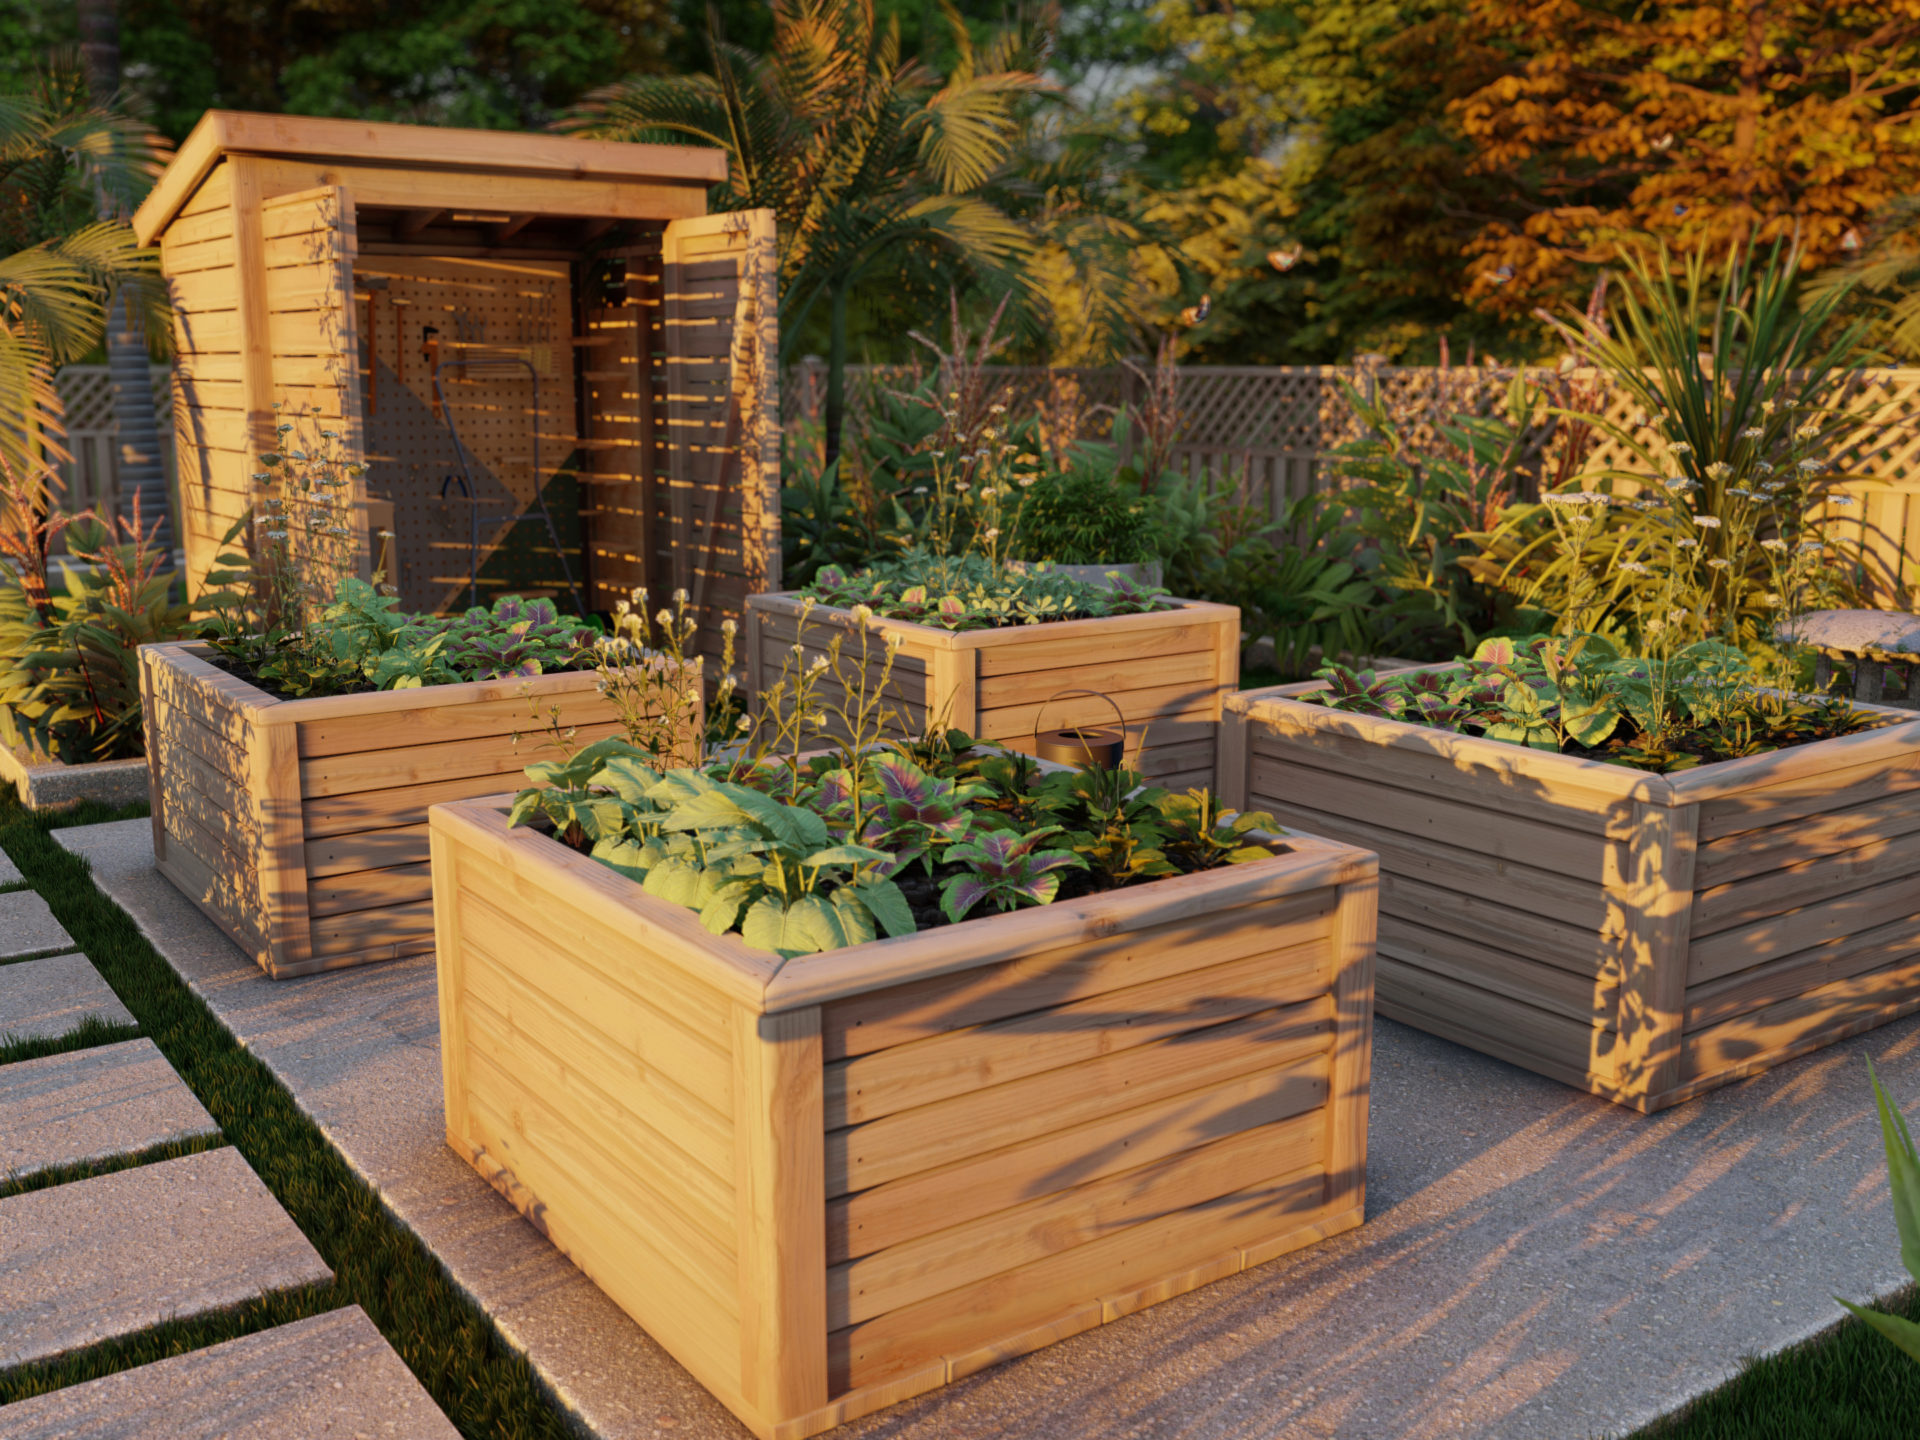
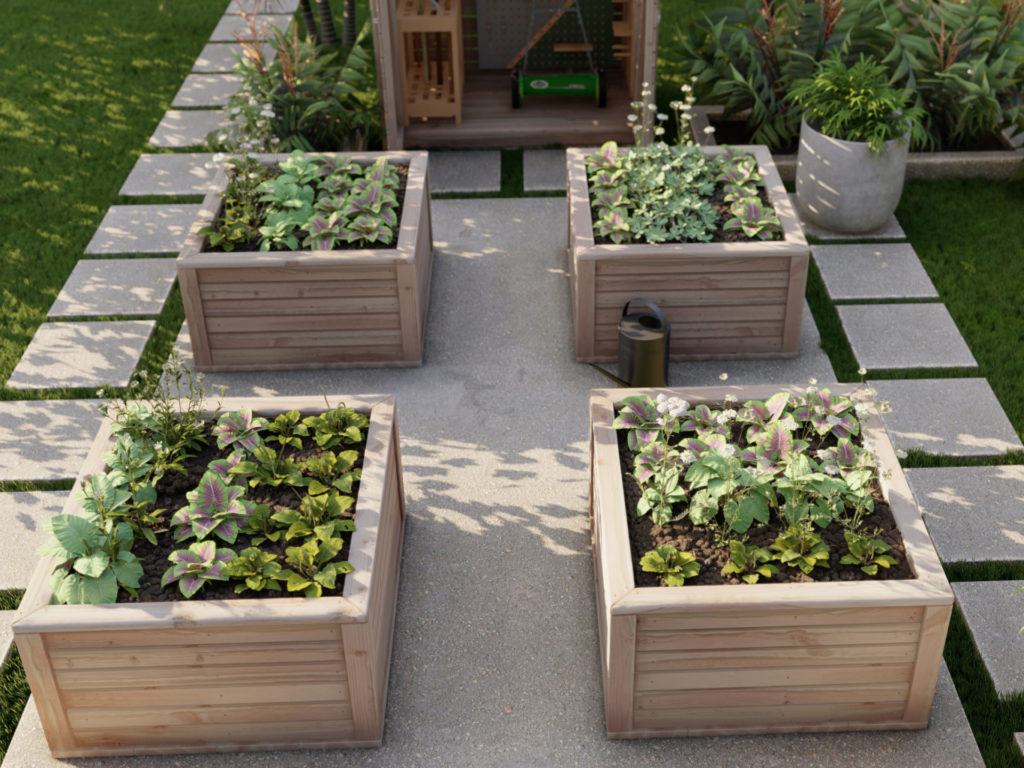
Furthermore, adding a planter box to your backyard, porch, and yard is a great way to add curb appeal. Add several in a pattern and you have a outdoor home improvement makeover that’s on a whole new level. This is a relatively inexpensive way to beautify your space and to show case your little garden.
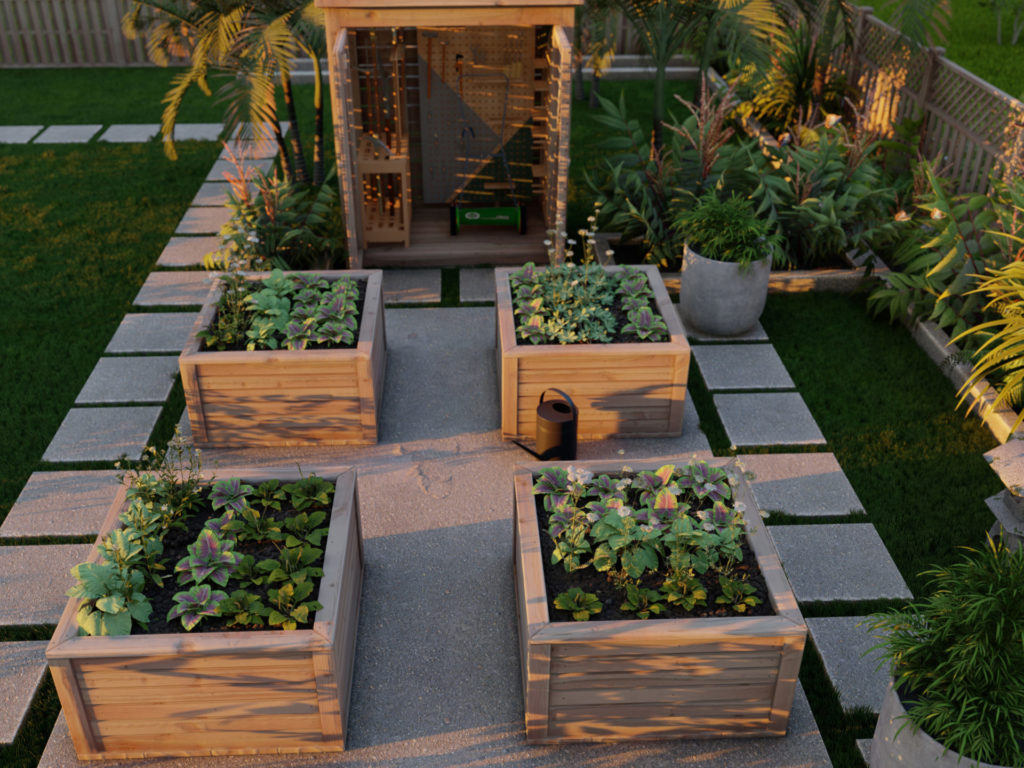
Use planter boxes for landscape architecture by positioned them in a way to subdividing large backyard spaces into more dedicated and functional areas. Examples include areas for medication, play, outdoor fireplaces, outdoor dining, and pool areas. These boxes can be filled with beautiful plants to support the theme of the landscape it frames.
Wooden planter boxes are also great because they can be stained to fit the style of any backyard or space. You are not limited to using lumber from a hardware store. It is entirely possible to build planter boxes using recycled reclaimed wood. This can give the planter boxes a beautiful rustic and farmhouse look.
What are the specs of this DIY planter box design?
Beginners to woodworking are able to build these boxes by following the easy step by step instructions provided. These planter boxes can be built in under a day with basic woodshop skills.
The height of the garden boxes are a little below waist high. You will not have to struggle to bend down to work on your plants. This is an ergonomic option for gardening.
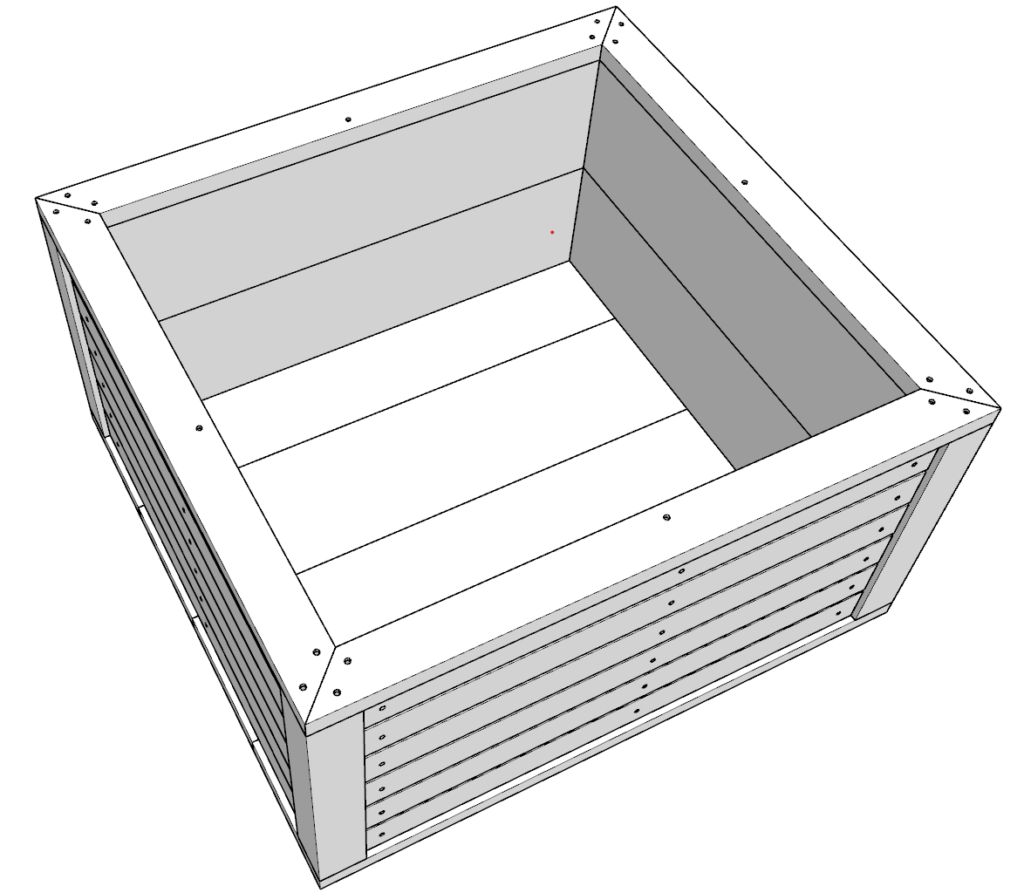
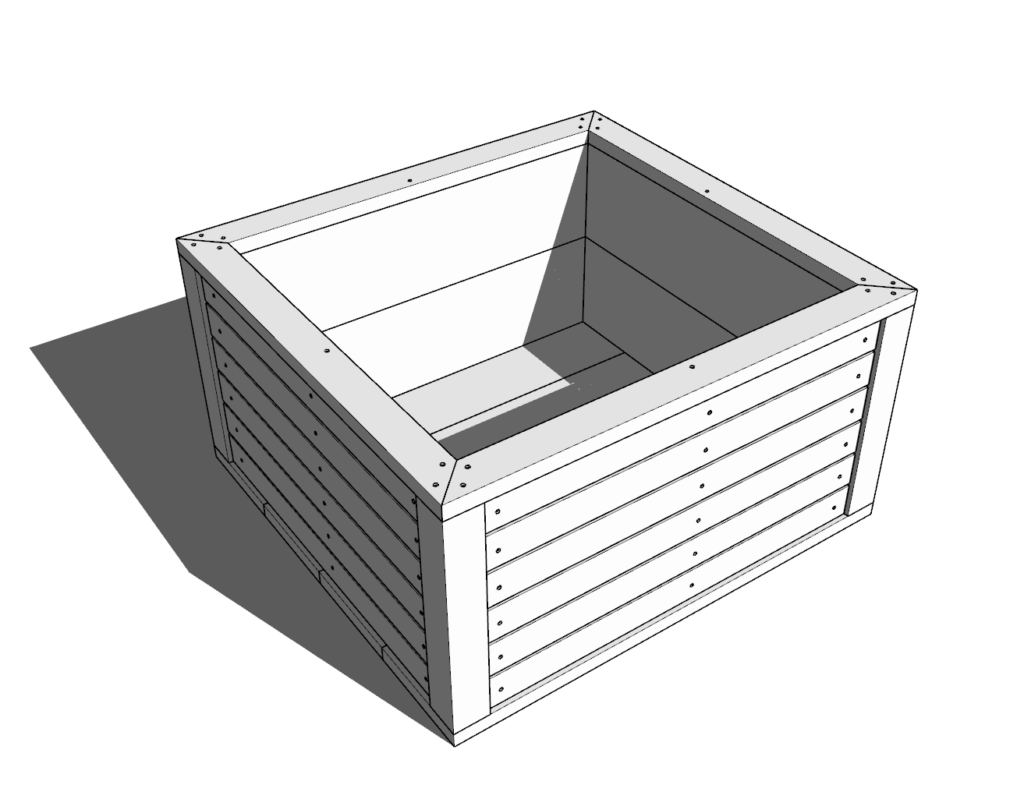
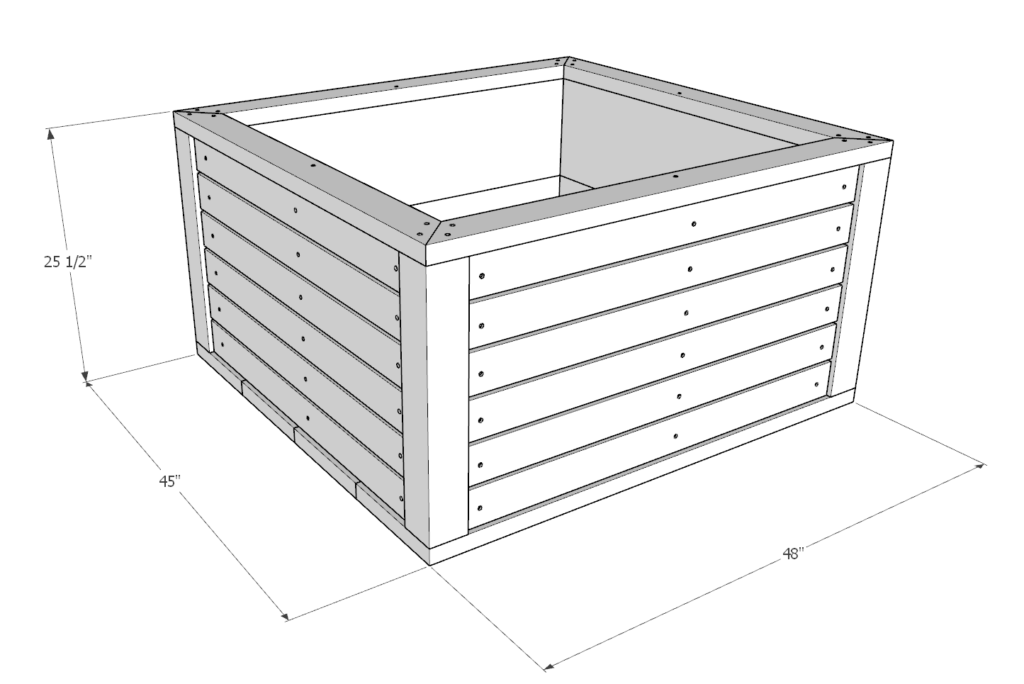
The design includes a double wall. The walls are made from 2x4s on the outside, 2x12s on the inside, with 4×4 posts on the outside corners to frame the whole structure. These lumber sizes are easy and cheap to find in most hardware stores.
These raised planter boxes can be places on a deck, porch, patio, or cement slab.
Since you are working with wood it would be easy to add a sub-irrigation self-watering system so that the garden can be less time consuming to take care of and more hands off for those who prefer that.
Working with wood also allows you to easily add lattices and other support structures for vining plants and vegetables that need support to grow. Cucumbers, gourds, melons are all great examples.
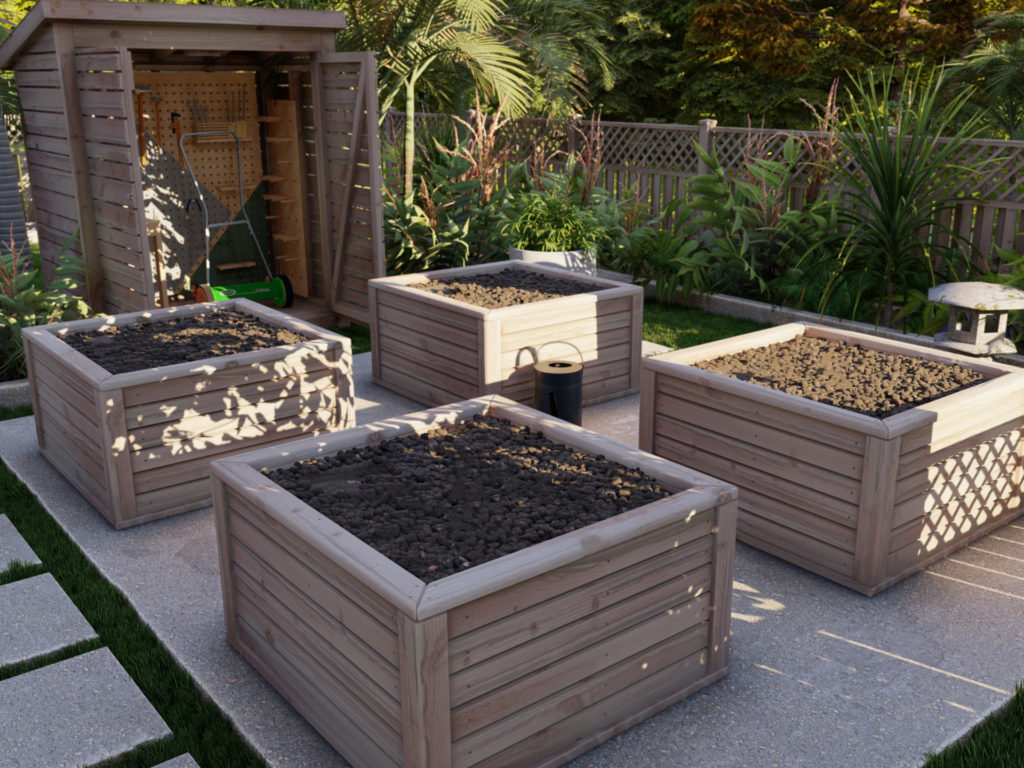
The boxes can be last a long time if you lined the inside with landscaping fabric. This will prevent the wood from rotting and decomposing quickly. Using pressure treated wood may cause chemicals to diffuse into the soil.
What are the dimensions of the planter box?
These boxes are 25.5 inches high, 45 inches wide, and 48 inches long.
What about the gardening shed in the background?
The plans for the gardening shed can be found here.
The shed allows for storage of gardening tools such as hoses, pruners, garden hoes, trowels, shovels, garden compost bags, gardening boots and gloves.
The DIY storage shed make gardening more enjoyable, neat, and organized.
Time to build
2 hours per planter box
Total cost of build
$175
Skill level required
Beginner
Download the PDF plans
Plans for how to build the 2x4x4 ' DIY planter box
What is included in the PDF download?
- Easy to read step by step instructions
- Material list
- Cut list
- Tools needed
- 3D illustrations
- Helpful links to tools and materials needed for the project
Recommend tools for this project
- Saw (miter saw recommended for precision cuts)
- Drill
- Ratchet Strap
- Impact driver with bit for screws
- Sander
- wood countersink drill bit
Discloser: Some links are affiliate links
Cut list and material list
Available with purchase of PDF plans.
Step 1 (DIY planter box)
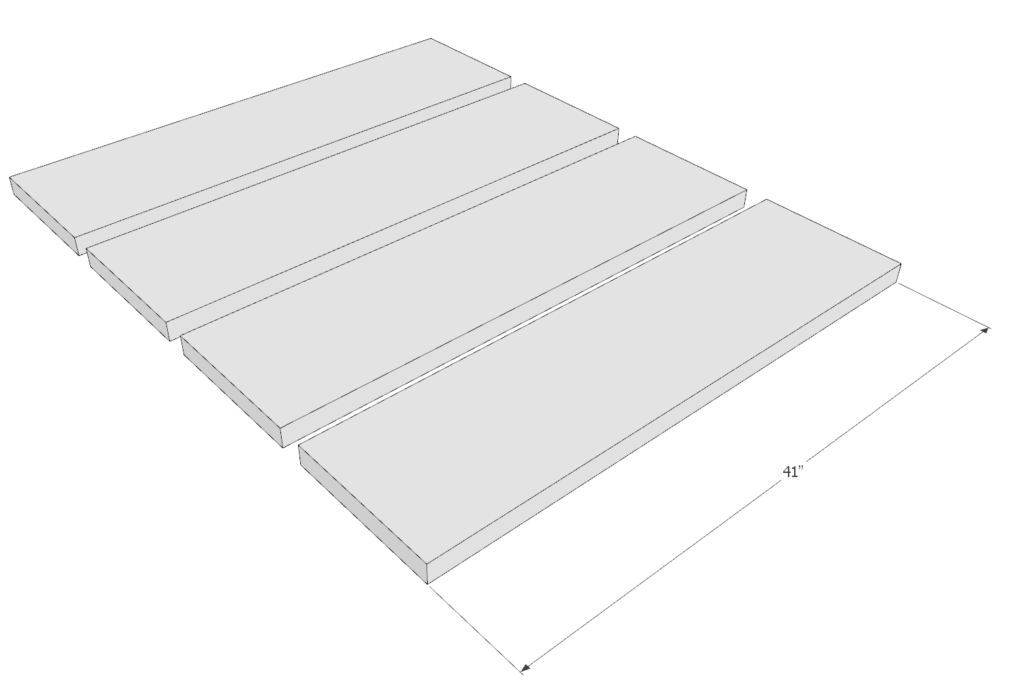
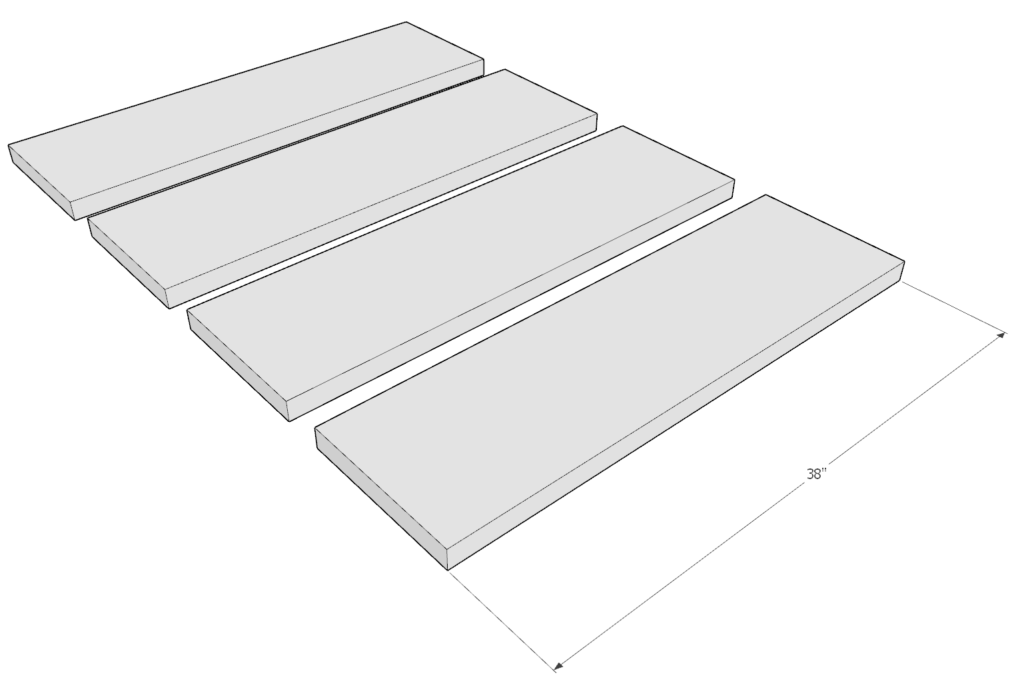
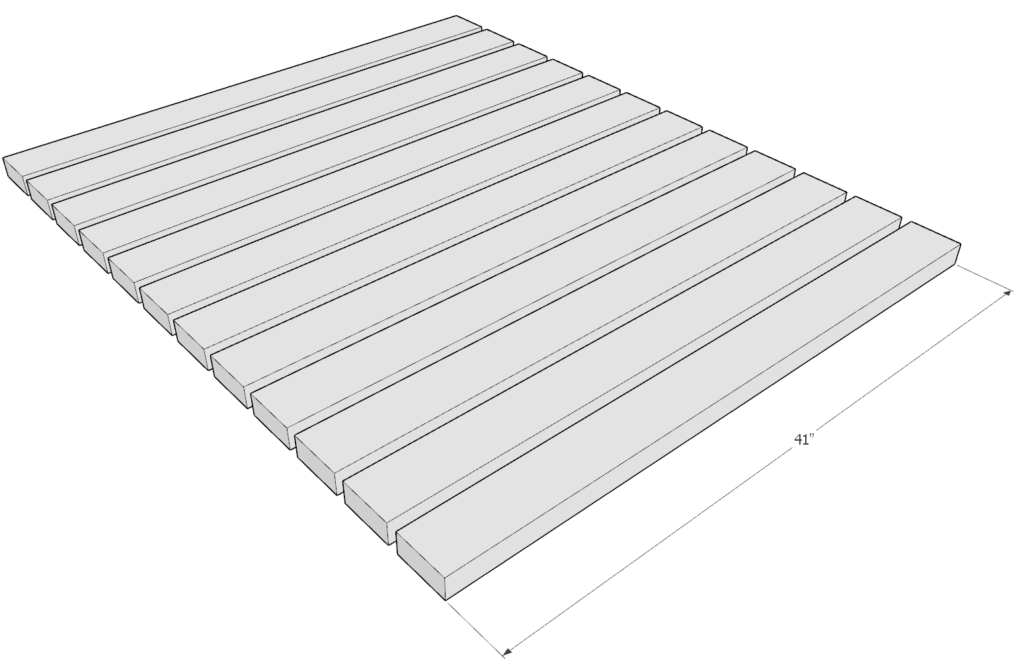
Precut all your wood pieces into the following dimensions:
- (4) 2-in x 12-in x 48 inches
- (4) 2-in x 12-in x 41 inches
- (4) 2-in x 12-in x 38 inches
- (12) 2-in x 4-in x 41 inches
- (12) 2-in x 4-in x 38 inches
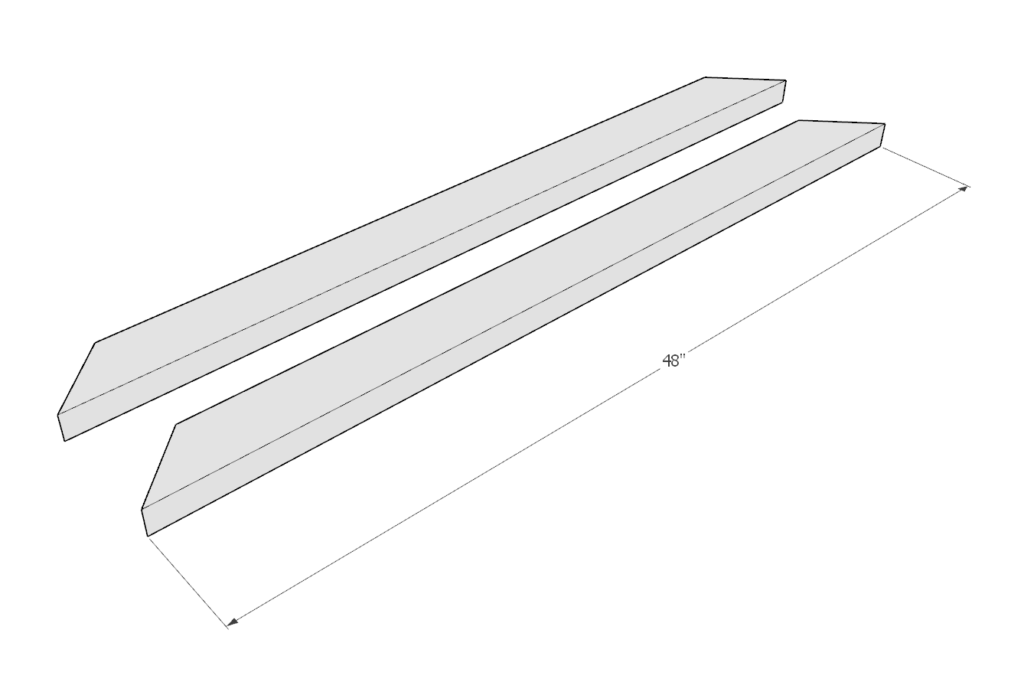
- (2) 2-in x 4-in x 48 inches cut at 45 degrees on both ends
- (2) 2-in x 4-in x 45 inches cut at 45 degrees on both ends
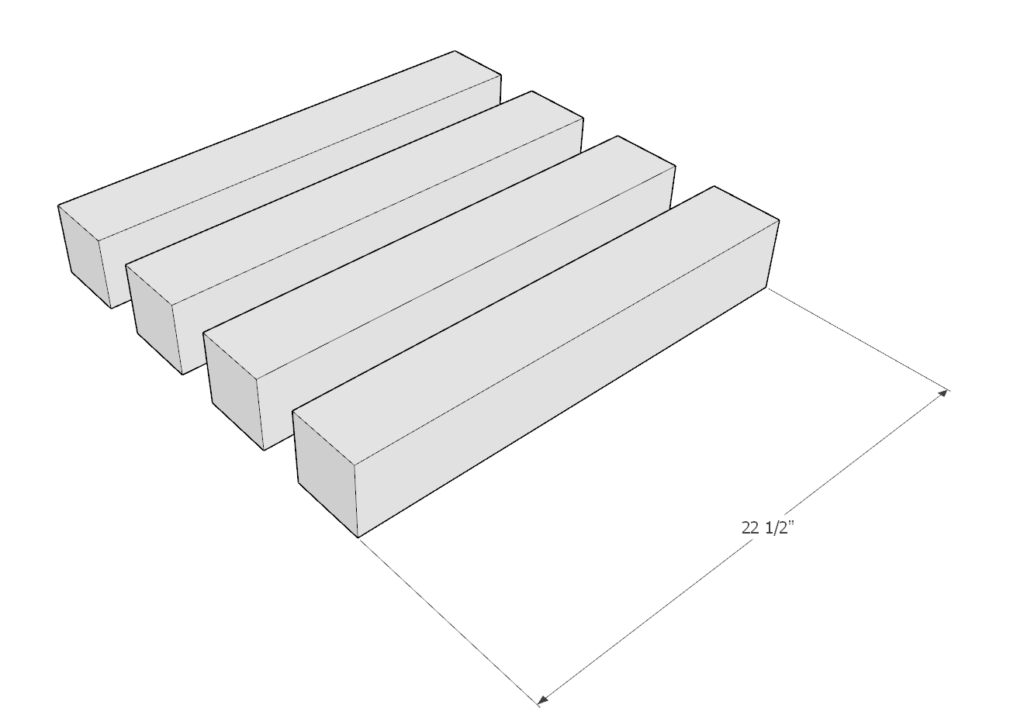
- (4) 4-in x 4-in x 22.5 inches


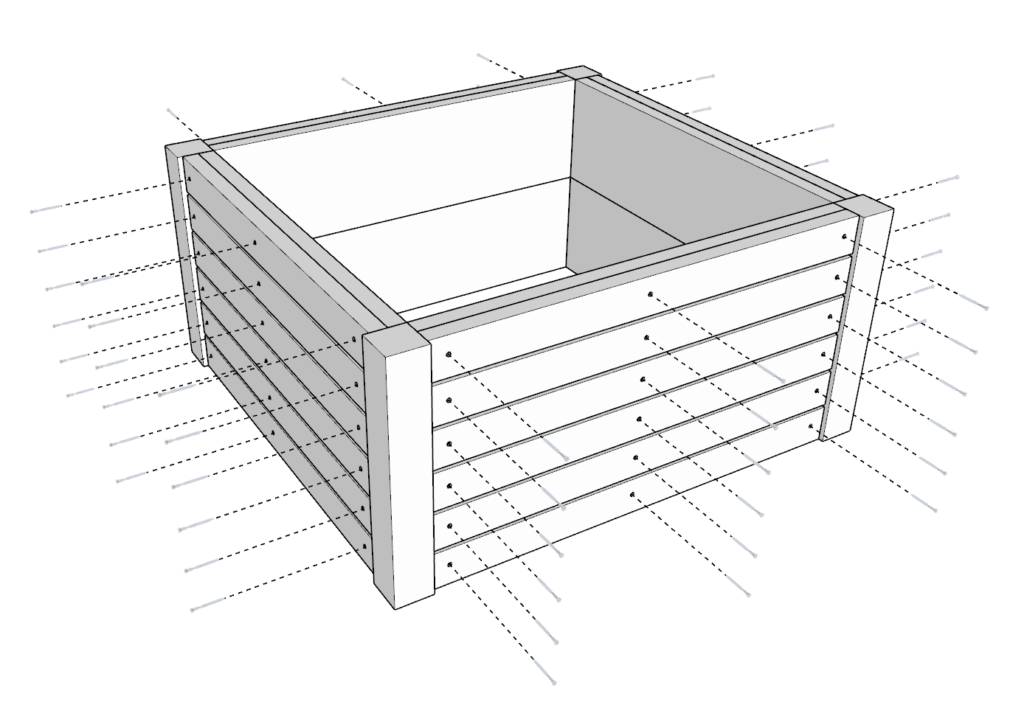
Step 2 (DIY planter box)
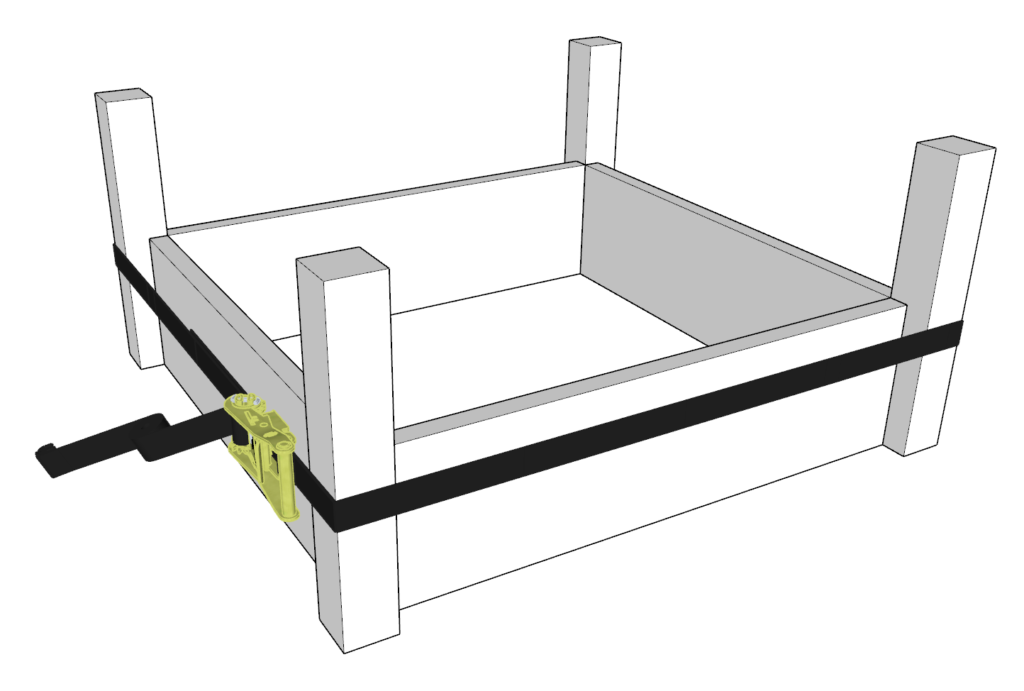
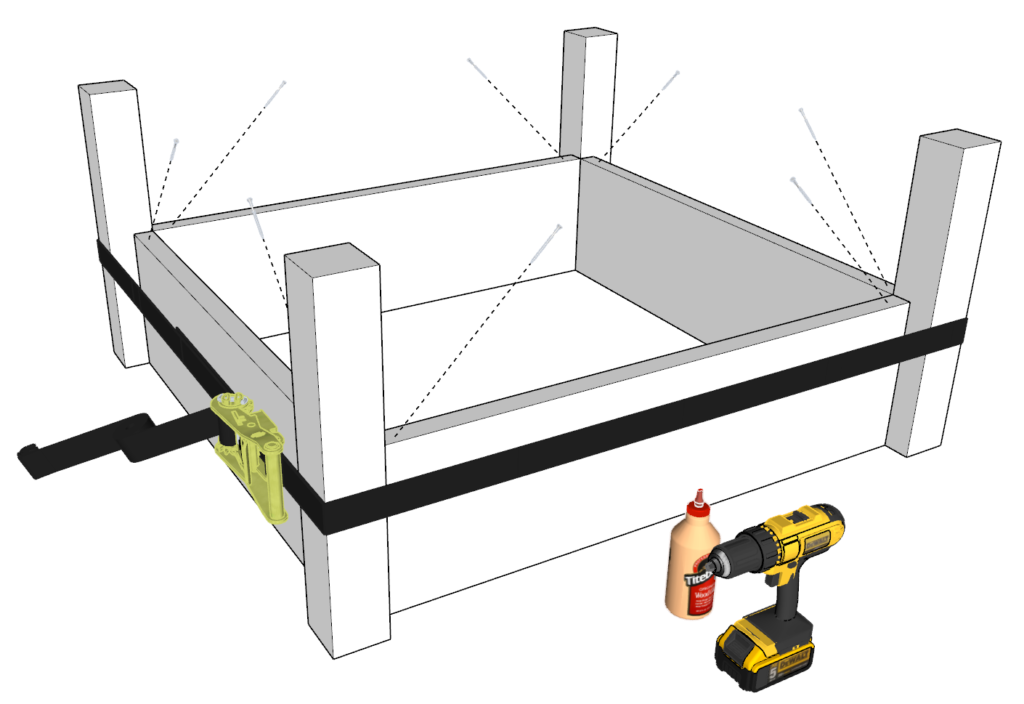
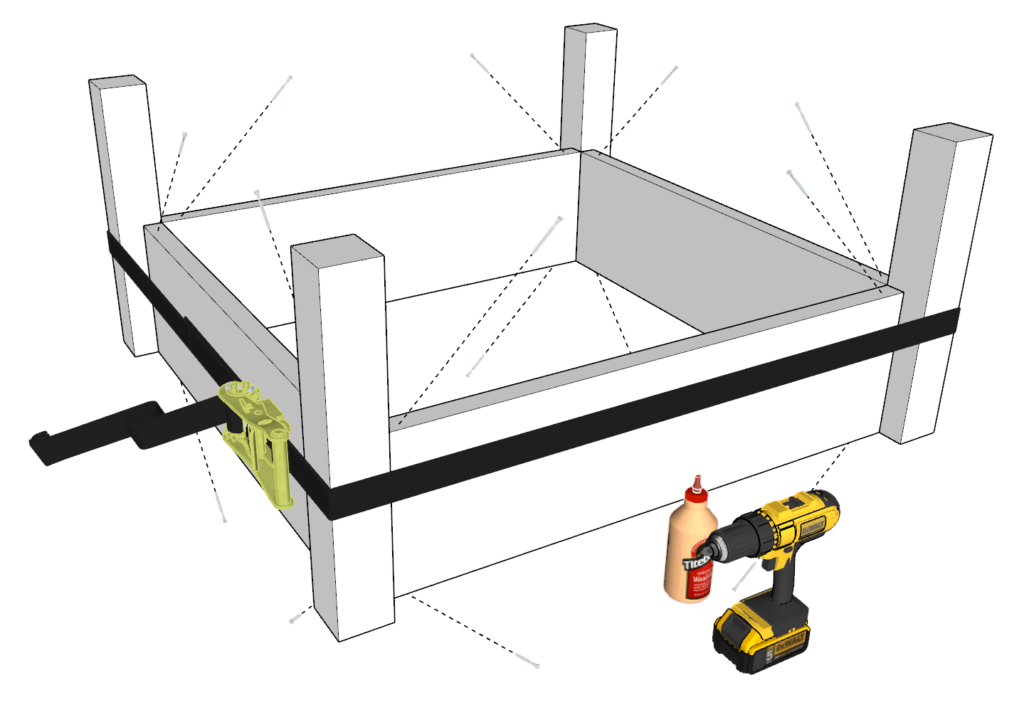
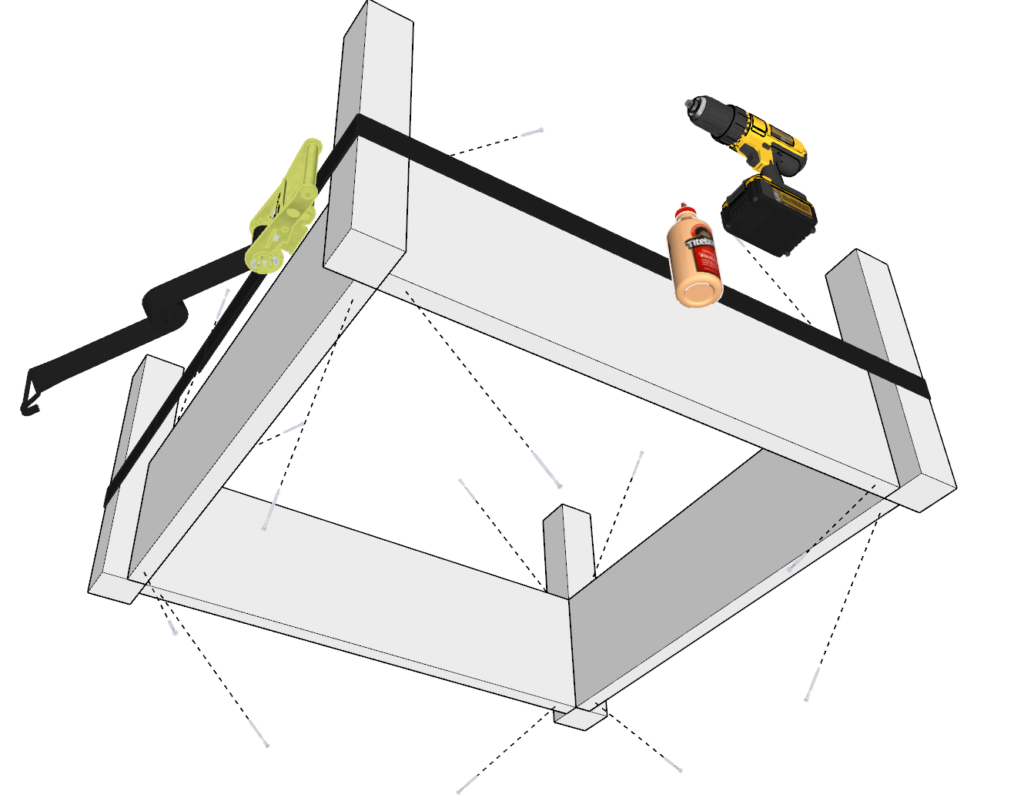
Start the assembly by taking 4 of the 22.5 inch pieces from 4×4 lumber, two of the 38 inch pieces from 2×12 lumber, two of the 41 inch 2×12 pieces from 2×12 lumber, and arranging them as shown in the diagram below.
Apply glue to all the areas that will be making contact.
Take the pieces mentioned and bundle them together using a ratchet strap. Make sure the straps are tight enough to hold the pieces together but not too tight. Don’t over tighten because this can create a dangerous situation where the unstable structure might collapse.
Make sure all the joints align together correctly. I use a hammer to “bang” some of the pieces into the correct place.
Once the pieces are alighted and the ratchet strap is tight, add 3.5 inch screws diagonally. Don’t forget to predrill holes to prevent wood splitting. Add screws from the top first, then from the bottom.
Loose the straps.
Next, place the top 41 inch and 38 inch pieces into places as shown in the diagram, add glue, tighten the straps, add screws from the top.

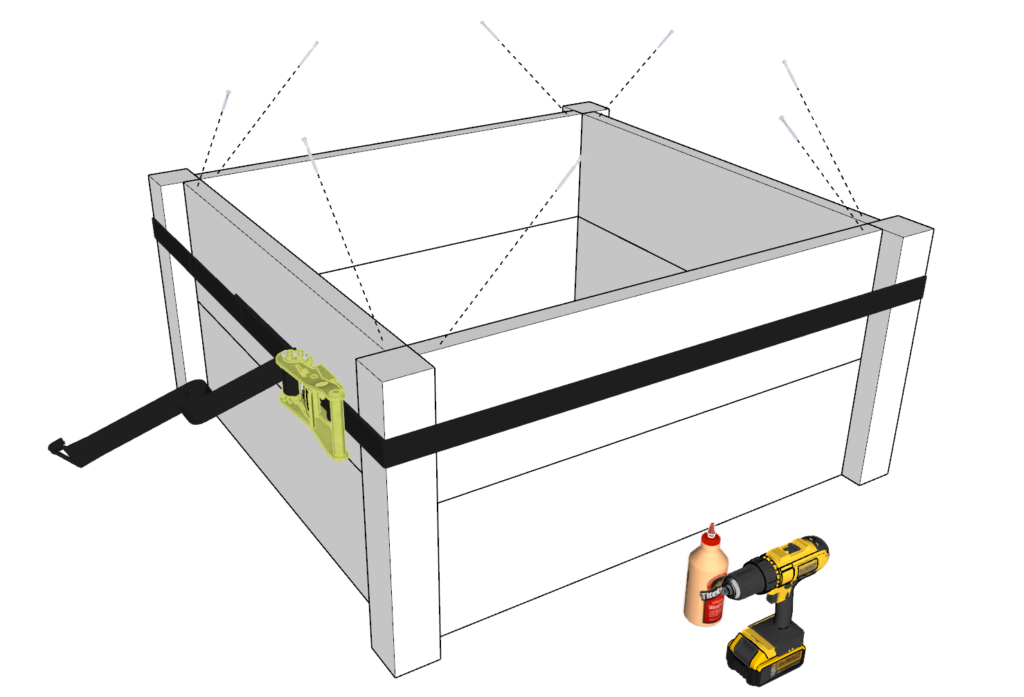
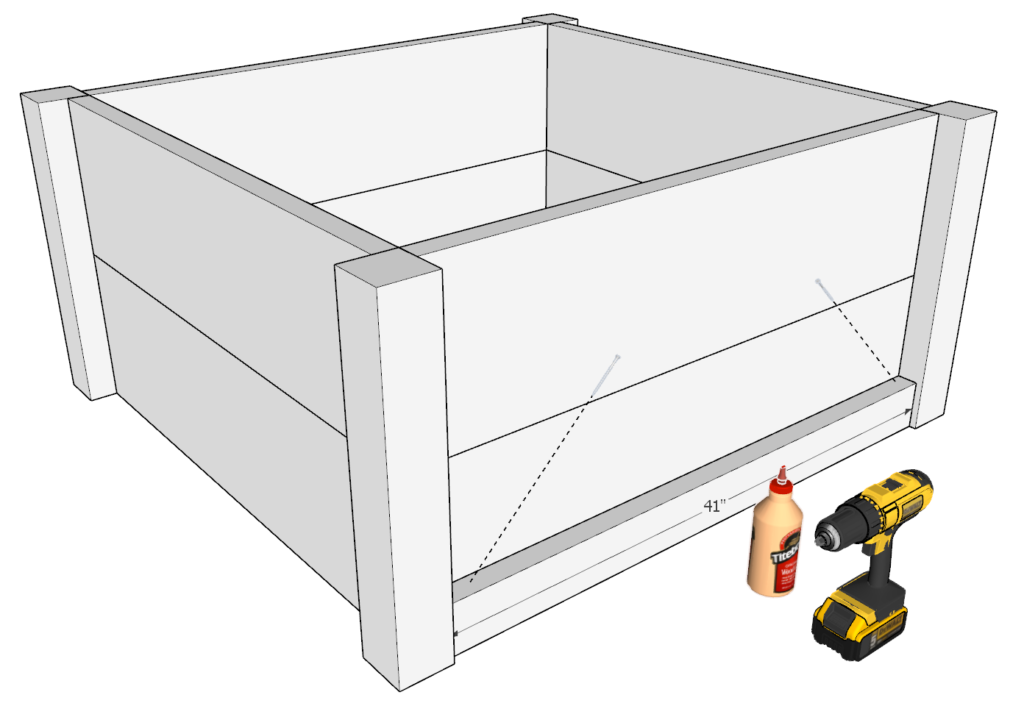
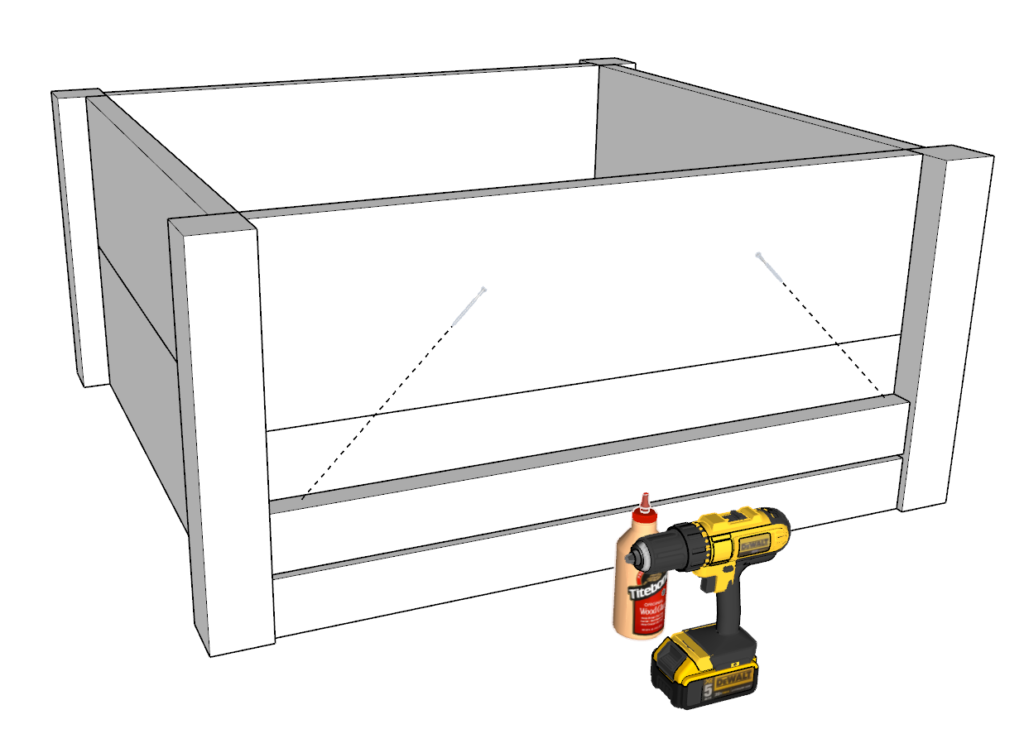
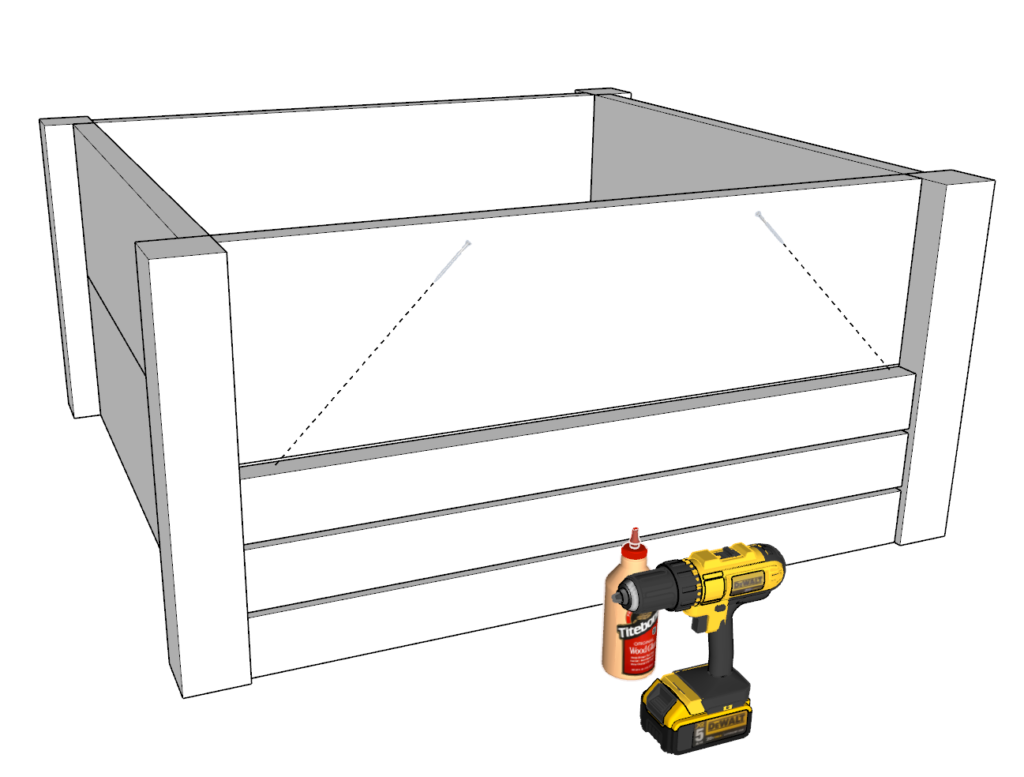
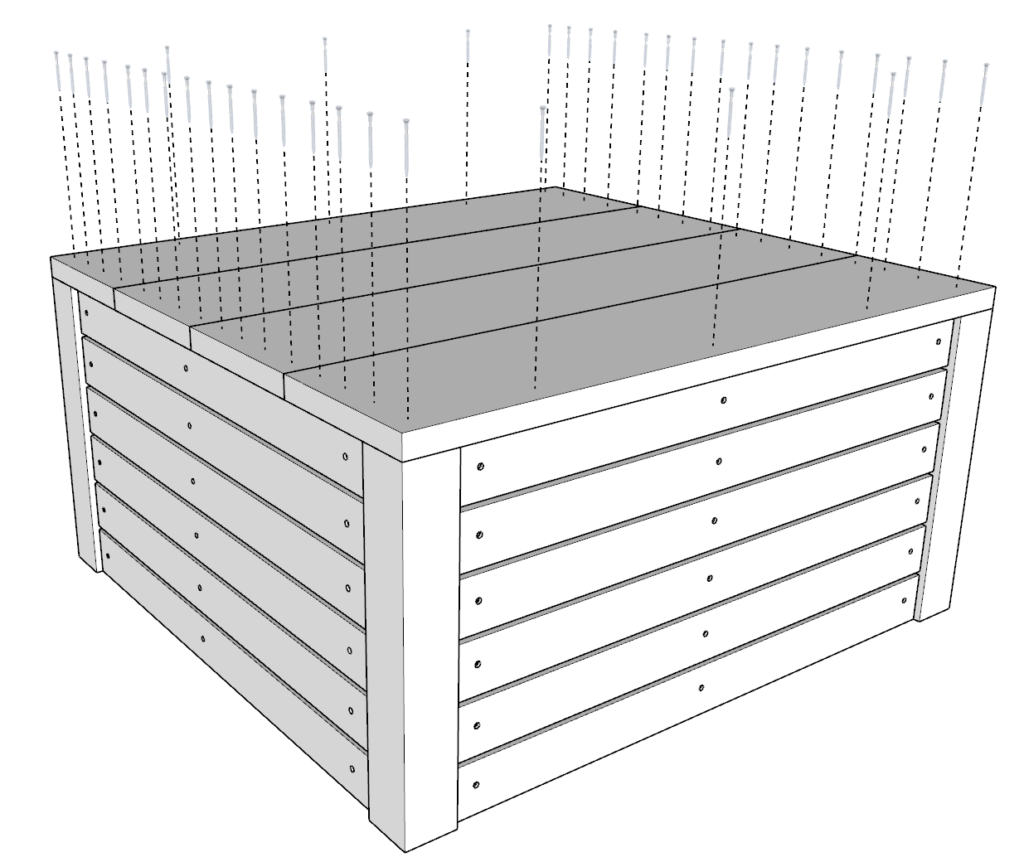
Step 3 (DIY planter box)
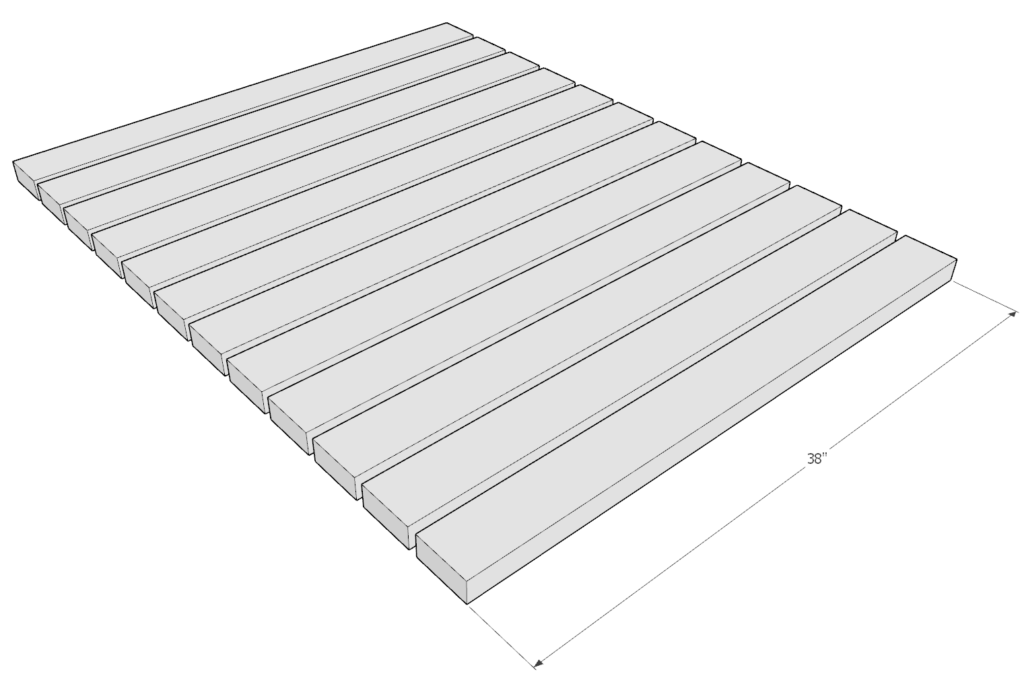
Next, take the 41 inch pieces from 2×4 lumber and begin adding them one by one to the “41” inch side.
Apply glue to the ends of the 2×4 and to the entire side that will be making contact with the 2×12
Secure it in place by adding 3.5 inch screws diagonally as shown below. Do not forget to predrill to prevent splitting of the wood..
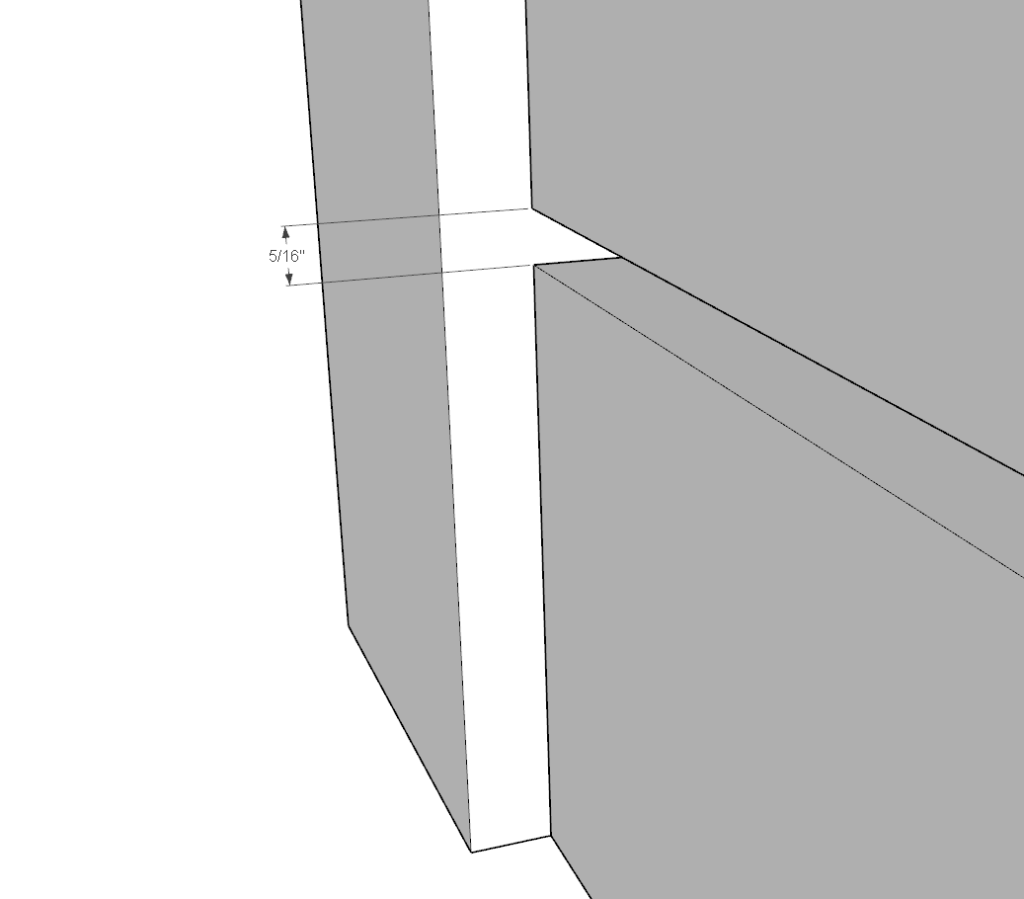
Repeat this on the next step 41 inch 2×4 piece. Space out the 2×4 pieces 5/16 inches apart. I find it very helpful to use a 5/16 inch spacer. This spacer can be cut from scrap wood and used to make the spacing process quick and easy.
Continue to repeat this process until all 41 inch pieces and 38 inch pieces are in place.
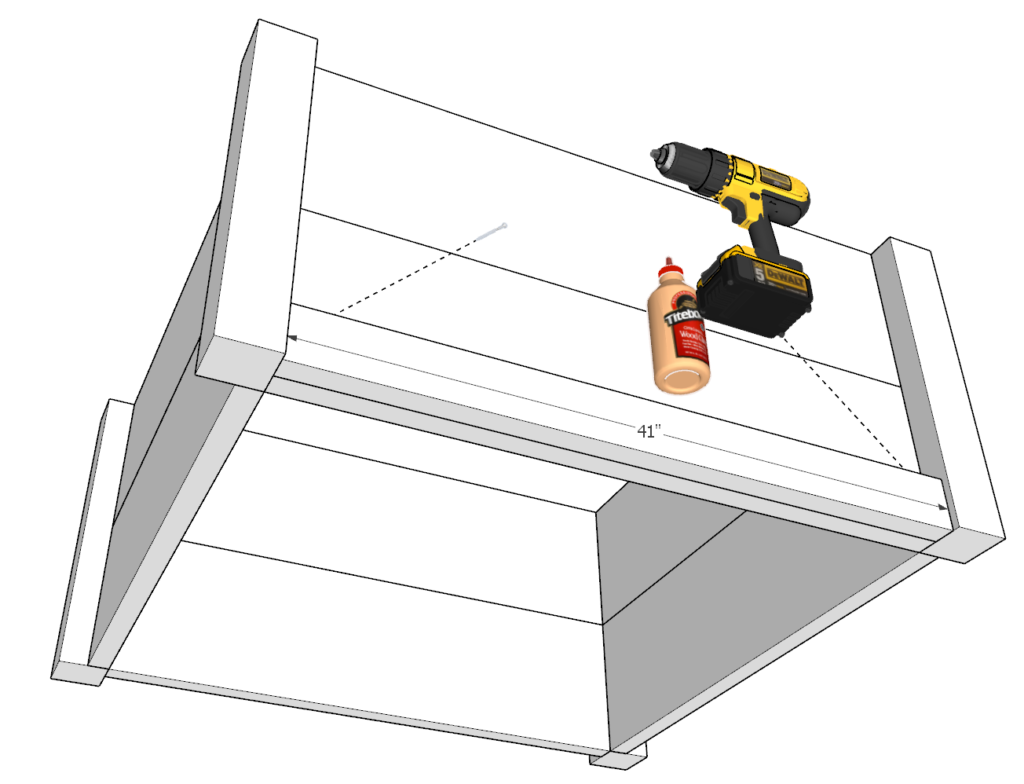
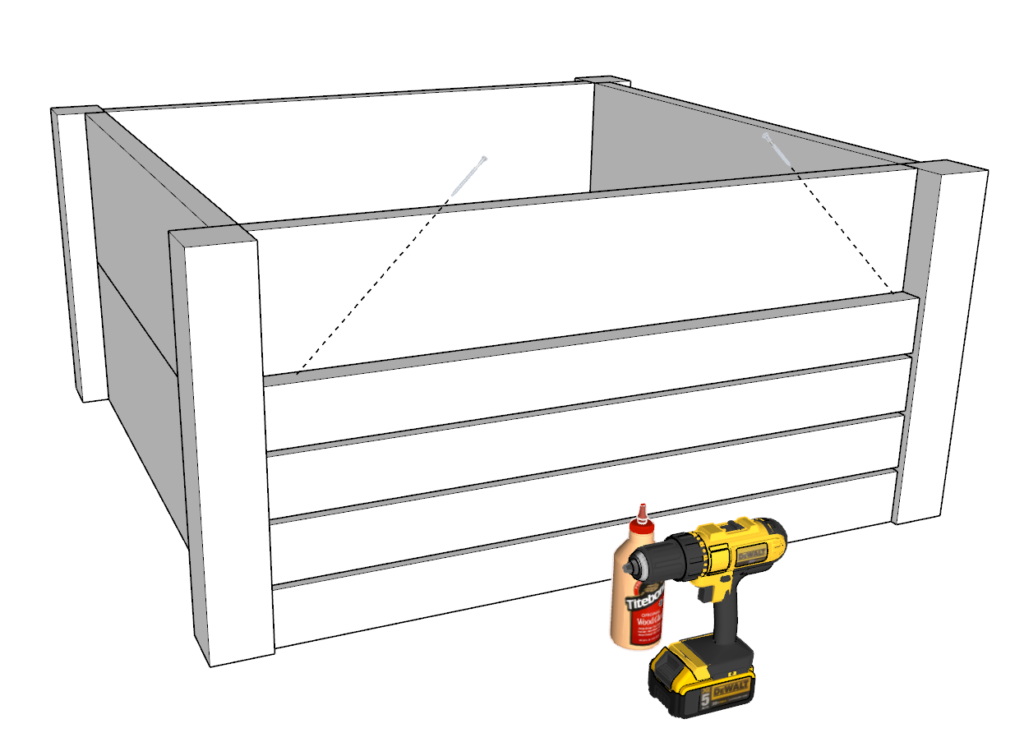
Step 4 (DIY planter box)
Next, secure all the 2x4s with 2.5 inch screws. Predrill. Make sure you don’t use the 3.5 inch screws as they will stick out into the planter box.

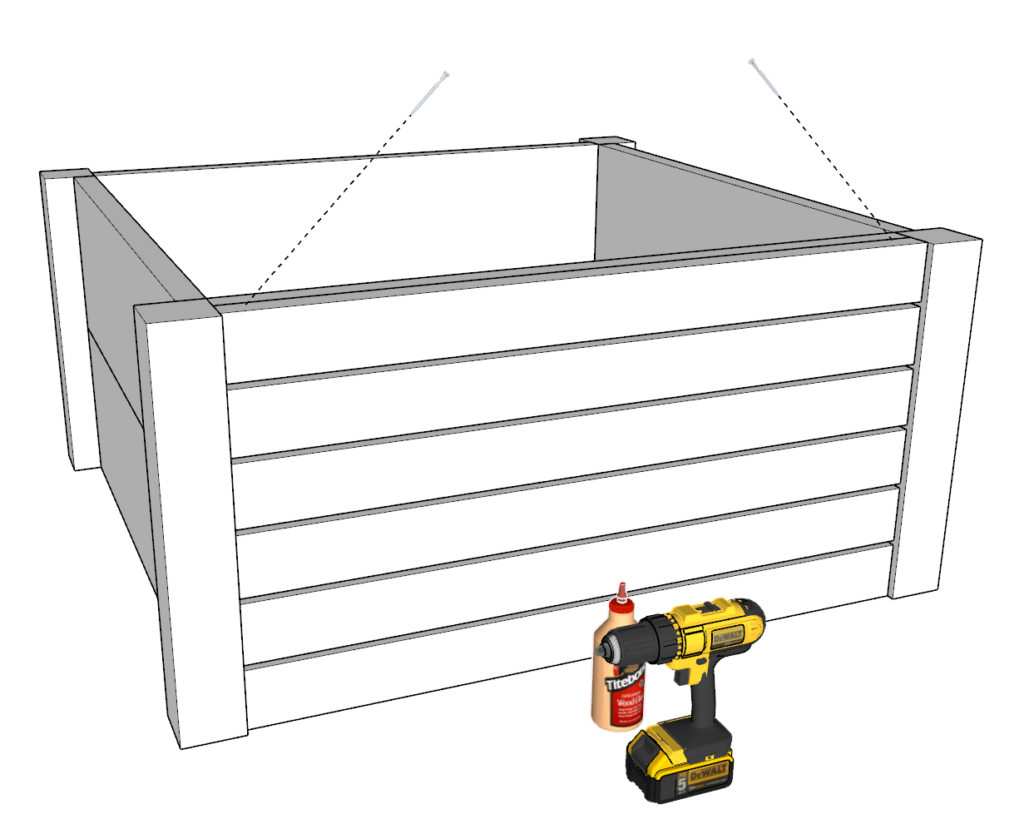
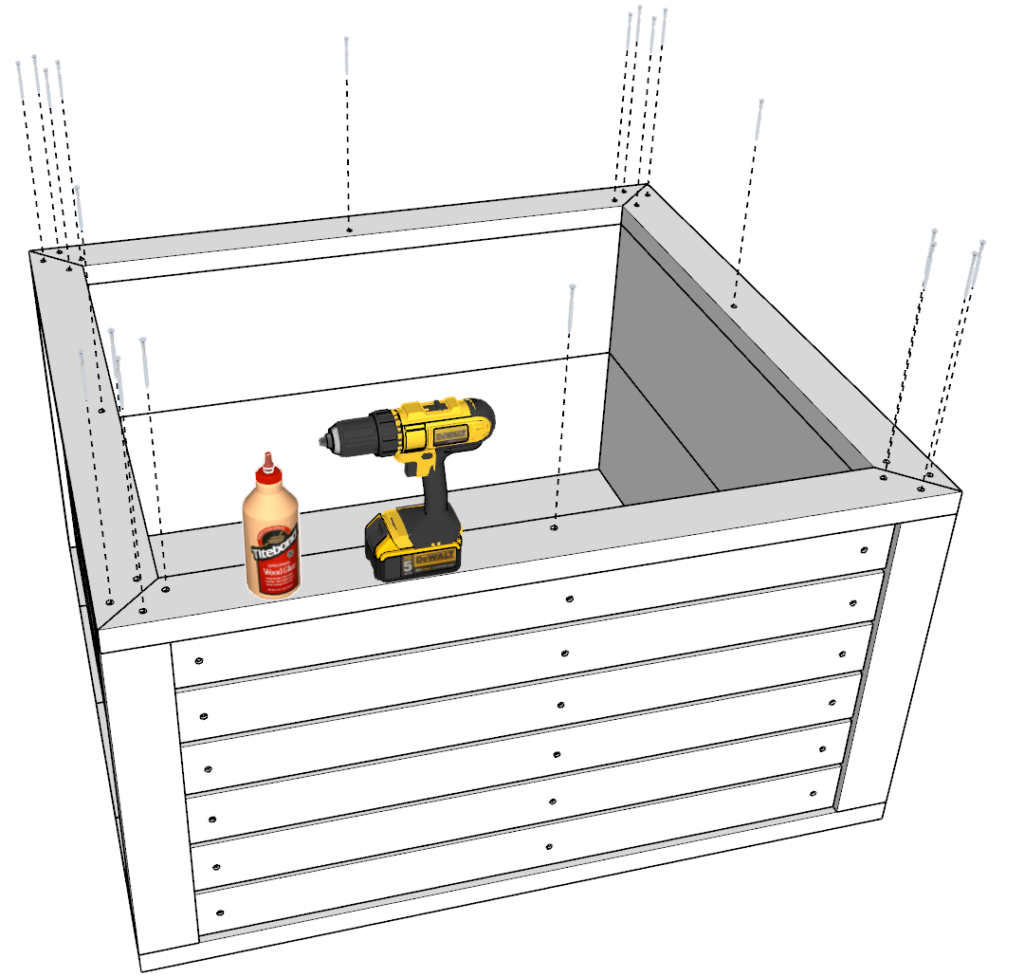
Step 5 (DIY planter box)
Next, take the remaining 2×12 lumber pieces and place them as the bottom boards for the planter box.
Apply glue to all areas that will be making contact, predrill, and add screws. You can use either 2.5 inch or 3.5 inch screw here.
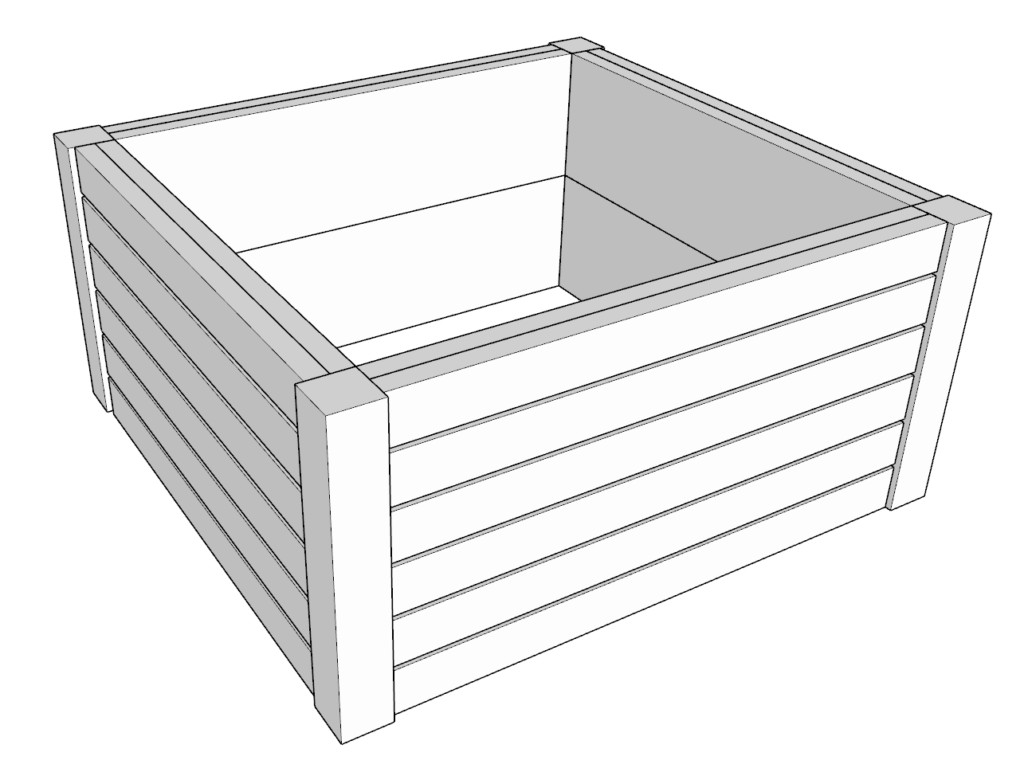
Step 6 (DIY planter box)
Next, add the trim pieces to the DIY planter box using the remaining 2×4 pieces that were cut at a 45 degree angle.
Don’t forget to be generous with glue, predrill, and add screws. Use 2.5 or 3.5 inch screws.
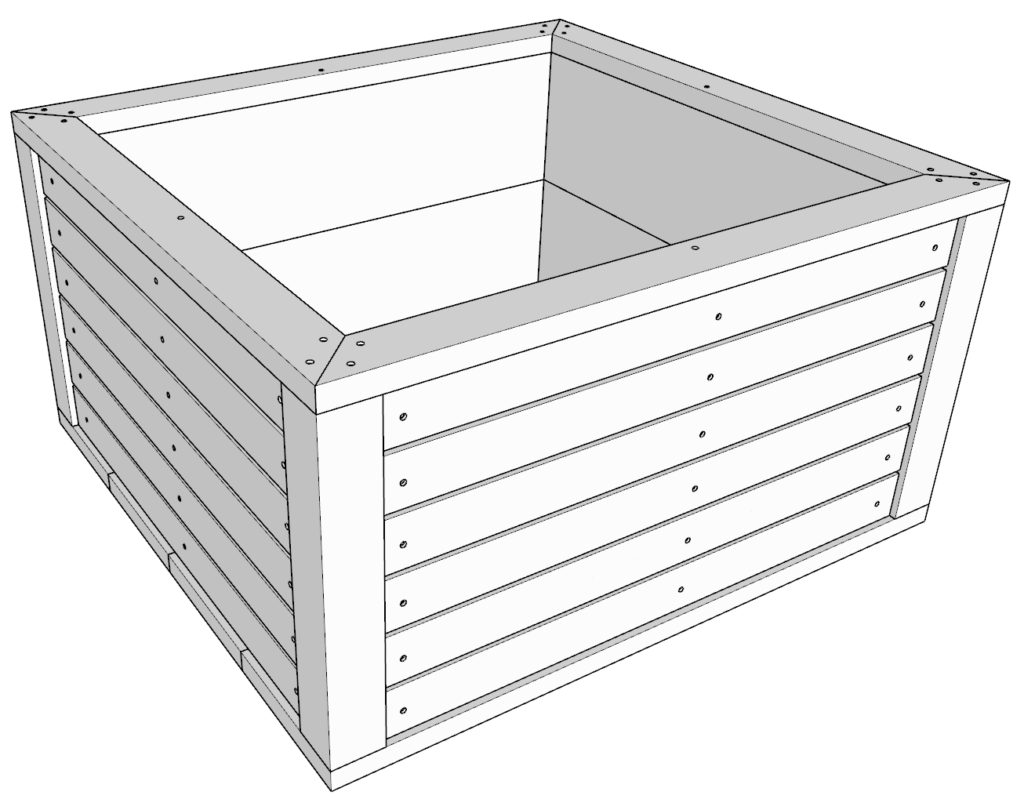
Step 7 (DIY planter box)
The final step is to sand down the planter box. This is optional but does make the box have a cleaner and nicer look.
I start sanding with a rough grit sandpaper. Usually about 80-grit. Then, for the final touch I use a fine grit. Usually, a 220-grit.
The planter box is now ready to be stained or painted.
Lastly, add the gardening lining and add dirt. Your ready to garden!