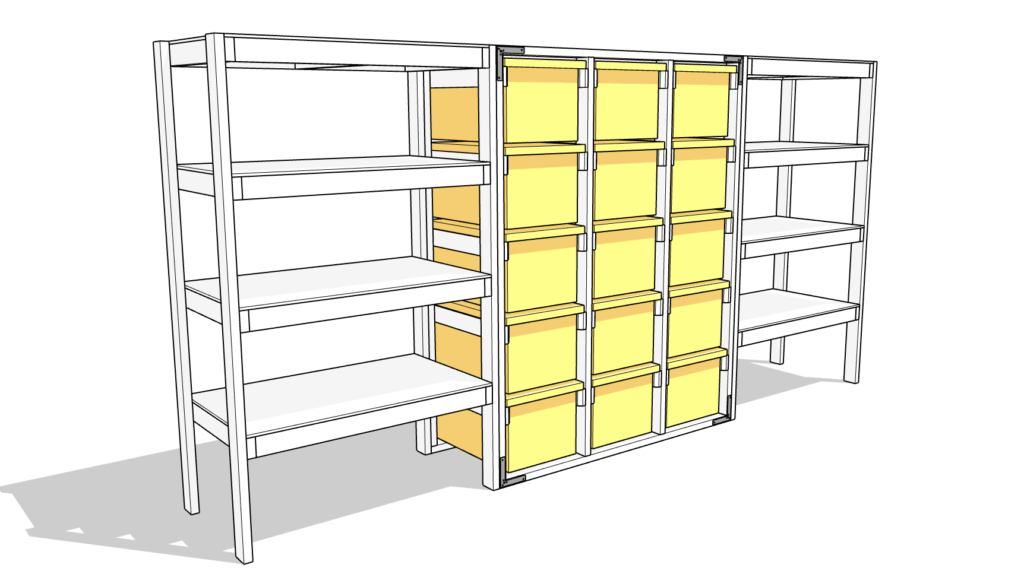
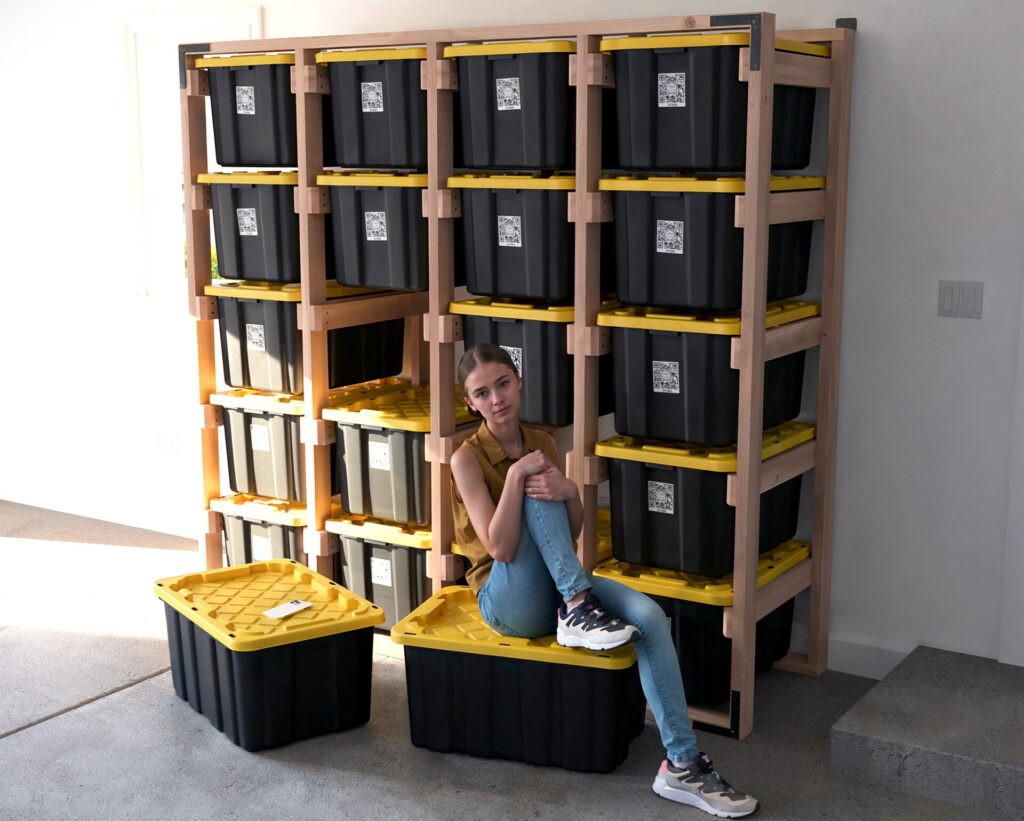
Step-by-Step Guide: Combining Shelf and Tote Rack Units
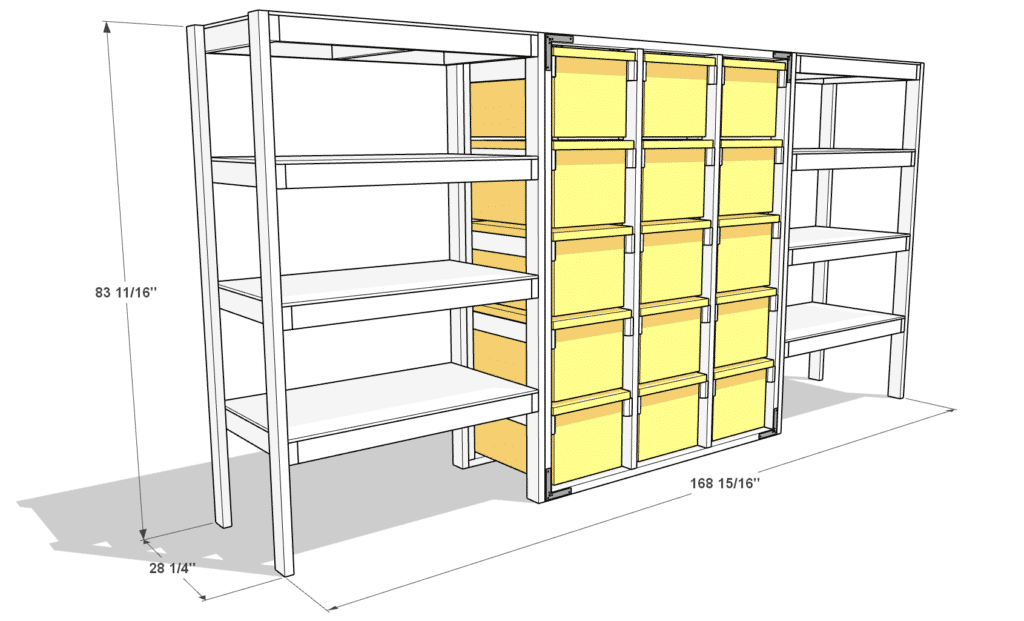
Recommend Tools
Screwdriver/Drill – Drives screws easily for connections.
Drill – For pre-drilling holes to prevent wood splitting.
Countersink Drill Bit (Optional) – Allows screws to sit flush for a cleaner finish.
Stud Finder – Identifies wall studs for secure mounting.
Clamps (Optional) – Holds units together while screwing for alignment.
Level (Optional) – Checks for plumb and level during installation.
Pencil – Marks stud locations on the wall.
Recommend Materials
2.5″ Screws – For connecting units without poking through.
1″ Screws – For attaching brackets to units.
3.5″ or Longer Screws – For securing brackets through drywall into studs.
2×4 L-Shaped Brackets (like Simpson Strong Ties) – Reinforces connection to wall for stability.
Shims or Scrap Wood – Levels base on uneven floors to prevent wobbling.
Step 1: Preparing the Components for Combination
In this step, you will gather the units you plan to combine and position them in their final spot.
Gather the Parts and Safety Note
- Move the fully built units to the area where they will stay.
- Arrange them next to each other or as shown in the diagram to check the fit.
- Do not add items to any units yet. Wait until all steps are done, and everything is secured to the wall and to each other. This prevents tipping and keeps everyone safe.
Step 2: Connecting the Units
In this step, you will join the units together using screws for a secure but removable connection.
Choose and Prepare Screws
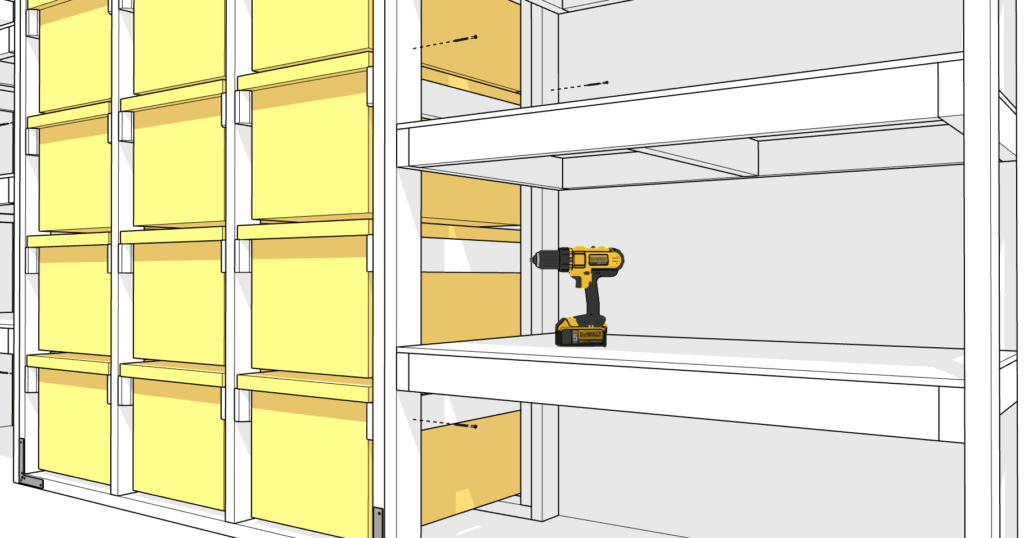
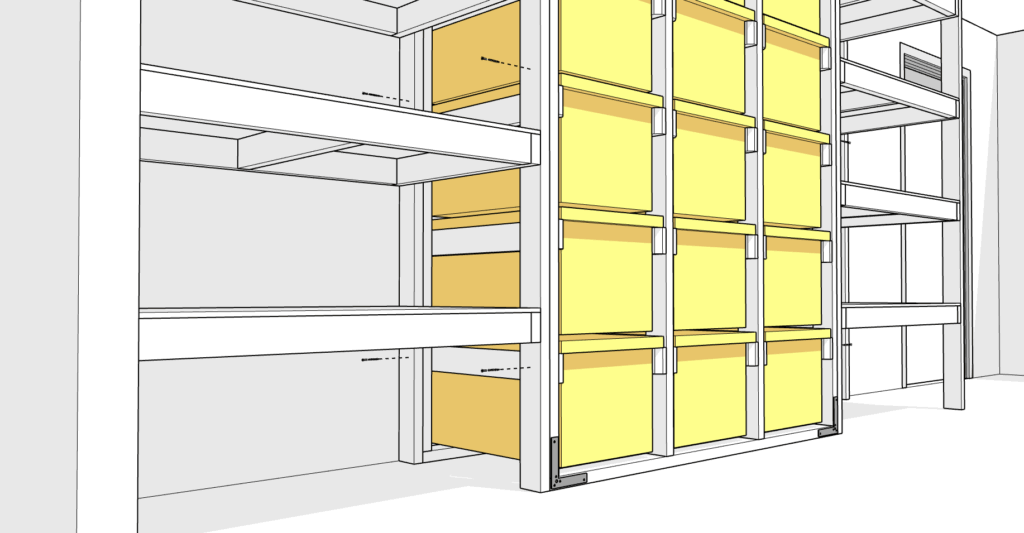
- Use 2.5-inch screws to connect the units. These are ideal because 2×4 lumber is about 1.5 inches thick, so two pieces together total 3 inches—preventing the screws from poking through.
- Avoid glue so you can disassemble the units later if needed, like for moving.
- Decide on the number of screws based on the diagram and your judgment—add enough for stability but not too many.
Secure the Units
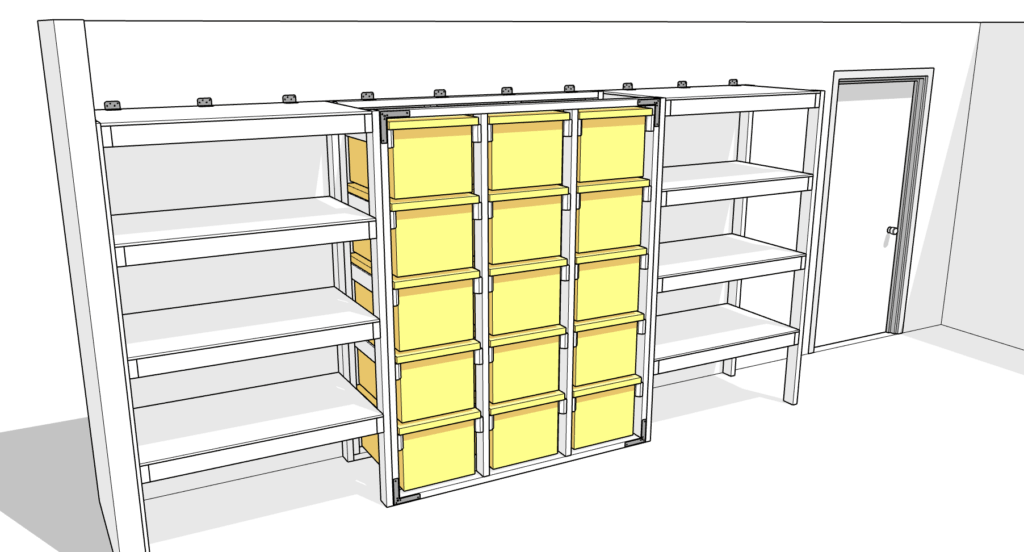
- Position the units flush against each other as shown in the diagram.
- Use clamps to help bring the 2x4s together.
- Pre-drill holes to prevent wood splitting, and use a countersink bit for a clean finish.
- Drive the screws through one unit into the other (either direction works). Tighten firmly but check for wobbling and add more screws if needed for safety.
Step 3: Securing the Units to the Wall
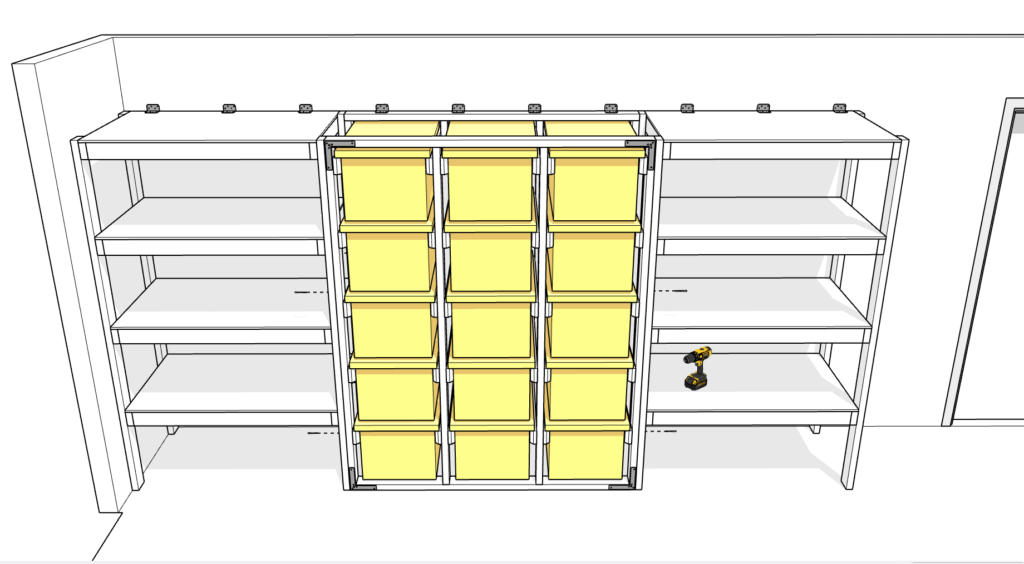
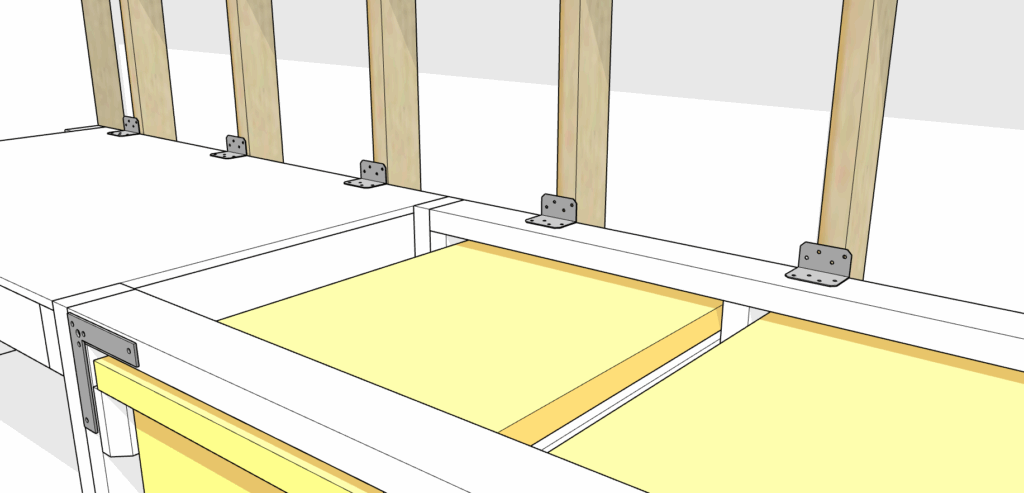
In this step, you will attach L-shaped brackets (like Simpson strong ties for 2x4s) to connect the units to the wall studs for stability. Get these from home improvement stores like Home Depot or Lowe’s.
Prepare and Locate Studs
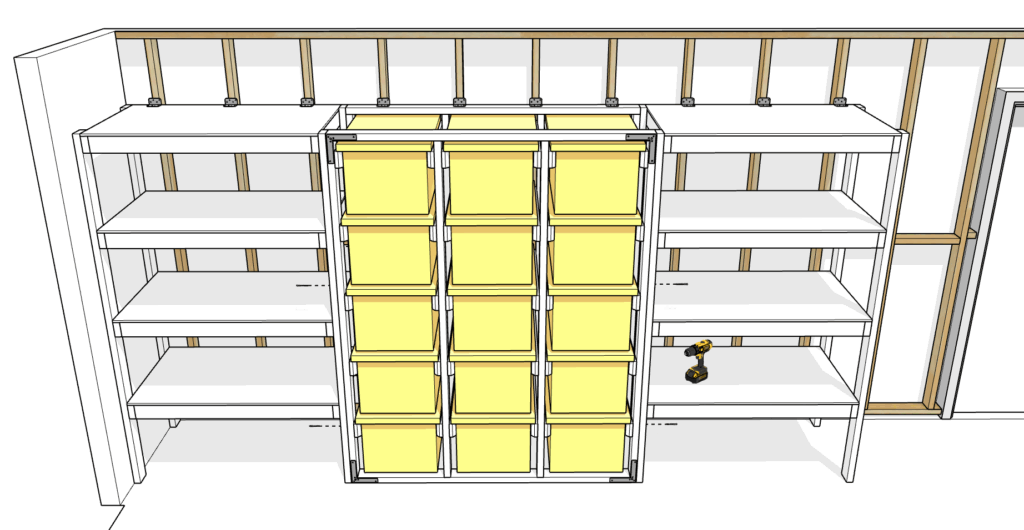
- Use a stud finder to locate studs—these are usually 16 inches apart, but check based on your home’s age and build. Best technique: Turn on the stud finder, hold it flat to the wall, and slide slowly until it beeps or lights up. Mark both edges of each stud with a pencil for clear spots to drill.
- Avoid drilling near electrical outlets, switches, panels, or wires; turn off power in the area if unsure and get pro help to stay safe.
- Pick screw sizes: 1-inch for attaching brackets to units, and 3.5-inch or longer for going through drywall into studs—test one to ensure it grips well without damage.
Install the Brackets
- Start with one bracket: hold it in place to line it up with a marked stud first, ensuring it also aligns properly with the unit. This keeps everything level and prevents the unit from lifting or shifting during installation.
- Attach the bracket to the unit using 1-inch screws, then secure it to the wall stud with the longer screws.
- Repeat for the next bracket about 16 inches away, working across the units.
- Check for plumb and level as you go; add shims or scrap wood under the base if the floor is uneven to stop wobbling.
Final Safety Check
- Test the setup by gently pushing and pulling—add more brackets or screws if it moves.
- Ensure the units can handle heavy loads or accidental climbing without tipping; never skip studs or rush this step to avoid injury or collapse.
- If your setup has special cases like near doors or uneven walls, adjust placement carefully and get help if needed.
Step 4: Adding Totes, Items, and Organizing with SnapSort AI
In this step, add your 27-gallon totes to the racks and items to the shelves or totes. Test for stability—no wobble. I highly recommend using SnapSort AI for smart inventory—it’s ideal for seasonal or long-term storage like decor, gear, toys, or snow items. I built this app for myself because I needed something real for my own chaos, and it changed everything.
What You Get with SnapSort AI App
- Add items to your inventory super easy with AI image recognition. No manual data entry needed—just snap a photo and move on to the next item. AI handles the rest in the background.
- Quick “Where is it?” answers without digging—use the search feature to find items instantly.
- Shared for family: Add your husband, wife, or kids to the same account so everyone can access the items.
Without vs. With App
- Without: It’s hard to know what’s in each tote. You’ll end up rummaging through them… and with a lot of totes, why do that? You could just scan the QR code on the tote to see exactly what’s inside or search to know which tote has the item.
- Labels suck and easily become obsolete if someone moves something or reshuffles. Memory fails, and even if you have a “special place” for everything, others won’t follow it—it’s unnatural.
- With: Search by name or photo, see exact spots; updates stick even if things move. It’s modern, quick, easy to use. Adding items takes 1-2 seconds—it’s actually fun, like a game that levels up your organization.
For Families/Teams
- One account across all devices.
- Real-time changes: If someone marks an item borrowed, everyone sees who took it instantly in the item history. If anyone adds an item to a tote, everyone sees it right away.
Where It Shines
- Seasonal swaps (decor, gear, clothes).
- Kids’ items and shared tools that move around.
- Big tote setups.
- Home businesses like selling on eBay or Etsy—perfect for inventory management if you’re a reseller.
- Organizing raw materials.
Get Started
- Download from App Store or Google Play.
- Use QR codes: Buy durable physical stickers via in-app purchases (nice things cost money—it’s just how it works) or get digital ones to print yourself.
Download SnapSort AI from the Apple App Store or Google Play. From 2025 Pshichenko Enterprises Inc.
Result
- Shelf + rack + app = fast, reliable finds. The in-app tutorial guides setup.
