Introduction
Imagine the thrill of throwing an axe and hearing the satisfying thud as it sticks into a wooden target. Now, picture that target in your own backyard, built with your own hands. That’s right, with our step-by-step guide, even beginners to woodworking can construct a professional-level axe throwing target. Not only is it a fun weekend project, but it’s also a fantastic way to impress friends and family with your crafting skills. Let’s get into what makes our DIY axe throwing target a cut above the rest.

Features
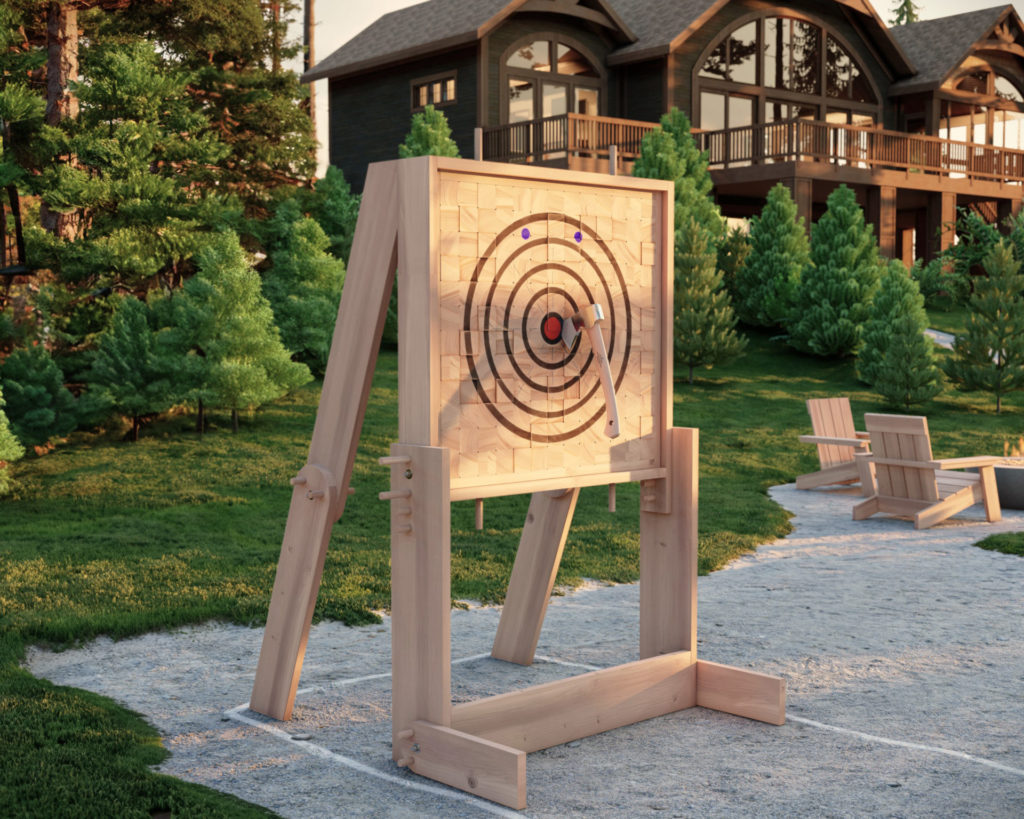
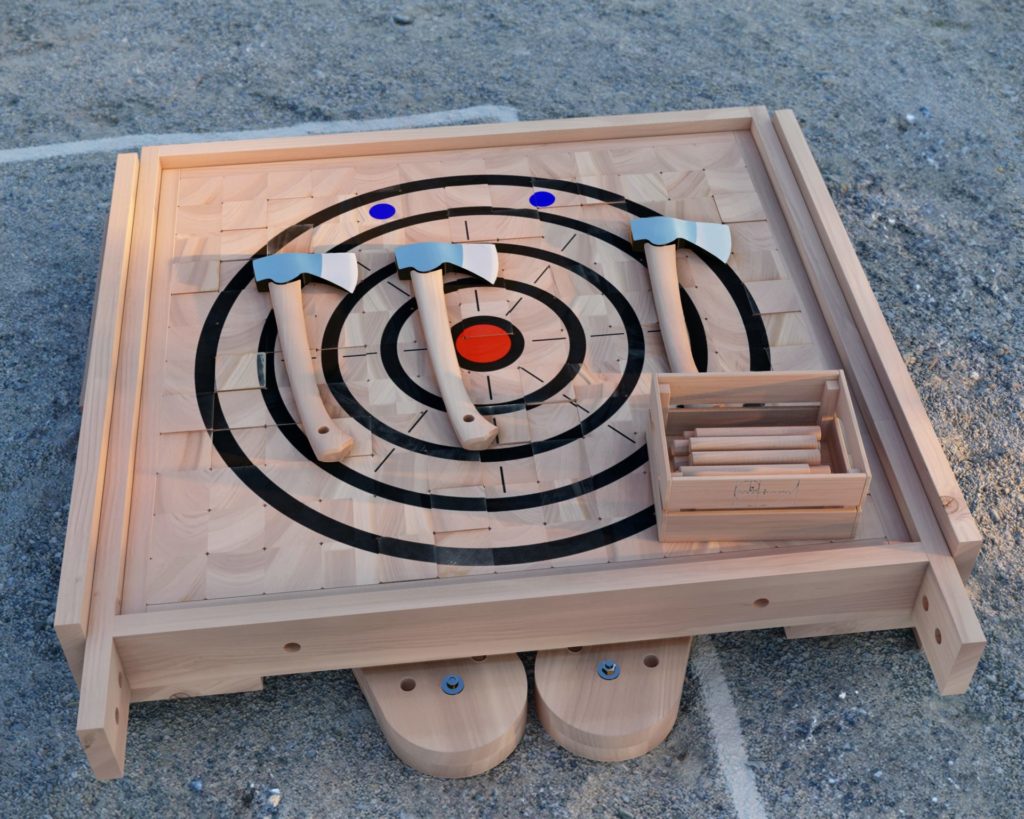
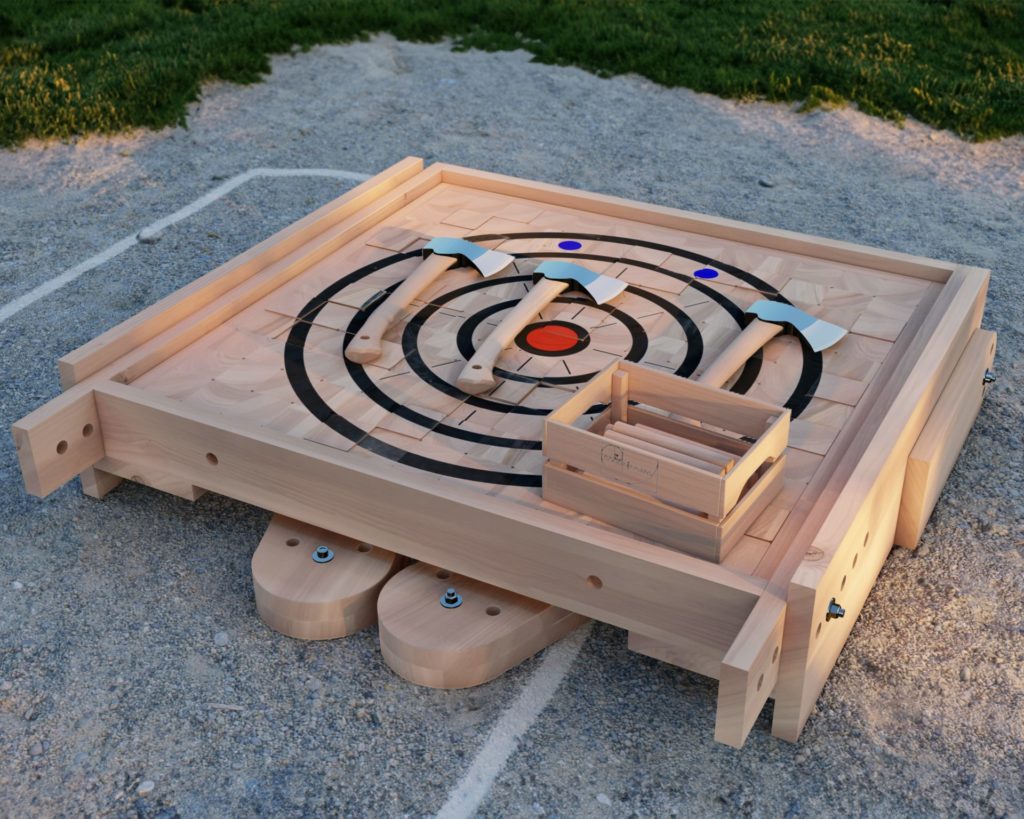
Our axe throwing target isn’t just any piece of wood—it’s a carefully designed, foldable, and portable creation made to withstand the rigorous impacts of your best throws. Here are the standout features:
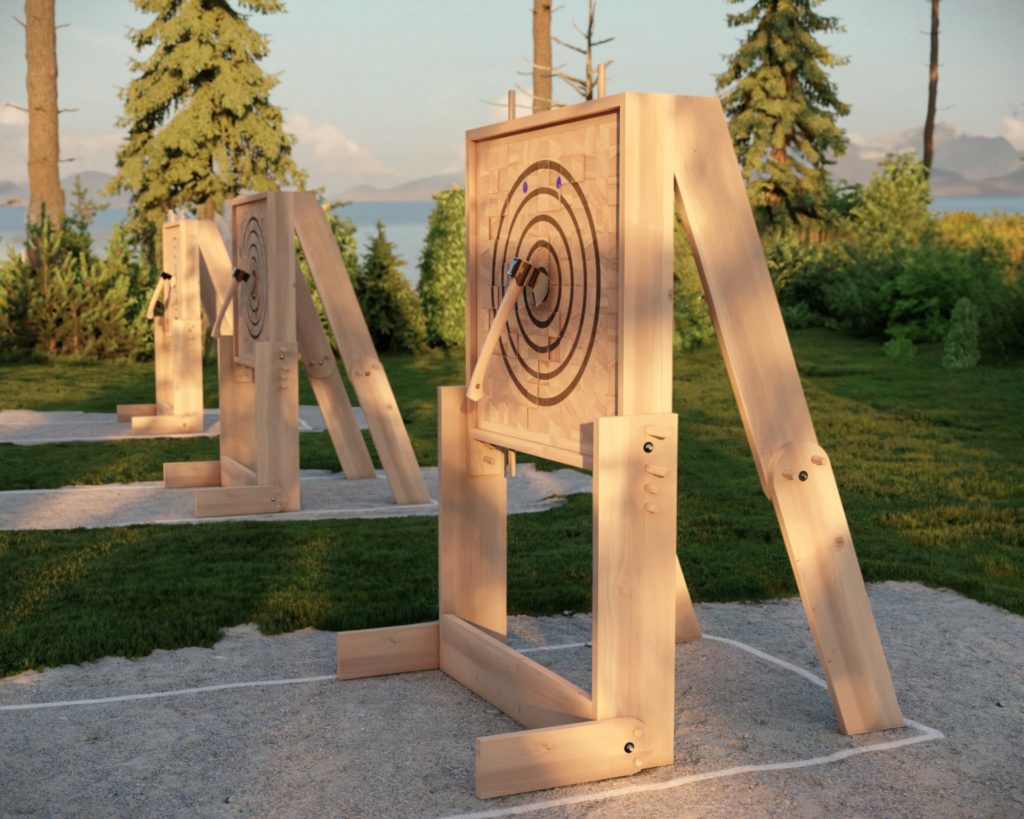
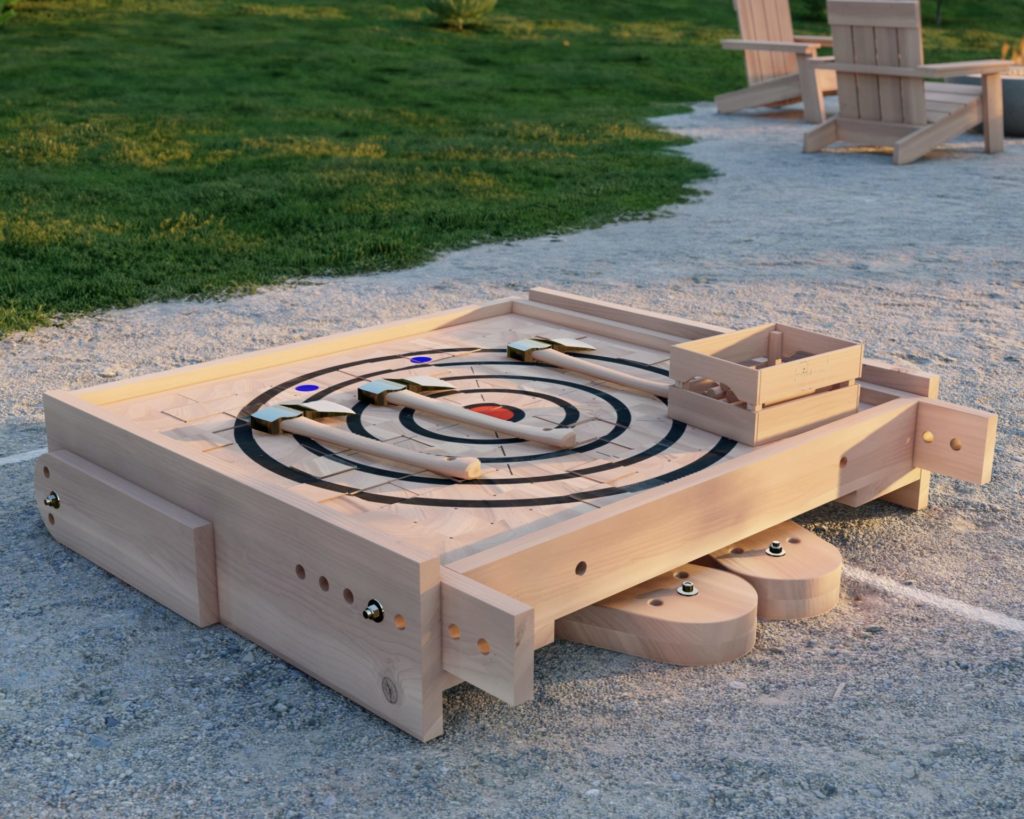
- Foldable Design: Our target easily folds down, making it a breeze to transport or store away when not in use.
- Heavy-Duty Construction: Using common construction lumber, we’ve ensured that this target can handle the heftiest of axes without faltering.
- Full-Height Frame: Standing at a standard axe throwing height, it’s perfect for both practice and competition.
- Long-Lasting Durability: Thanks to the quality of materials and design, this target is built to last.
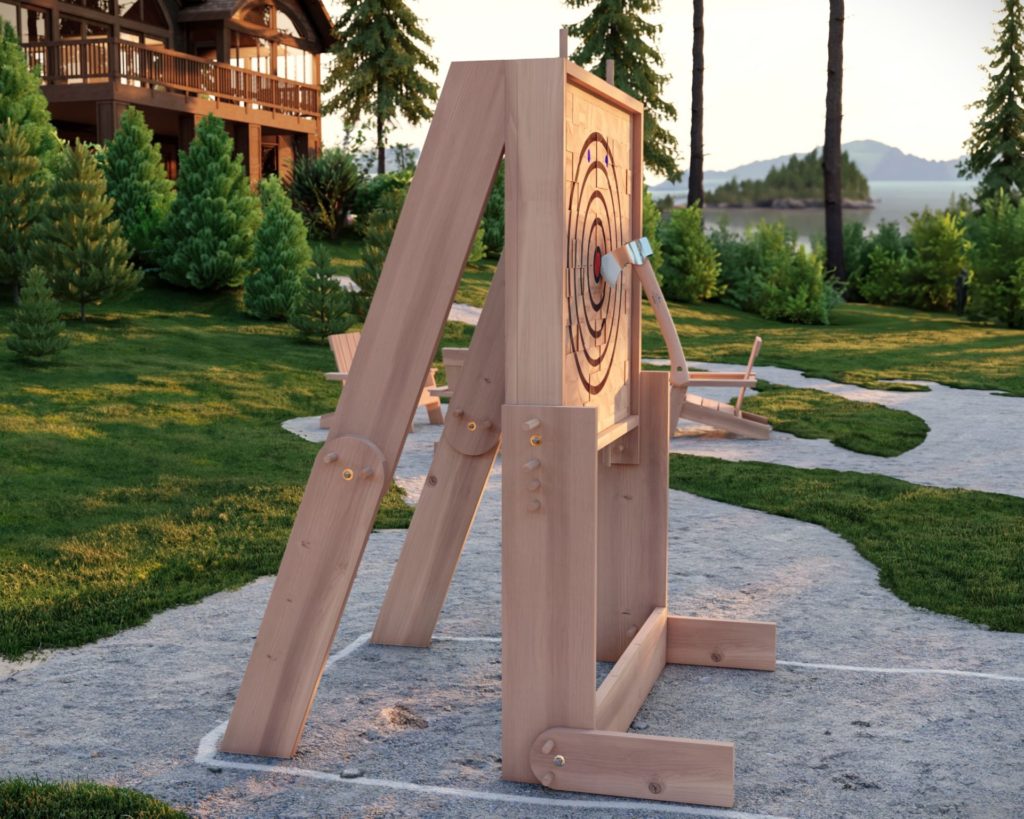
- Stability: Equipped with robust back legs to prevent tipping, and front legs that stop it from falling forward, safety is a top priority.
- Simple Assembly: No fancy cuts or tools needed; if you can follow a recipe, you can build this target.
- Two-Component System: The target detaches from the frame for ease of mobility.
With this target, you’re not just building a project; you’re crafting an experience.
Beginner-Friendly Project
Hesitant because you’re new to woodworking? Don’t be. We’ve tailored this project to ensure beginners can follow along without a hitch. You’ll learn as you build, acquiring skills that will serve you in future projects. Plus, you’ll have the satisfaction of knowing you created something truly impressive from scratch.
Flexible Functionality
This is more than a workbench—it’s a multipurpose stage for all your masterpieces. Standing proudly at an ergonomic 36 inches, it’s designed for comfort whether you choose to sit or stand, making those marathon crafting sessions a breeze. And with enough space for a team, collaboration has never been easier. The built-in outlet is the cherry on top, ensuring your tools are always ready to spring into action.
Conclusion
Our comprehensive DIY plan is the bridge between dreaming about a project and making it a reality. When you purchase our plan, you’ll receive an exhaustive cut list, a lumber shopping guide, a detailed list of tools and materials needed, helpful links, a step-by-step written guide, and illustrative images and diagrams to ensure your success.
What’s more, we offer support throughout your build. You’re not just buying plans; you’re gaining a partner in your DIY journey.
So, are you ready to make a statement in your backyard and create lasting memories? Click here to buy the plans and start building your own axe throwing target today. Let the chips fall where they may, but make sure they’re from the target you’ve crafted with pride.
Time
(varies with experience)
Cost
$250 Costs may vary based on location and supplier.)
Skill level required
Beginner
DIY Axe Throwing Target PDF Plan
What is included in the PDF download?
- Easy to read step by step instructions
- Material list
- Tools needed
- Helpful links to materials and tools needed
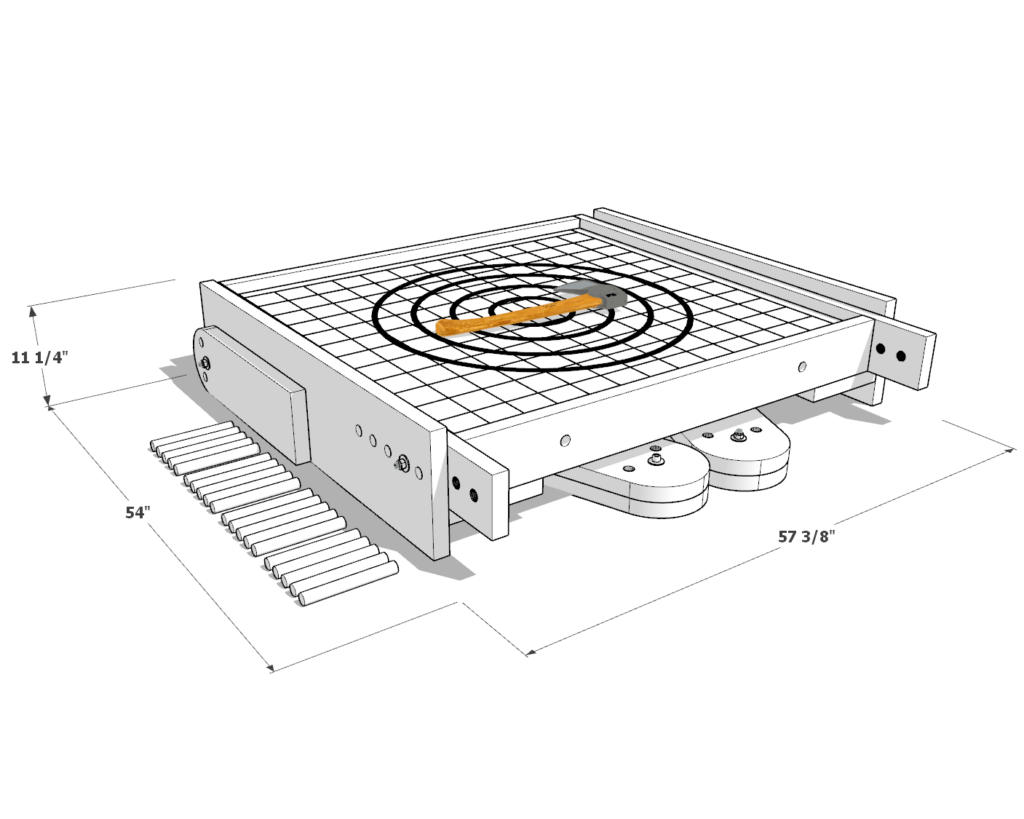
DIY Axe Throwing Target Dimensions

Tools and Materials:
Available with the purchase of the DIY plan PDF.
Lumber Shopping & Cut List:
Available with the purchase of the DIY plan PDF.
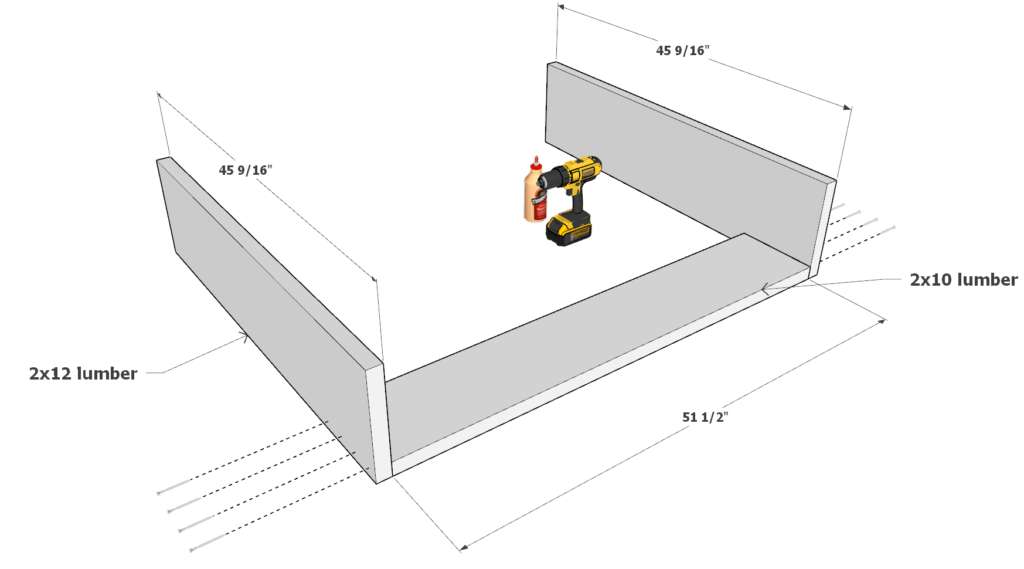
Step 1: Constructing the Leg Assembly
Materials Preparation:
- Select two 45-9/16 inch 2×12 lumber pieces and one 51-1/2 inch 2×10 lumber piece.
- Arrange them as shown in the provided diagram.
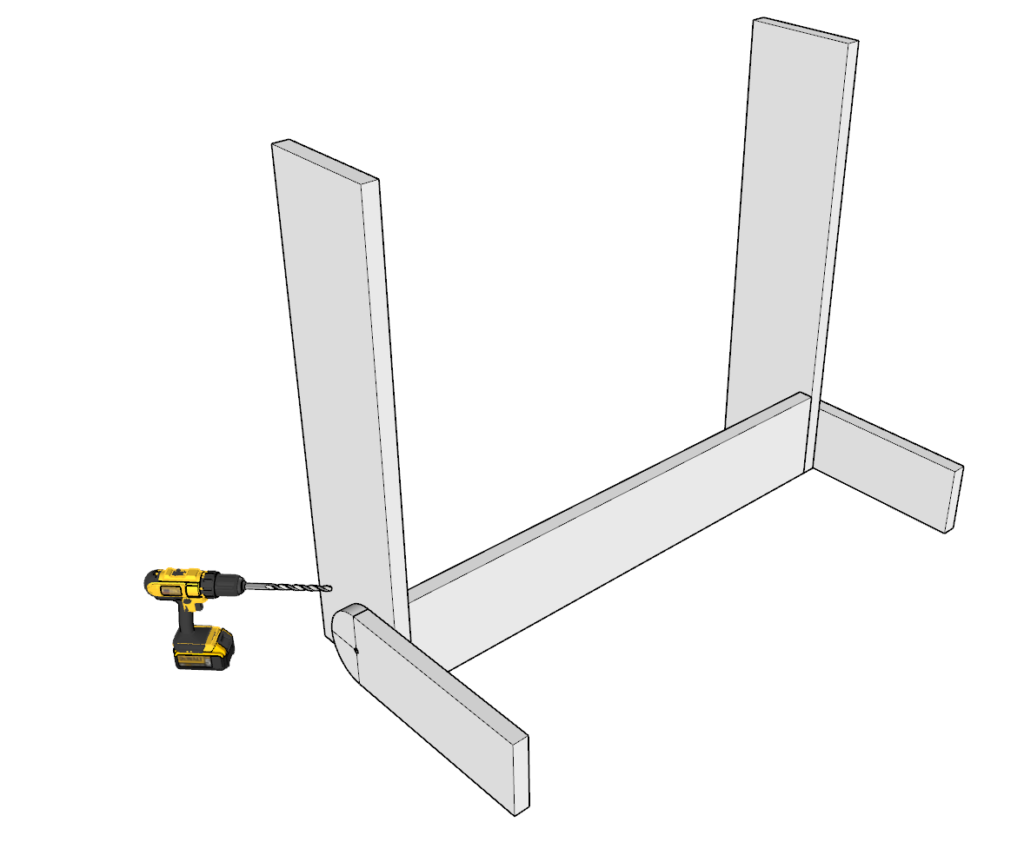
Leg Assembly:
- Secure the lumber pieces together with 3.5-inch screws and wood glue for a strong bond.
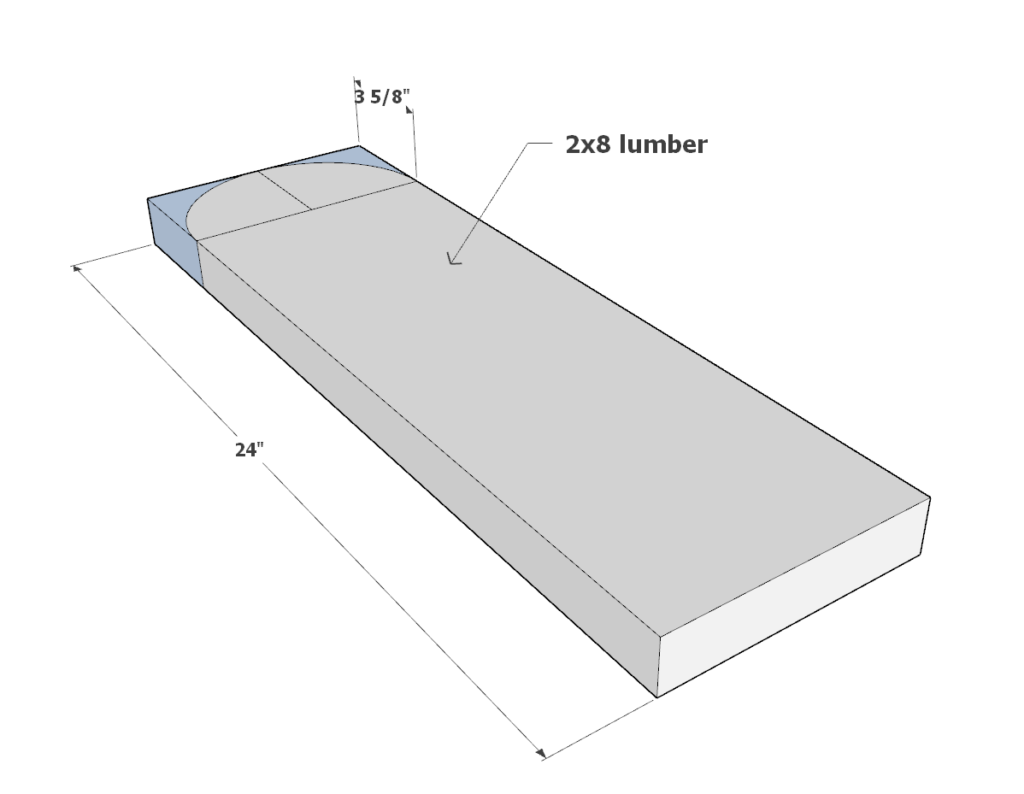
Leg Supports:
- Cut two 24-inch 2×8 lumber pieces according to the second diagram, removing a semicircular arch as indicated.
- Ensure both cut pieces are identical for symmetry.
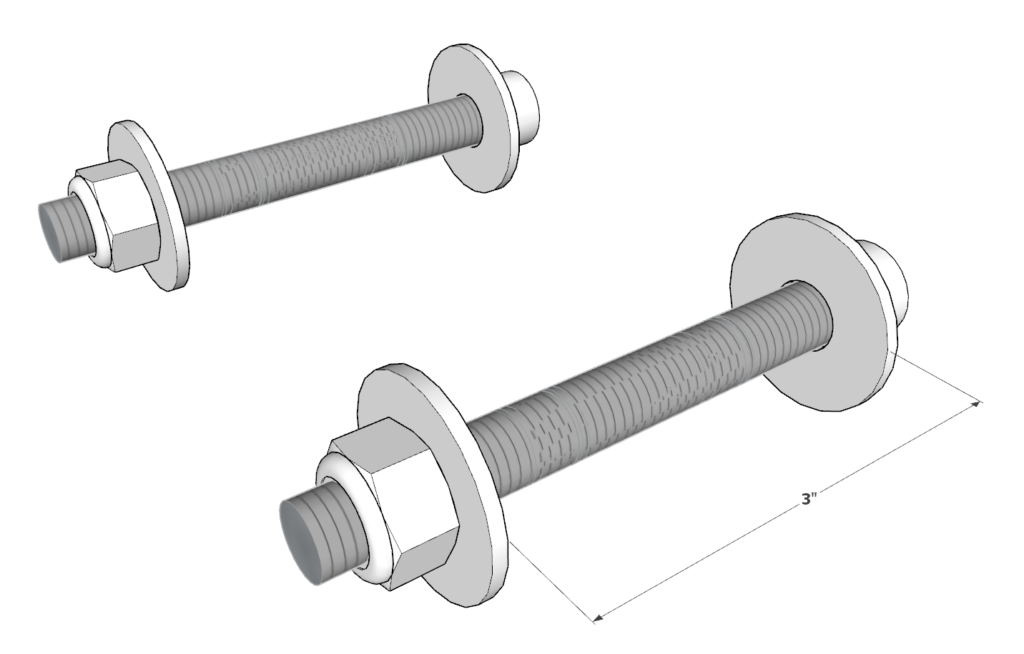
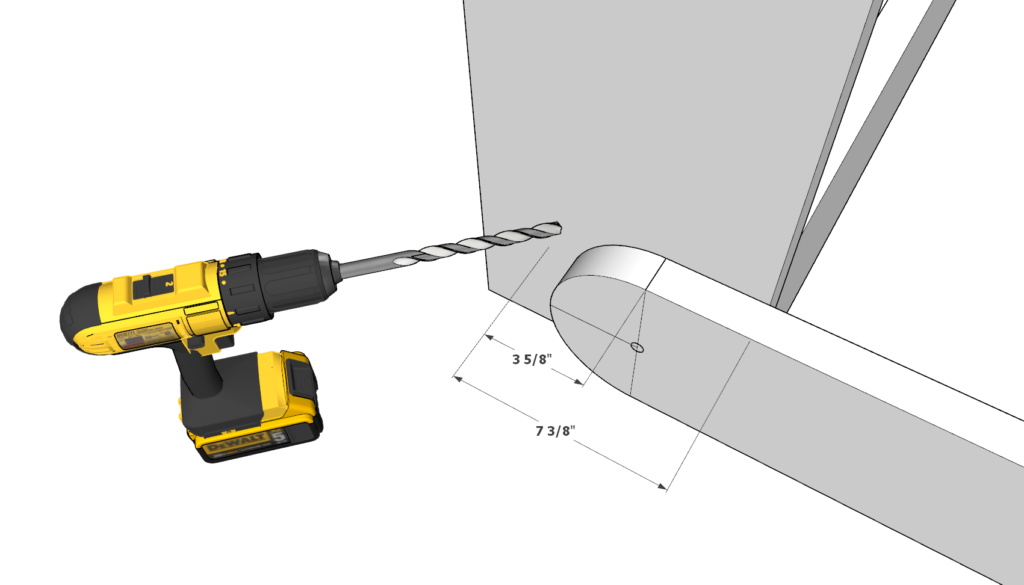
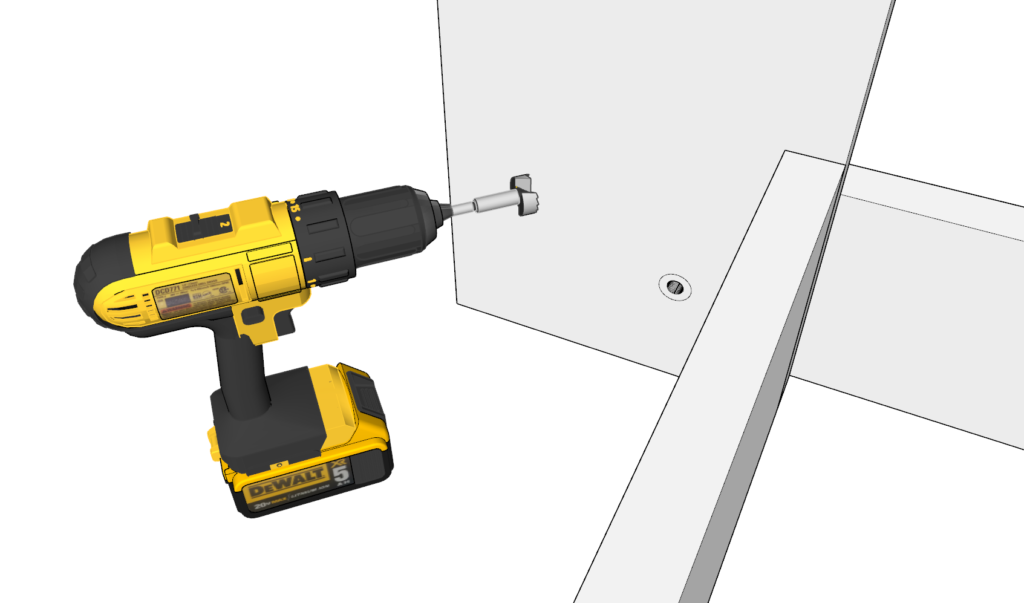
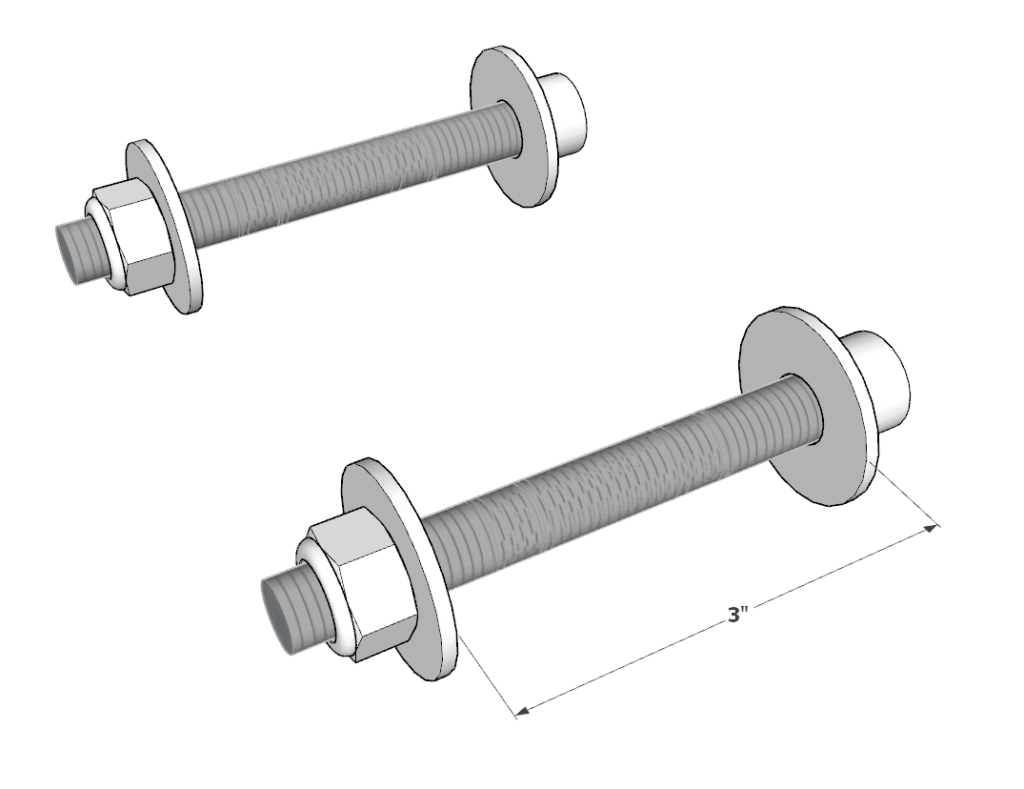
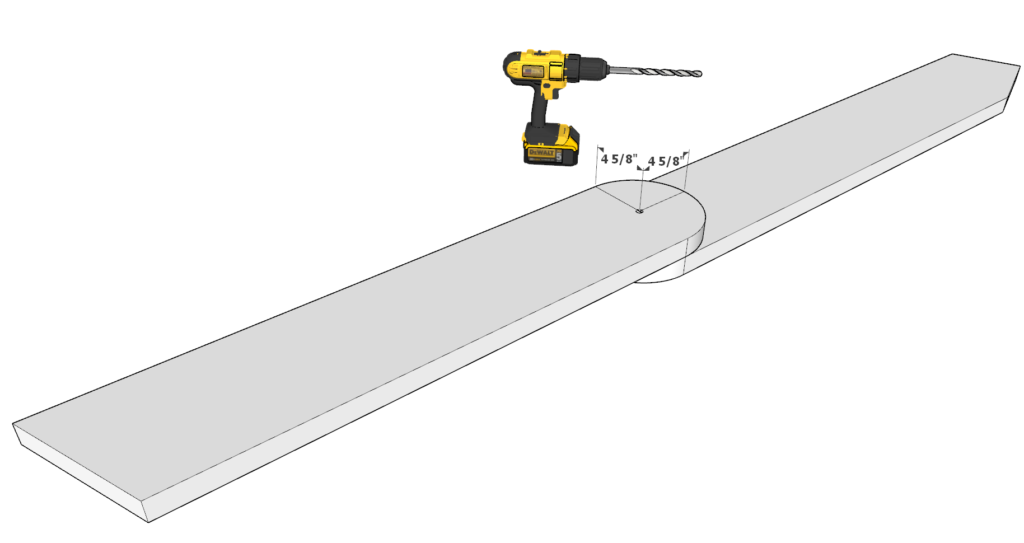
Bolt Hole Drilling:
- Choose a bolt assembly with at least 3 inches between washers.
- Select a drill bit matching the bolt’s thickness.
- Drill a hole through the 24-inch 2×8 lumber pieces and the 2×12 lumber from the previous step to create a foot for the legs.
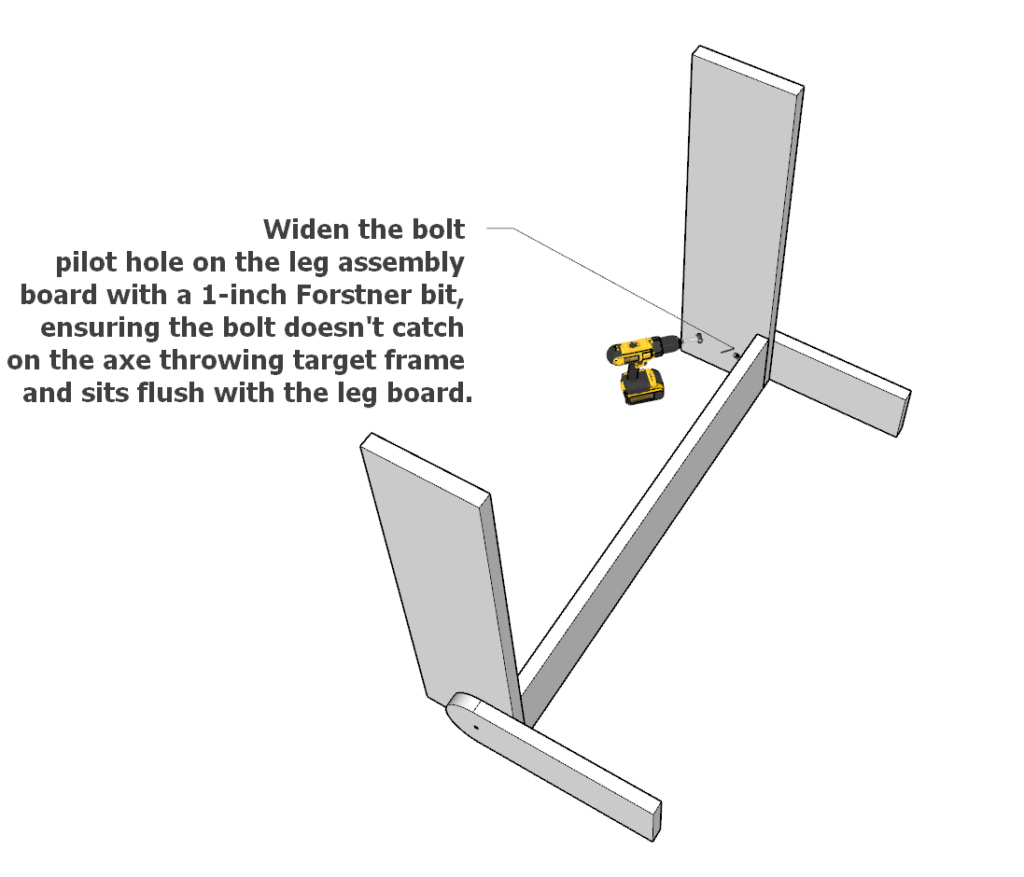
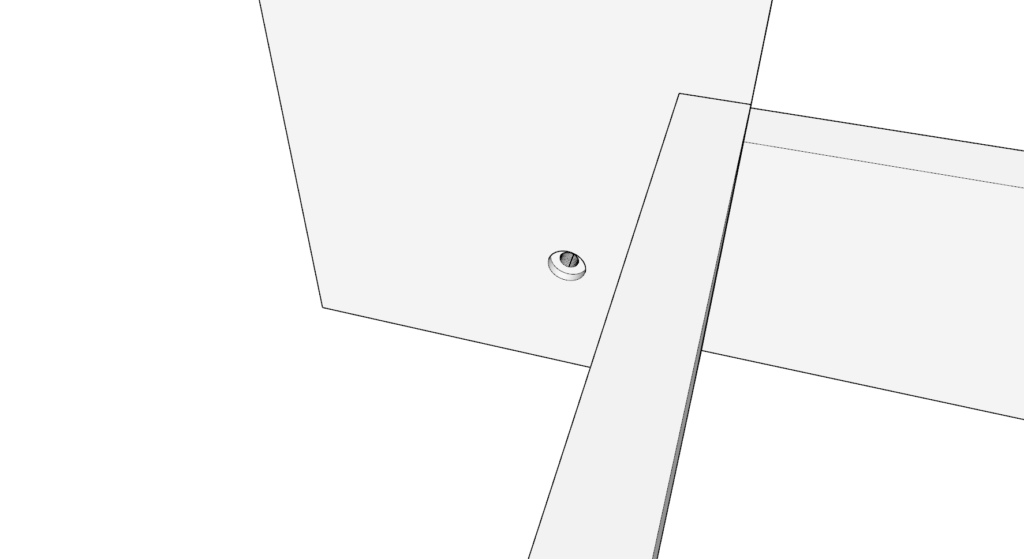
Pilot Hole Widening:
- Use a 1-inch Forstner bit to widen the bolt pilot hole on the leg assembly board.
- Ensure the bolt does not catch on the frame and is flush with the leg boards.
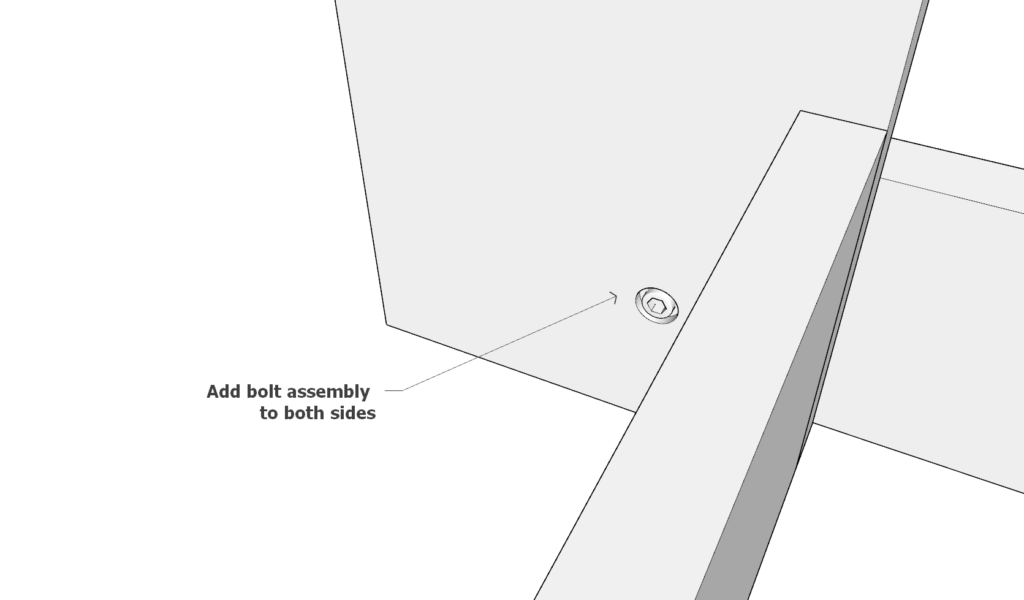
Bolt Assembly Installation:
- Add the bolt assembly to both sides of the leg assembly.
- Verify that the bolt heads are flush with the wood surface.
Pro Tip:
- Use a larger washer (1-inch recommended) to ensure smooth leg movement and durability of the joint.

Step 2: Assembling the Target Board
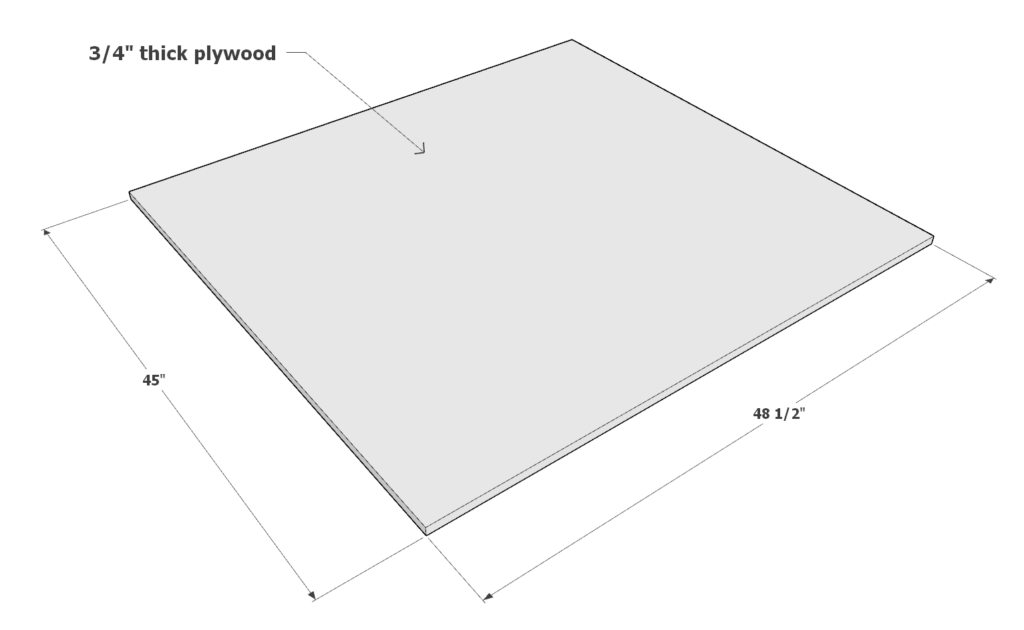
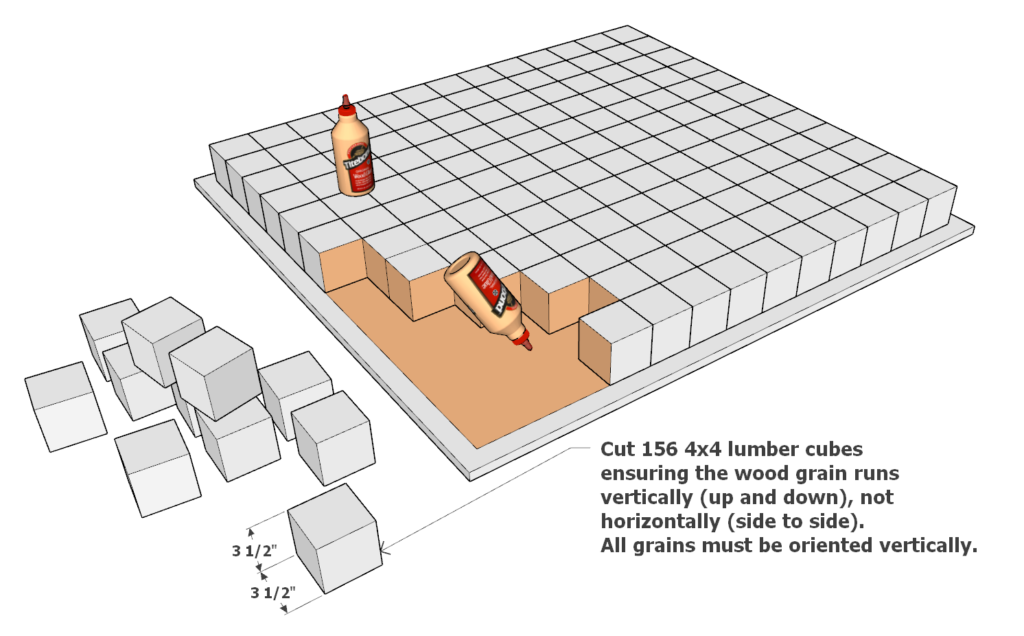
Plywood Base:
- Begin with a 48-1/2 inch by 45 inch plywood sheet, 3/4″ thick, as the base for the target.
Attaching the Cubes:
- Affix 156 4×4 lumber cubes onto the plywood, confirming that the wood grain is vertical.
- Use ample amounts of wood glue for each cube to prevent splitting upon axe impact.
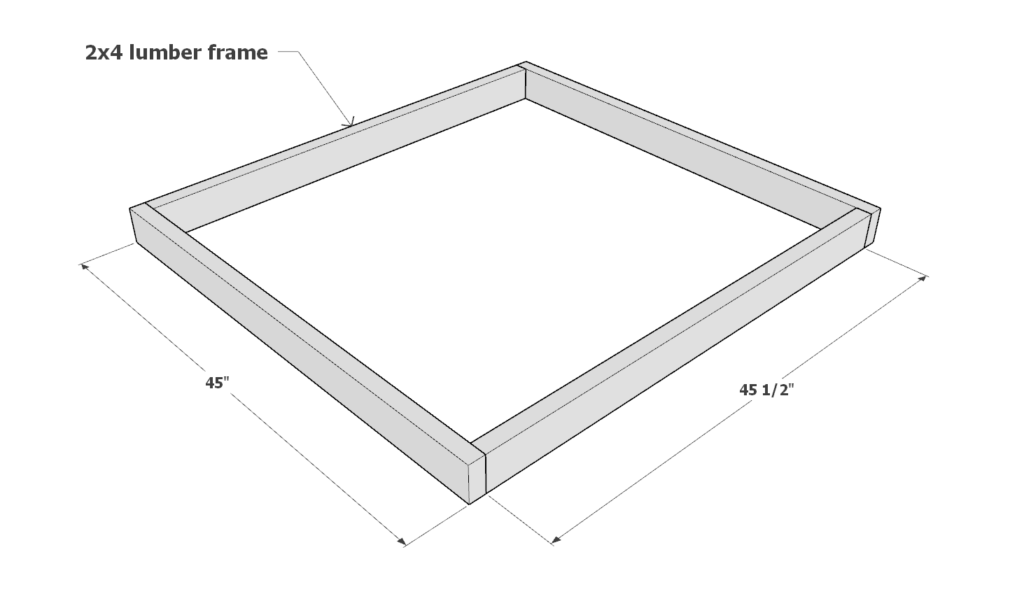
Frame Construction:
- Create a frame using two 45-inch 2x4s and two 45-1/2 inch 2x4s.
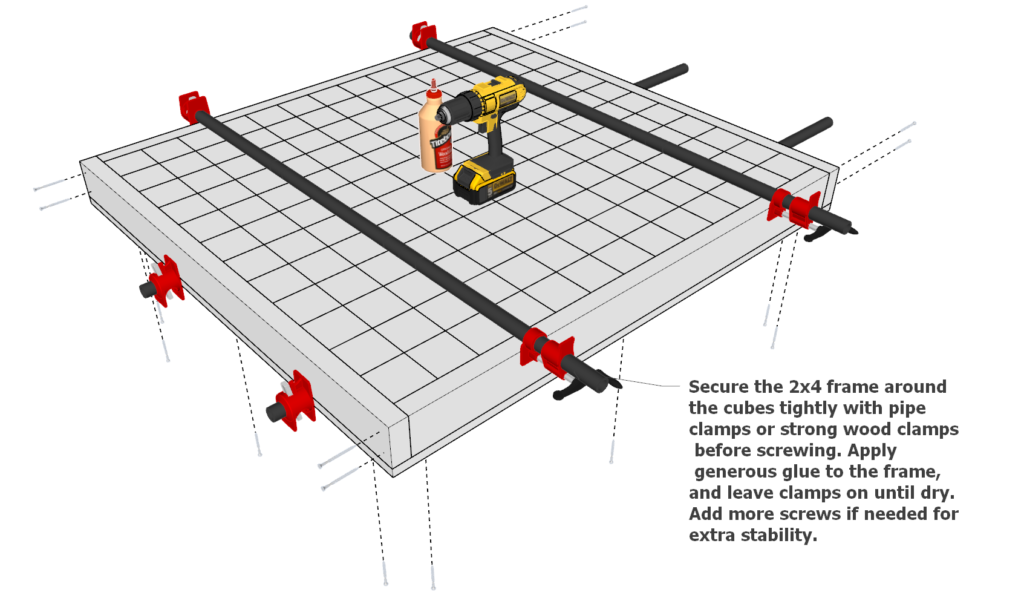
Securing the Frame:
- Position the frame around the cubes and tighten with pipe clamps or strong wood clamps.
- Fasten the frame to the cubes using 3.5-inch screws.
- Maintain clamps in position until the glue has fully dried.
- For added stability, insert additional screws as needed.
Alternative Clamping Method:
- If pipe or wood clamps are unavailable, utilize ratchet straps to encircle and tighten around the frame.
- Note: Using ratchet straps may make screw placement more challenging.
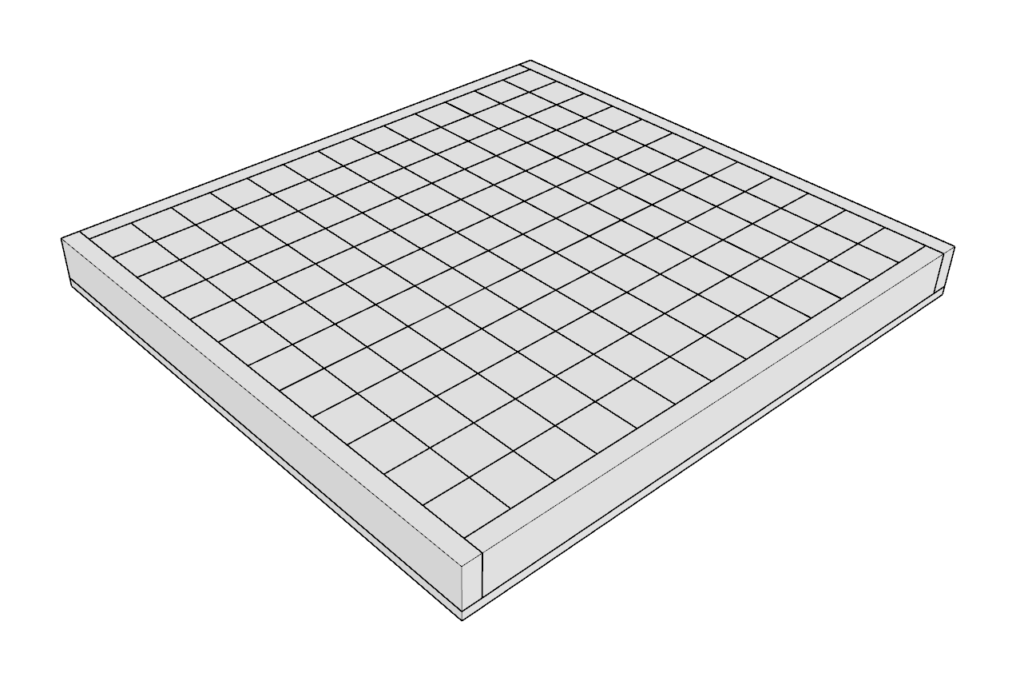
Finishing Touches:
- Once the glue is dry, sand the target board for a smooth, neat finish.
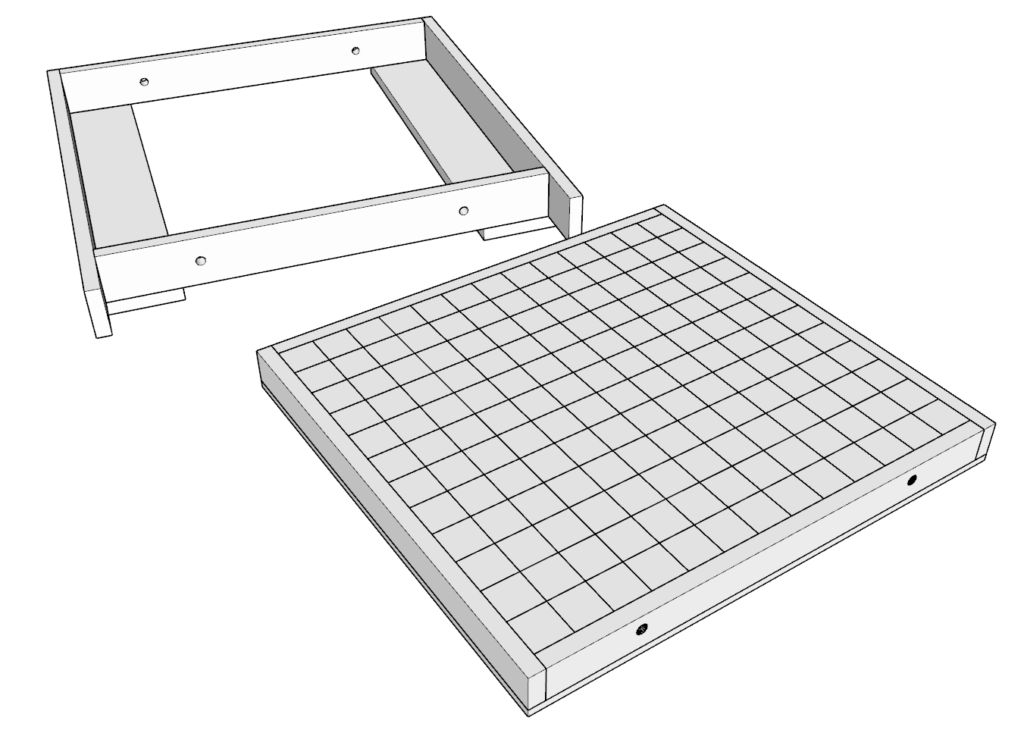
Step 3: Crafting the Target Housing
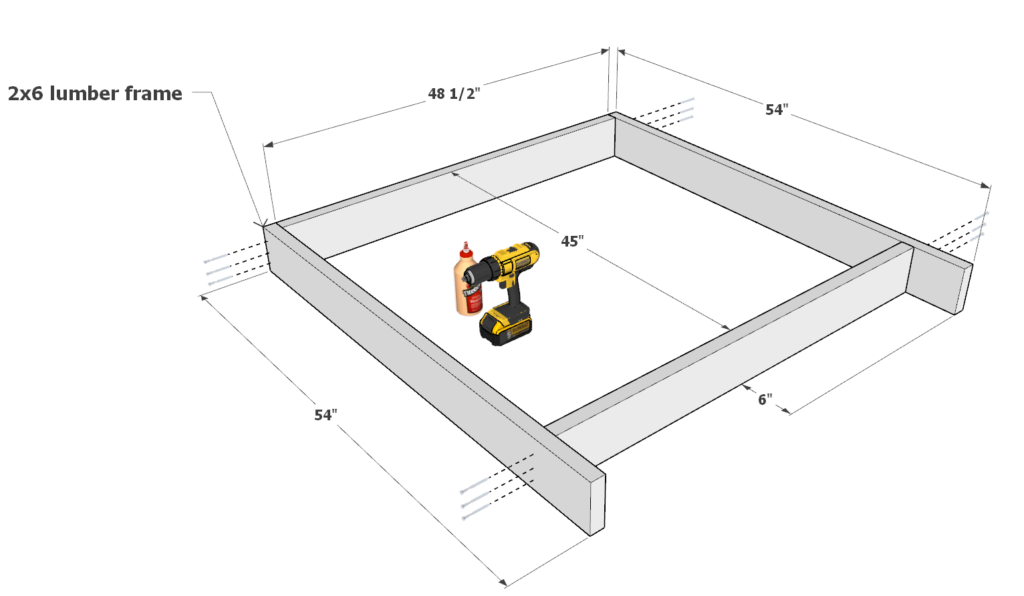
Framework Assembly:
- Begin by taking two 54-inch 2×6 lumber pieces and two 48-1/2 inch 2×6 lumber pieces.
- Join them using wood glue and 3.5-inch screws as shown in the first diagram.
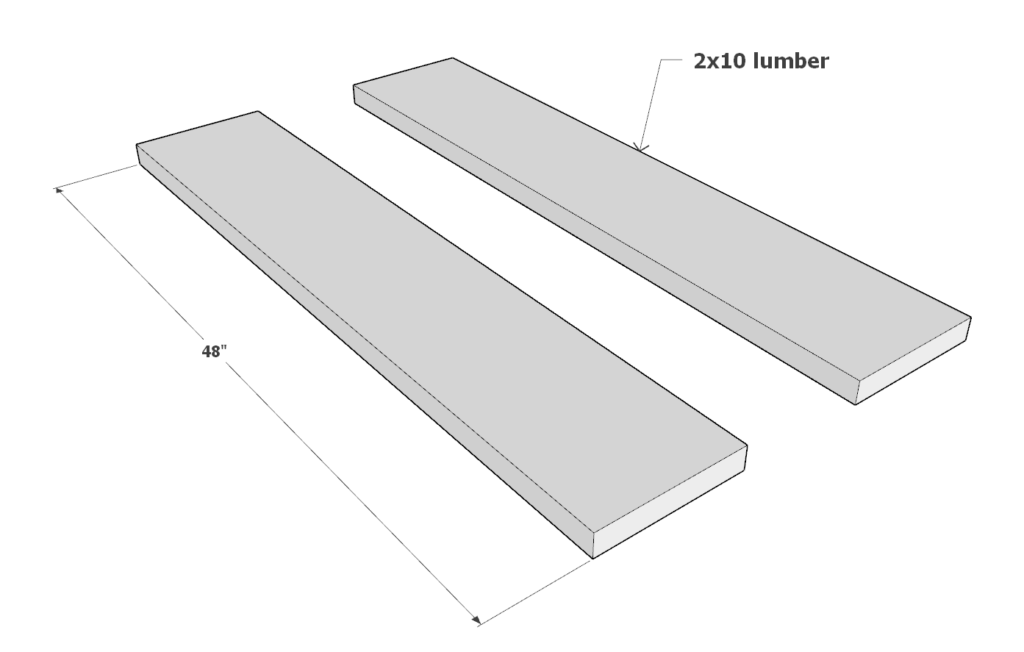
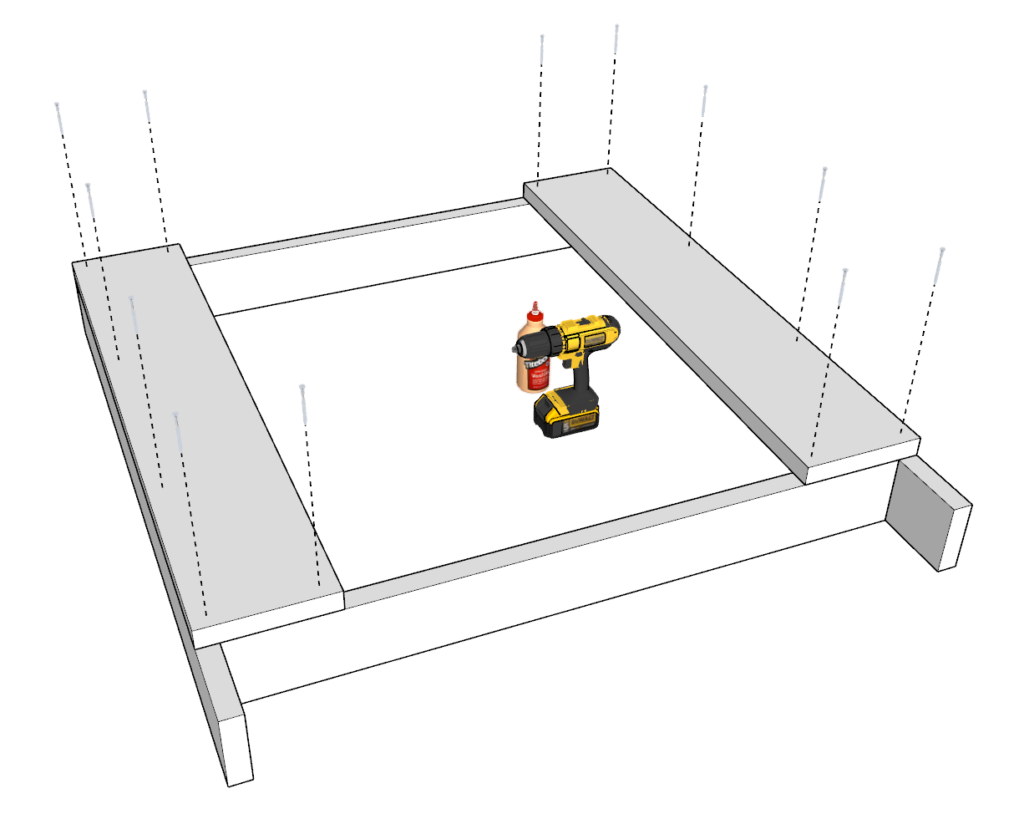
Back Support:
- Attach two 48-inch long 2×10 lumber boards to the rear of the 2×6 frame.
- Use wood glue and 3.5-inch screws for a secure fit.
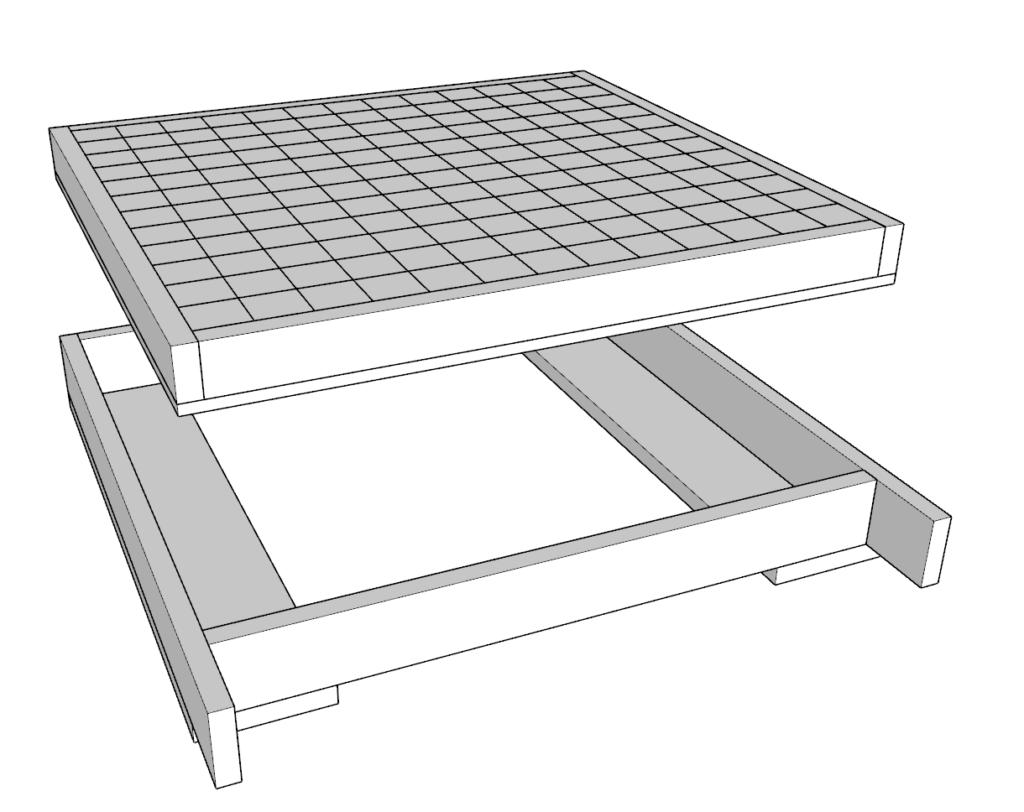
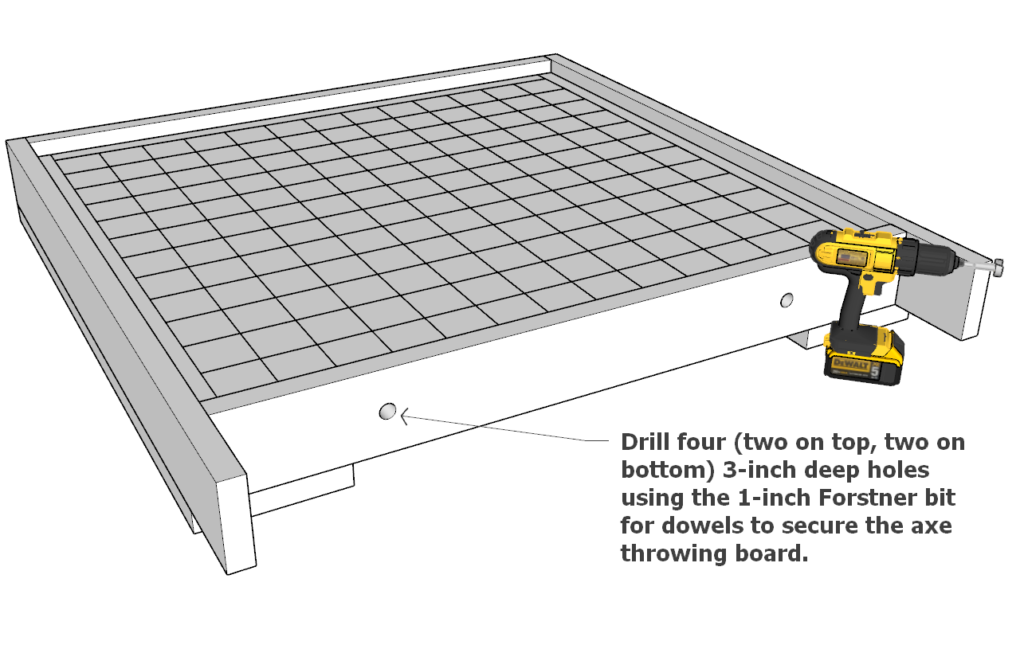
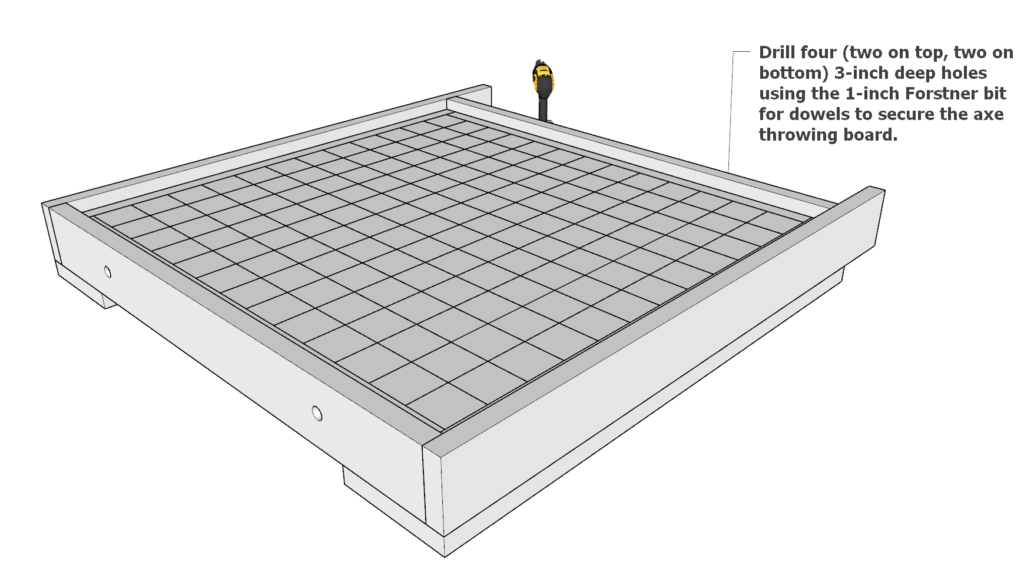
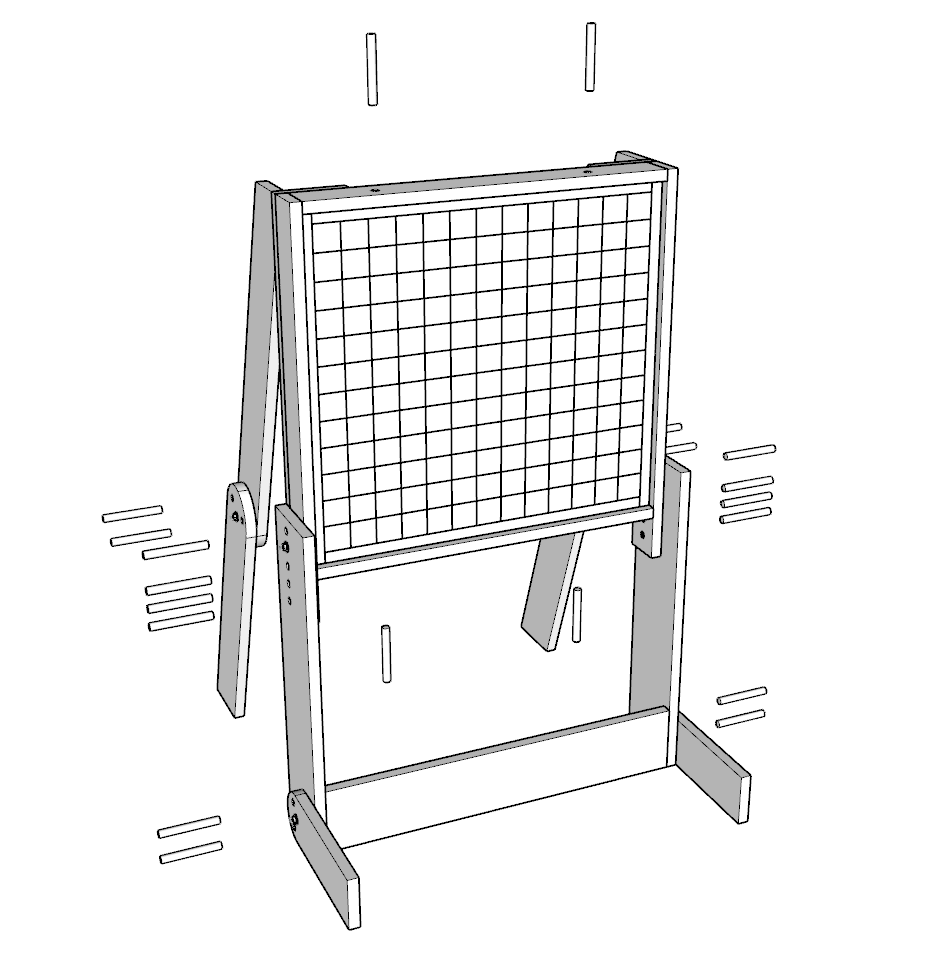
Integrating the Target:
- Place the assembled axe throwing target from the previous step within the housing frame.
- Drill four 3-inch deep holes (two at the top and two at the bottom) with a 1-inch Forstner bit.
- These hoes will serve to insert dowels to firmly secure the axe throwing board in position.
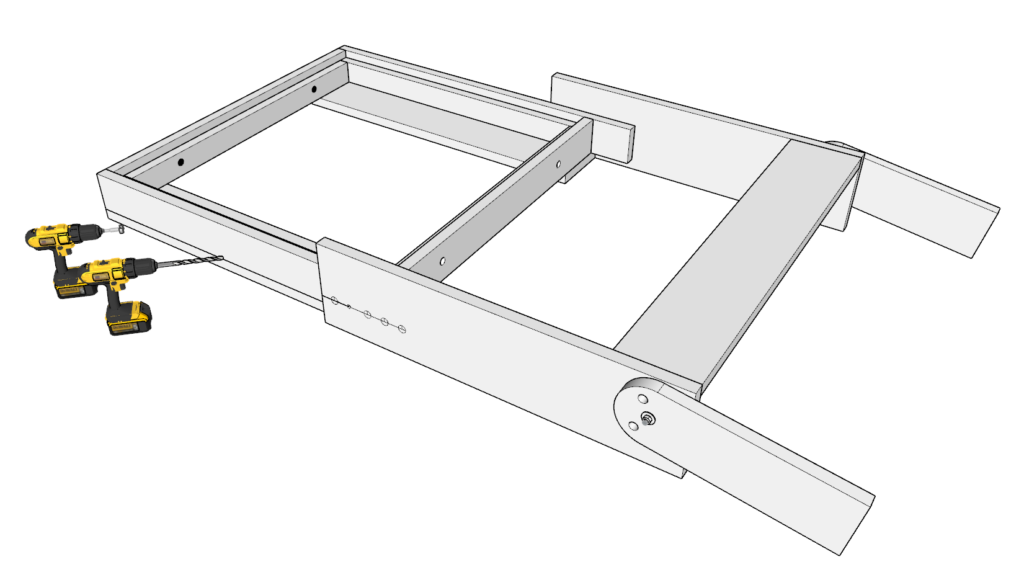
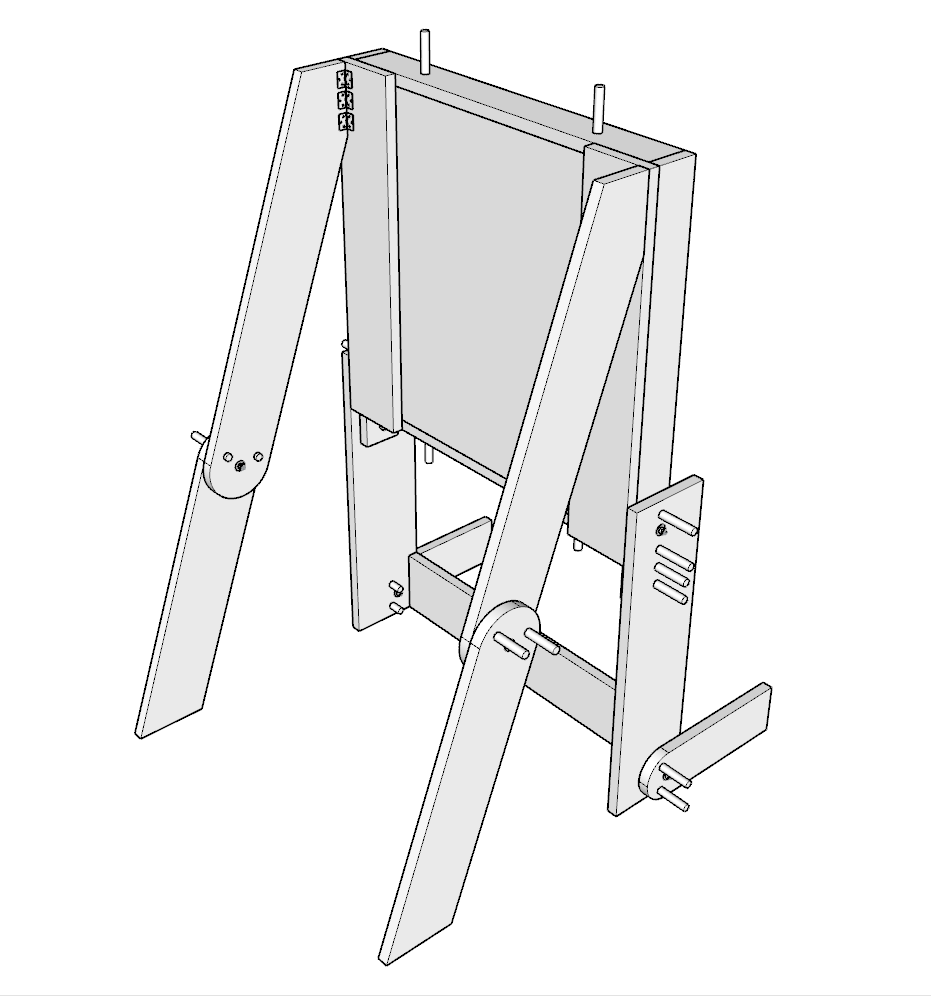
Step 4: Attaching the Target Housing to the Front Legs
Bolt Preparation:
- Gather two bolt assemblies, identical to those used previously, with at least 3 inches between washers.
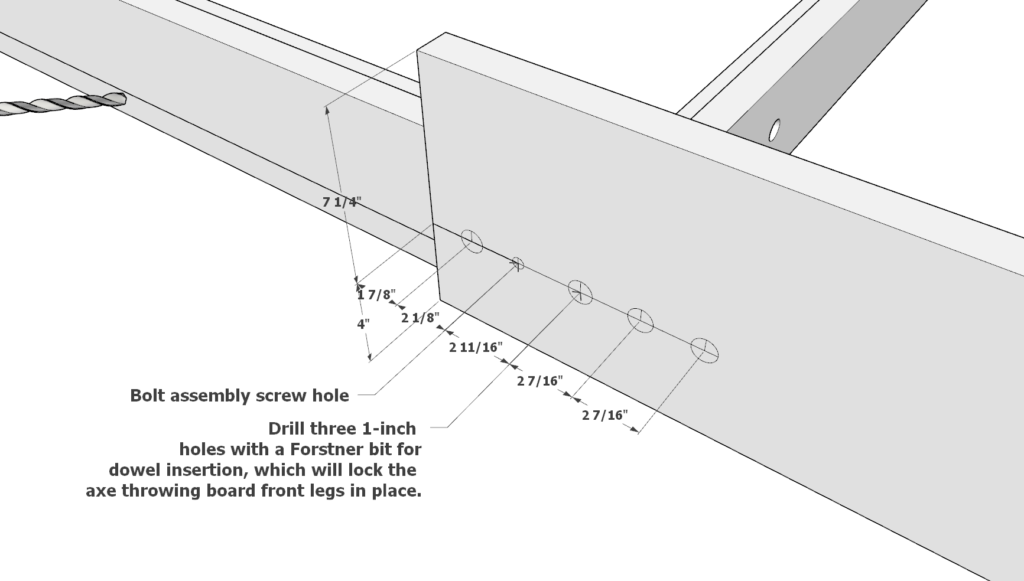
Pilot Hole Drilling:
- Refer to the diagram to drill pilot holes for the bolt assemblies on the target housing where it will attach to the front legs.
Dowel Hole Creation:
- Use a 1-inch Forstner bit to drill three holes for dowel insertion. These will serve as a locking mechanism for the front legs when the target is upright.
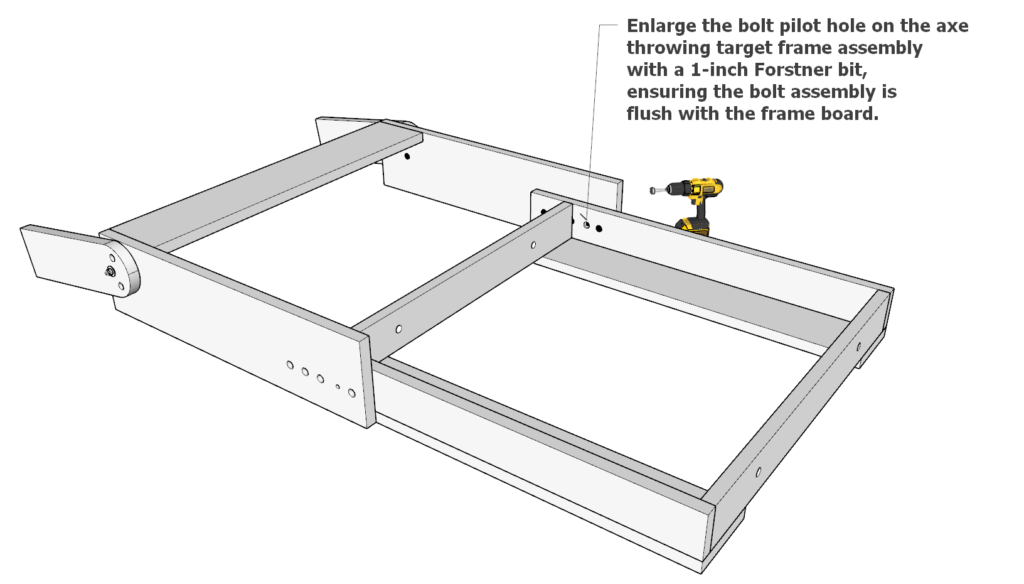
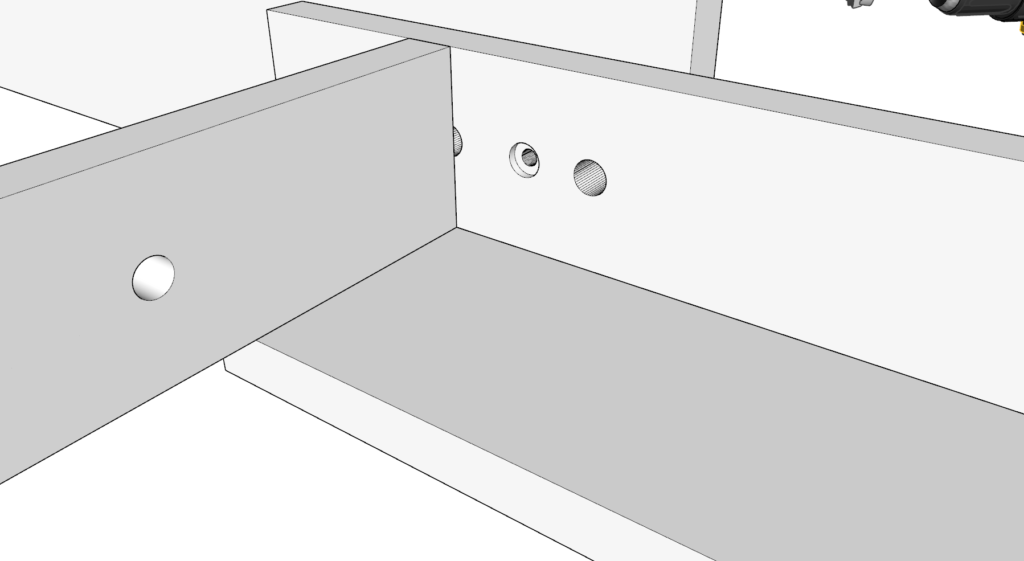
Pilot Hole Enlarging:
- Expand the bolt pilot holes on the axe throwing target frame housing using the 1-inch Forstner bit to ensure the bolt assemblies will be flush with the frame board.
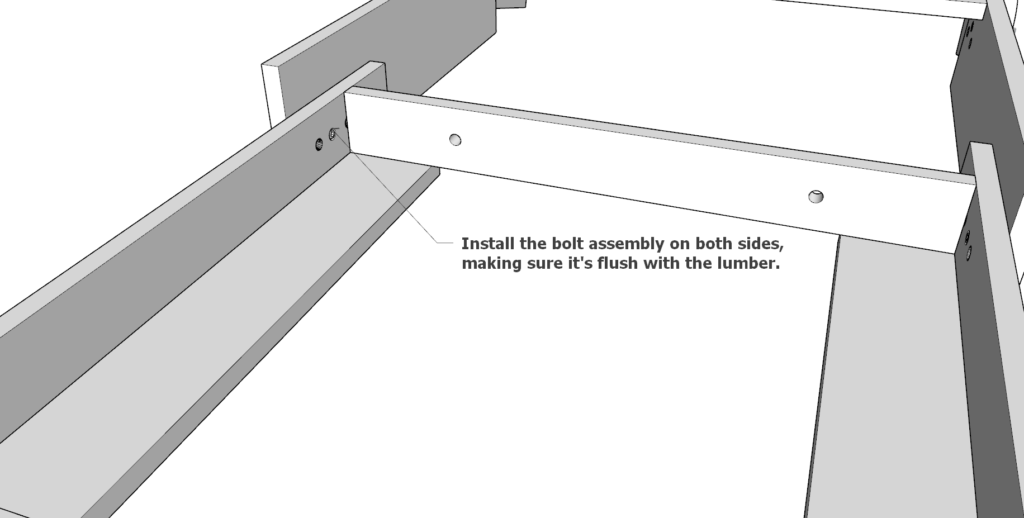
Bolt Assembly Installation:
- Install the bolt assembly on both sides of the target housing, confirming each is flush with the lumber for a seamless fit.


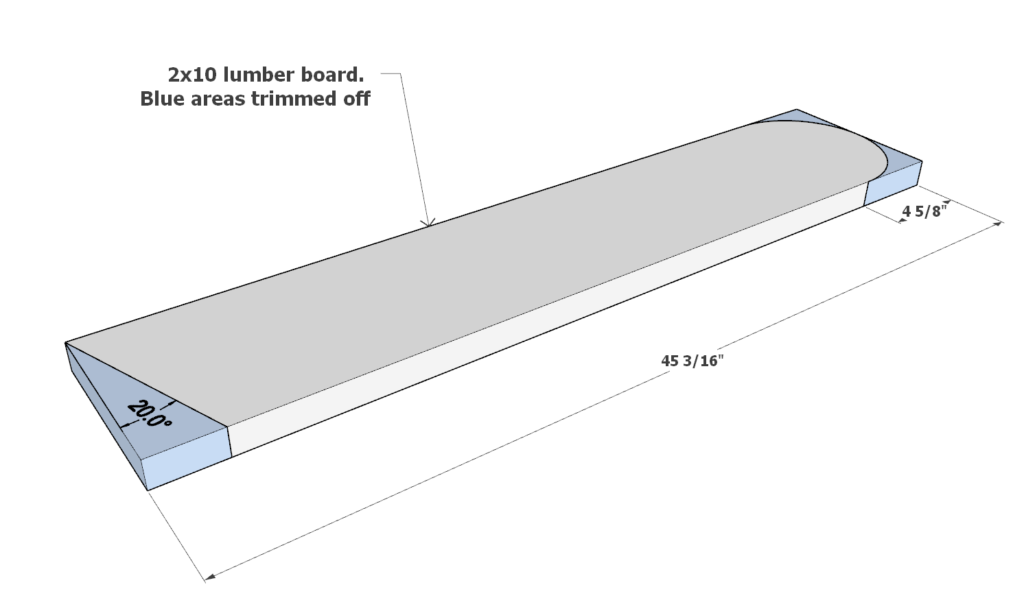
Step 5: Constructing the Back Legs
Initial Cuts:
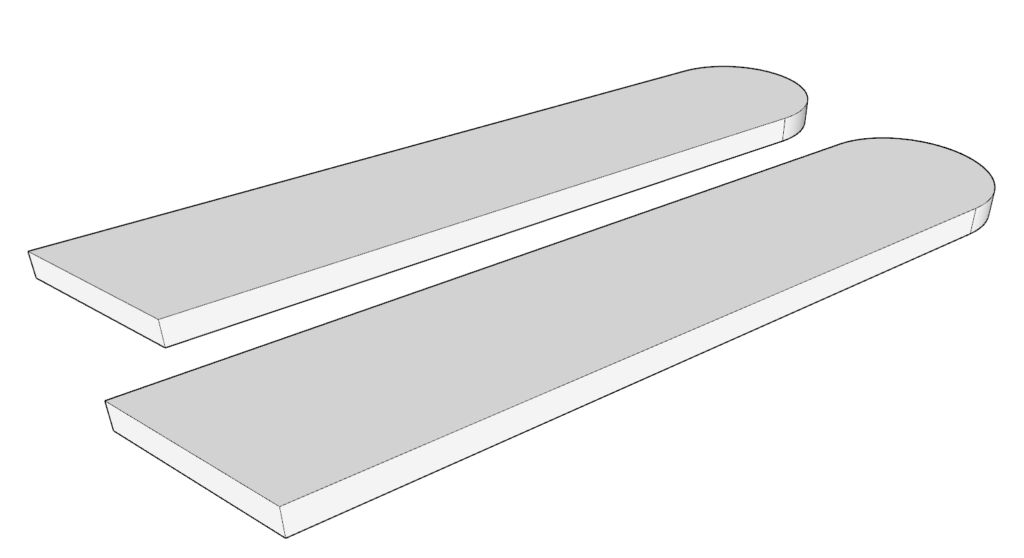
- Take a 45-3/16 inch long 2×10 lumber board, trimming one end at a 20-degree angle and shaping the other end into a semicircular arch, as shown in the diagram. Remove all sections marked in blue.
- Produce two identical boards following this pattern.
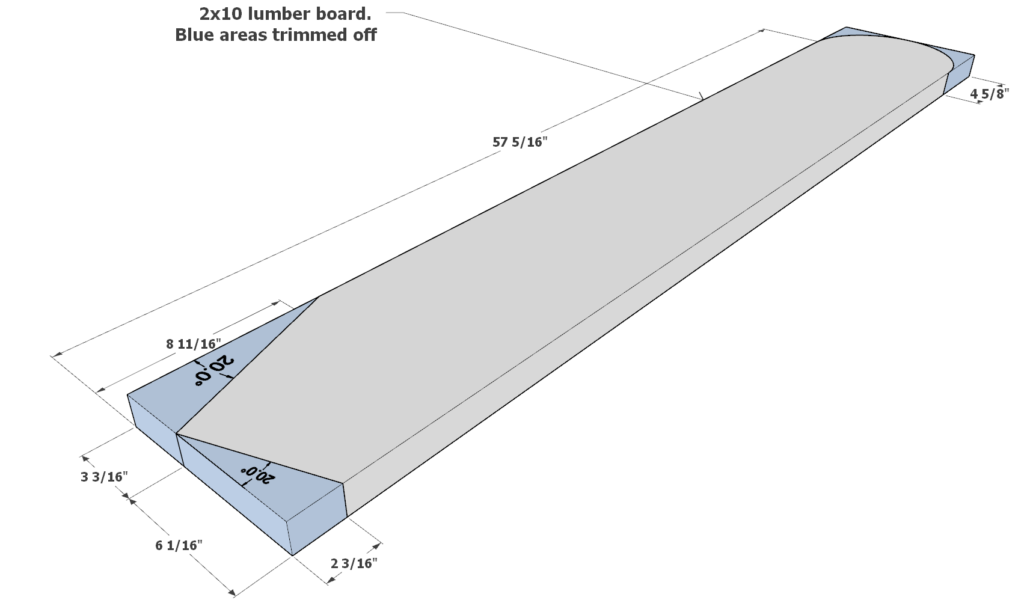
Additional Leg Boards:
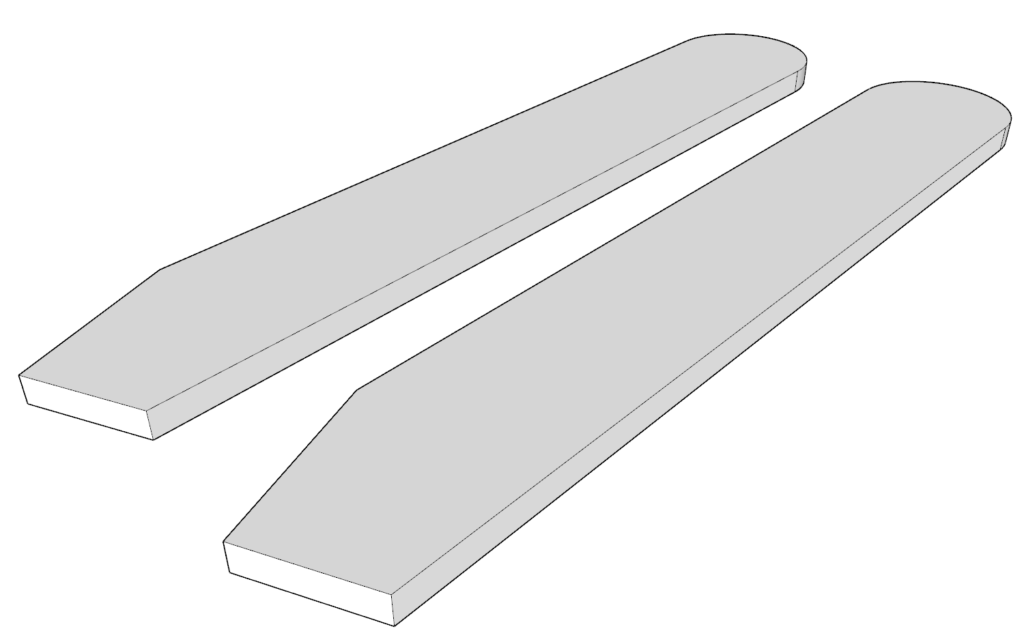
- For the 57-5/16 inch 2×10 lumber board, cut one end at a 20-degree angle (repeating twice as indicated in the diagram) and the opposite end in a semicircular arch, like the previous boards.
- Ensure you create two identical boards with these specifications.
Bolt Assembly Attachment:
- Use the same type of bolt assembly as before, with a minimum of 3 inches between washers.
- After drilling pilot holes corresponding to the bolt thickness, secure the bolts in place as shown in the diagram.
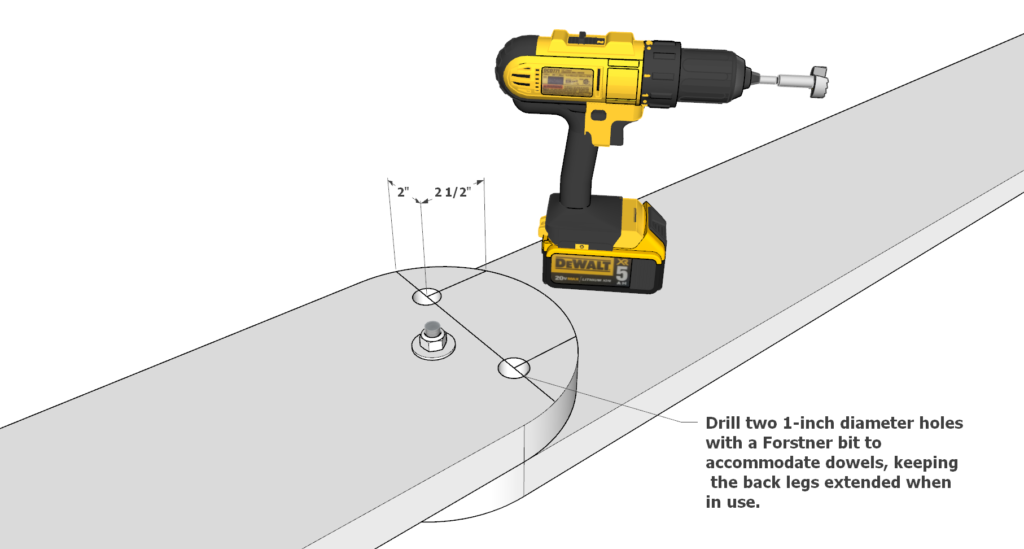
Dowel Hole Drilling:
- Drill two 1-inch diameter holes with a Forstner bit to fit the dowels that will maintain the back legs extended during use.
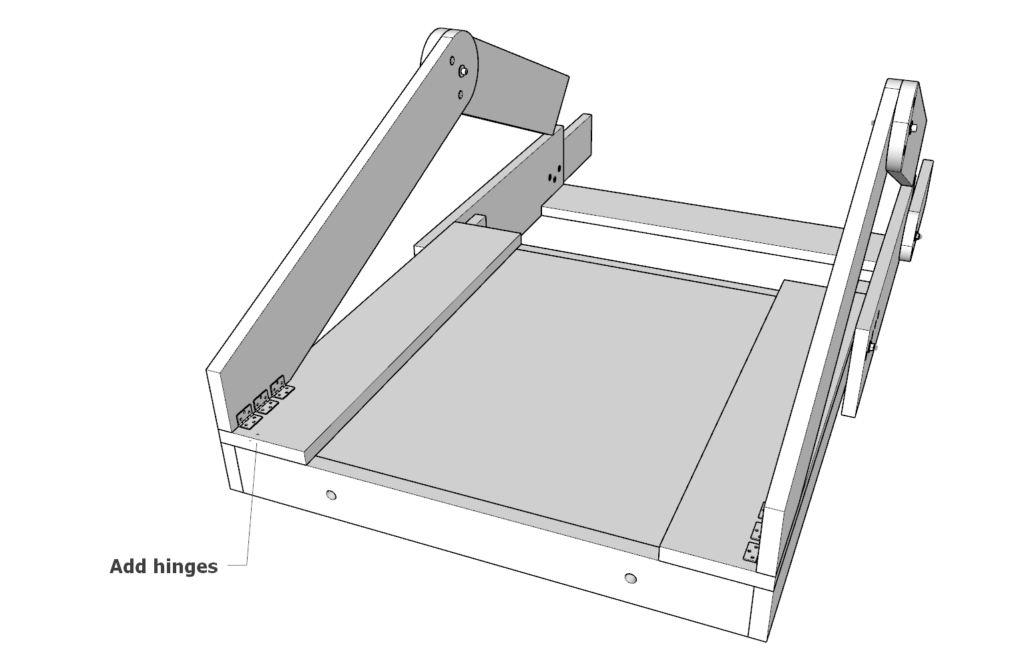
Hinge Installation:
- Affix hinges to the back legs to allow them to fold neatly when the target is not in use.

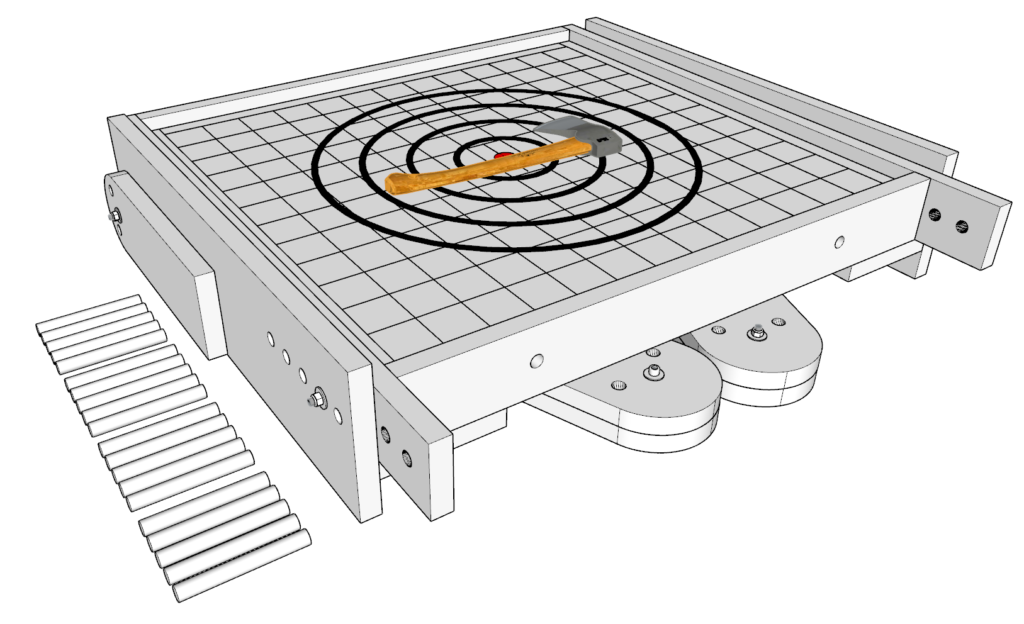
Step 6: Preparing Dowels and Marking the Target
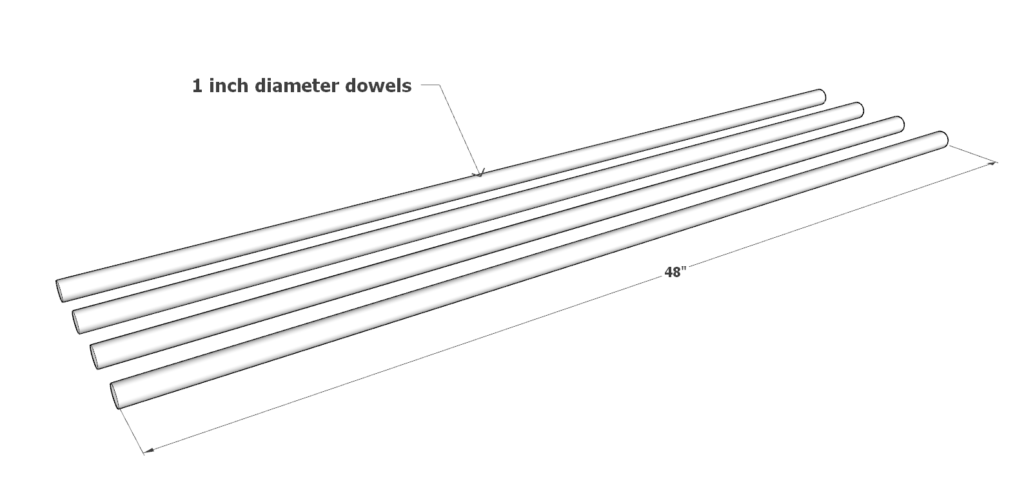
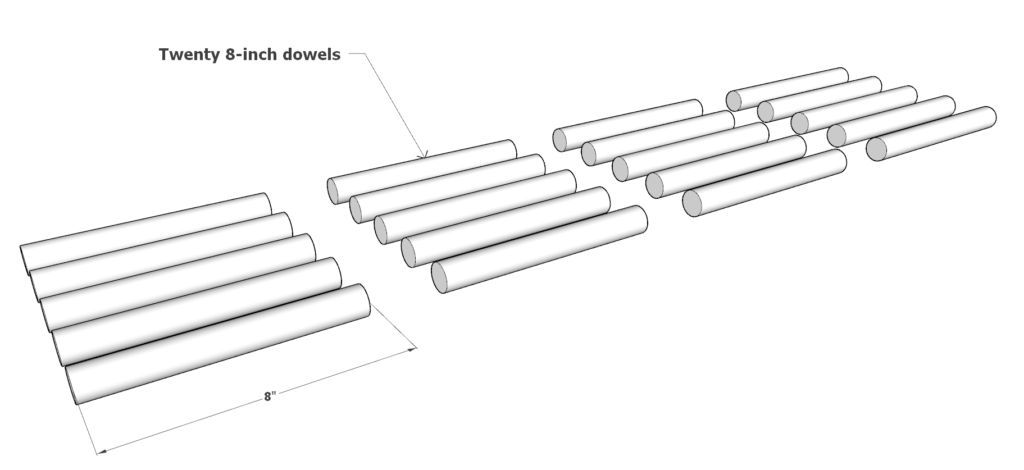
Dowel Cutting:
- Cut twenty 8-inch long dowels from 1-inch diameter dowel rods, typically available in 48-inch lengths.
- These dowels will be inserted into designated parts of the target for stability during use, as illustrated in the diagram.
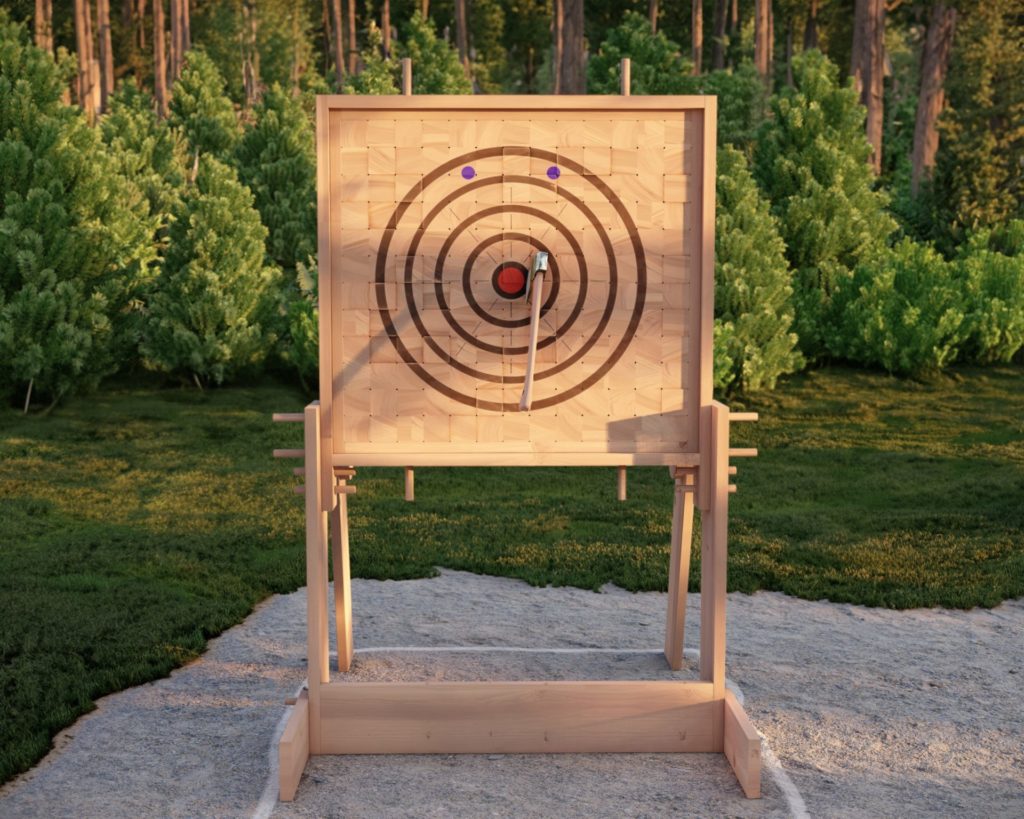
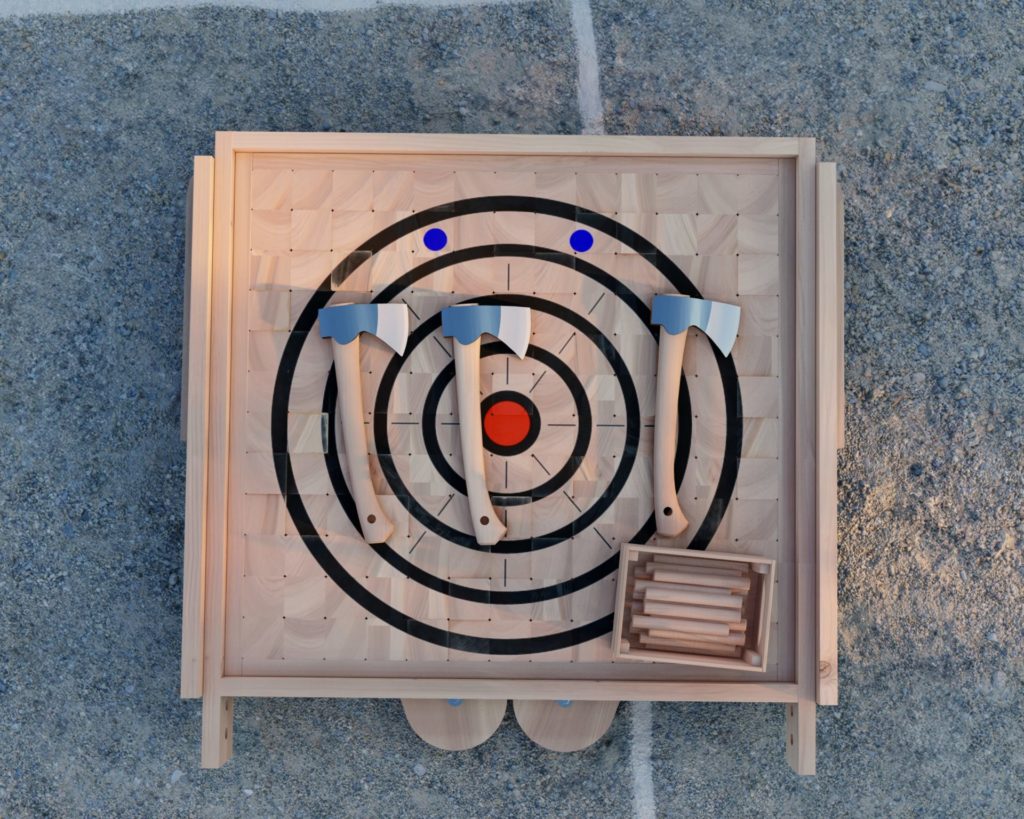
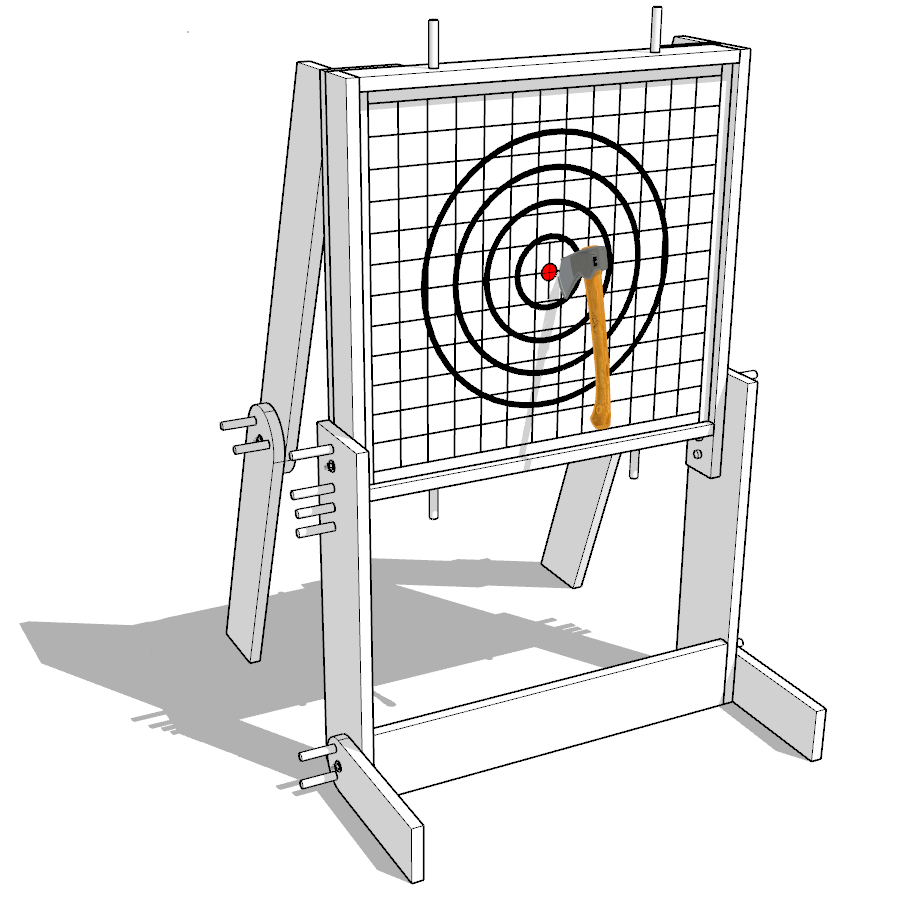
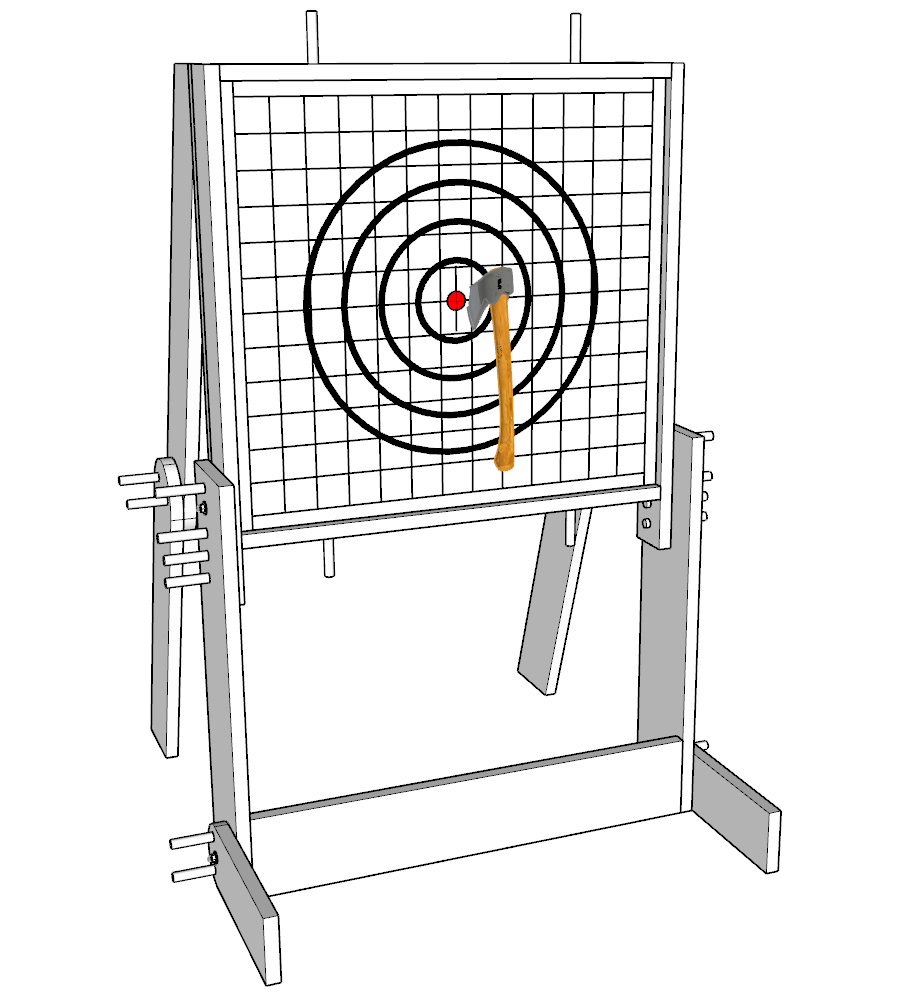
Drawing Target Circles:
- On the axe throwing target board, draw concentric circles for scoring. Standard axe throwing boards typically feature:
- A bullseye circle with a 6-inch diameter.
- Surrounding circles at intervals (e.g., at 12-inch, 18-inch, and 24-inch diameters) to create scoring zones.
- Ensure all circles are centered and uniformly spaced for accurate scoring.
- On the axe throwing target board, draw concentric circles for scoring. Standard axe throwing boards typically feature:
Collapsing the Target:
- To collapse the target, remove all dowels and fold the target board downwards.
- Due to its weight, it’s advisable to have two people carry it, or separate the target from the frame for easier one-person transport.
- The dimensions are designed to fit in most vehicle trunks, facilitating easy transportation.
Step 7: Finishing Touches, Maintenance, and Safety
Sanding for a Professional Finish:
- Sand the target board thoroughly, starting with coarse-grit sandpaper and gradually moving to finer grits for a smooth finish.
- Pay extra attention to edges and corners to eliminate splinters and rough patches.
- Wipe down the board with a clean cloth to remove all dust before staining.
Staining the Board:
- Apply a wood pre-stain conditioner to ensure even absorption of the stain.
- Choose a stain color that enhances the wood grain and apply it with a brush or rag in the direction of the grain.
- Allow the first coat to dry, then apply a second coat if a darker shade is desired.
- Finish with a clear sealant for added protection and durability.
Routine Maintenance:
- Wood can shrink and warp over time, so periodically check and tighten all bolts to maintain structural integrity.
- Round off the ends of the dowels to facilitate easy insertion and prevent splintering.
- Regularly inspect the target for signs of wear and tear, especially after heavy use.
Replacing the Target Insert:
- When the target insert becomes too worn, simply remake it following the instructions from Step 2.
- Swapping out the old target for a new one is straightforward and ensures continued safe usage.
Safety and Liability Disclaimer:
- As with any sport involving projectiles, safety should always be the top priority while using the axe throwing target. Ensure all participants understand and adhere to safety guidelines.
- GoodDIYplans provides detailed instructions for building an axe throwing target, but we assume no responsibility for accidents or injuries resulting from its use.
- Users should exercise caution and common sense at all times, and children should only use the target under adult supervision.
- By building and using this target, you acknowledge that axe throwing can be dangerous and agree to take full responsibility for your safety and the safety of those around you.