Introduction
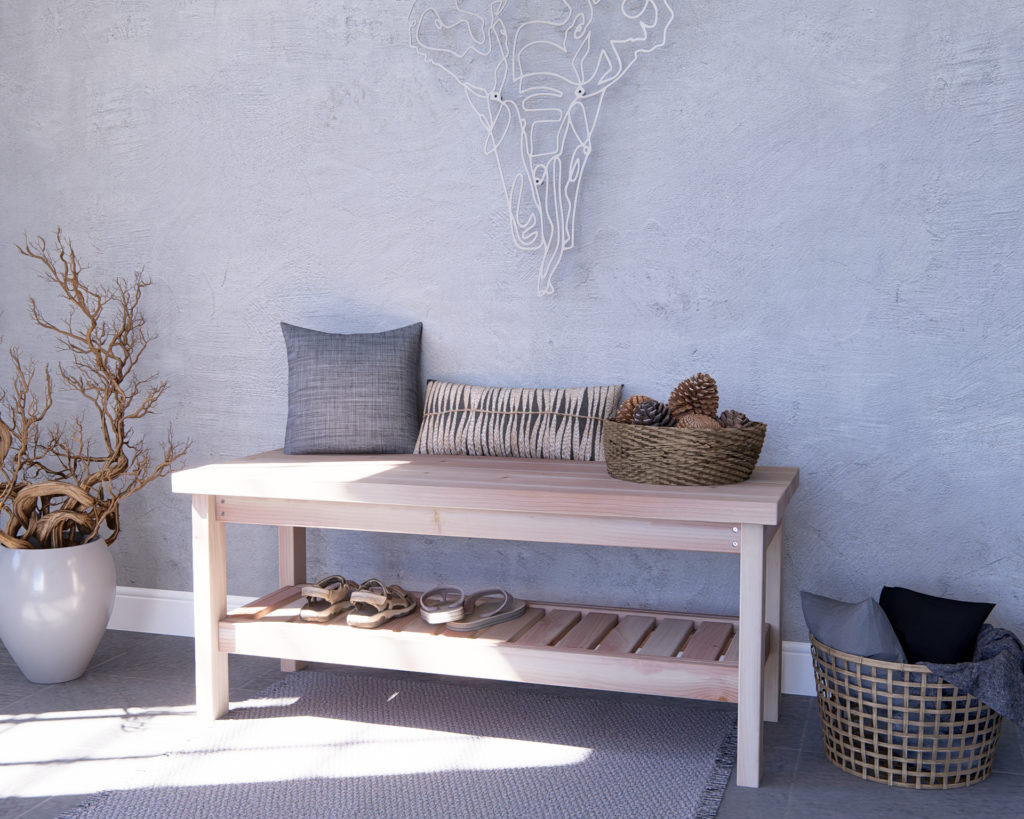
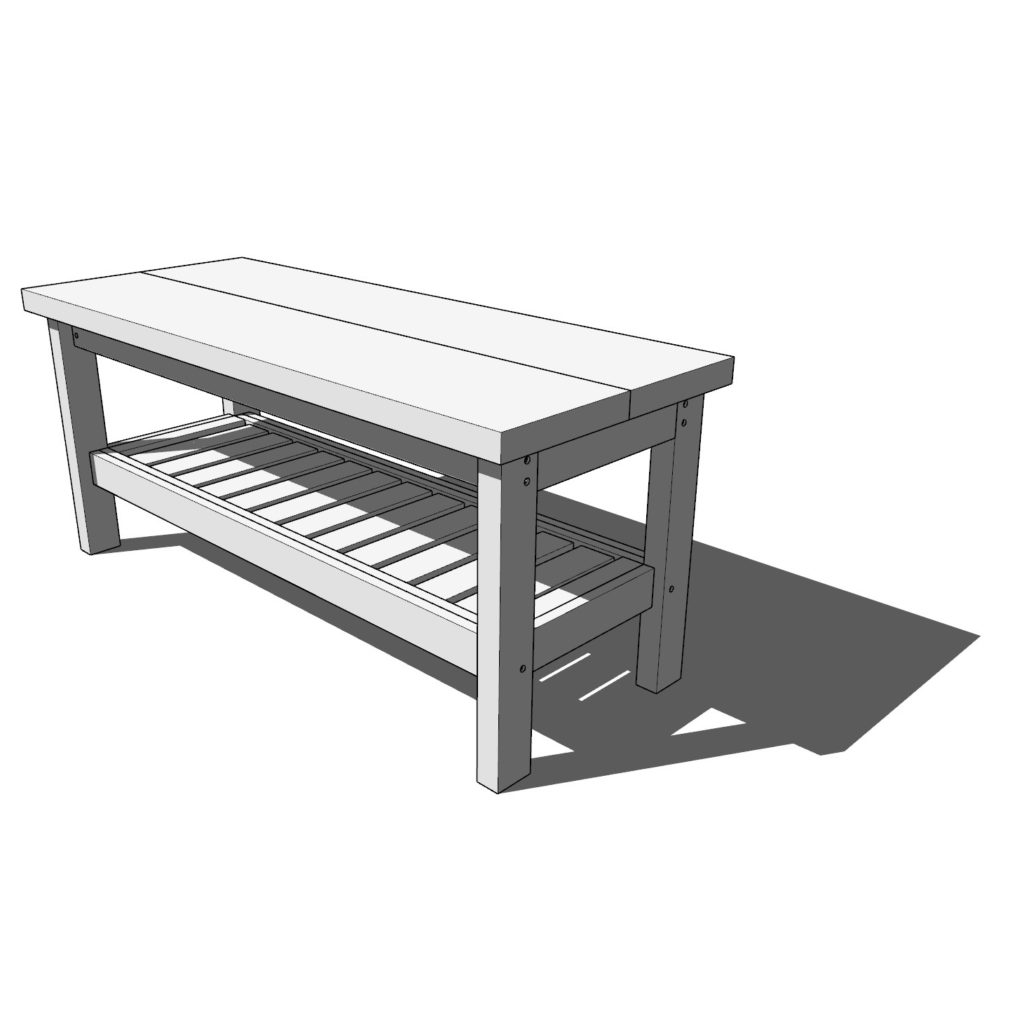
Are you tired of tripping over shoes and clutter in your entryway? Do you dream of having a stylish and functional space where you can sit and put on your shoes comfortably? Look no further! Our beginner-friendly DIY entryway bench plan is the answer to your home organization woes. This simple, yet elegant, hallway bench will transform your entryway into an inviting space that makes coming home a pleasure.
In this comprehensive article, we’ll dive into the world of woodworking, explore the benefits of a well-designed entryway bench, and reveal why our easy-to-follow plan is the perfect project for beginners. You’ll learn about the versatility of common construction lumber and how it can be transformed into a beautiful, functional piece of furniture. Plus, we’ll share some helpful tips for getting started in woodworking and how our DIY plan keeps things simple for beginners. So, let’s get started and turn that cluttered entryway into an organized oasis!
The Magic of a Well-Designed Entryway Bench
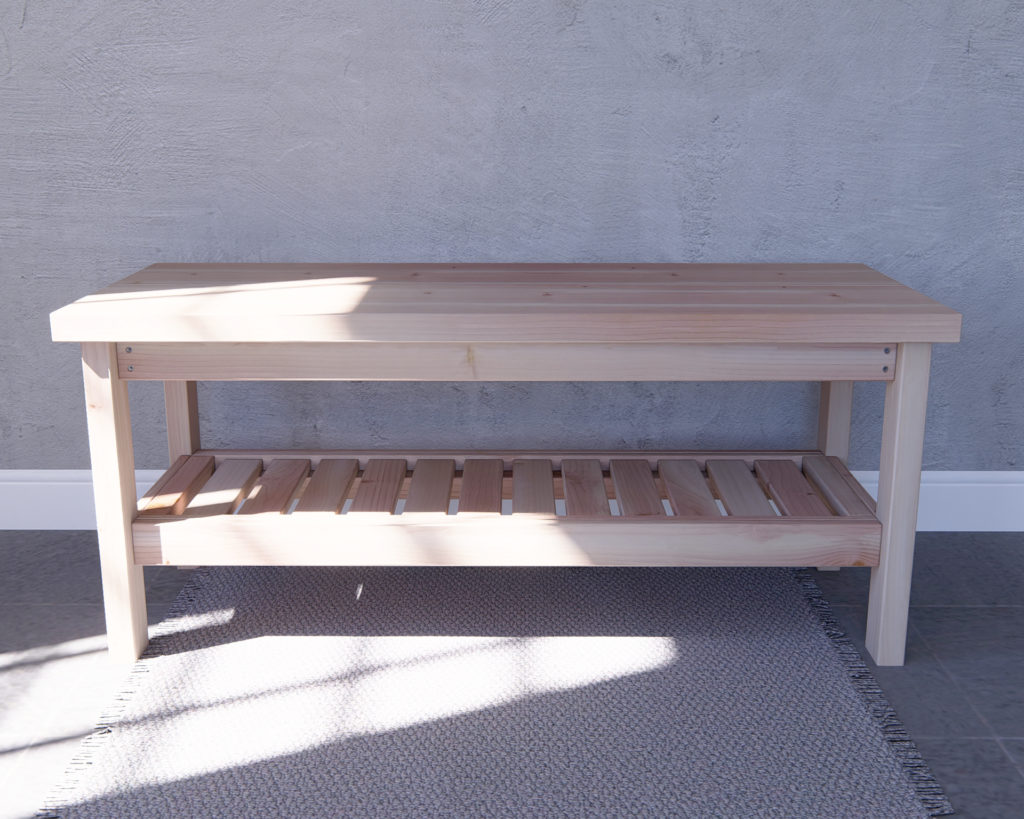
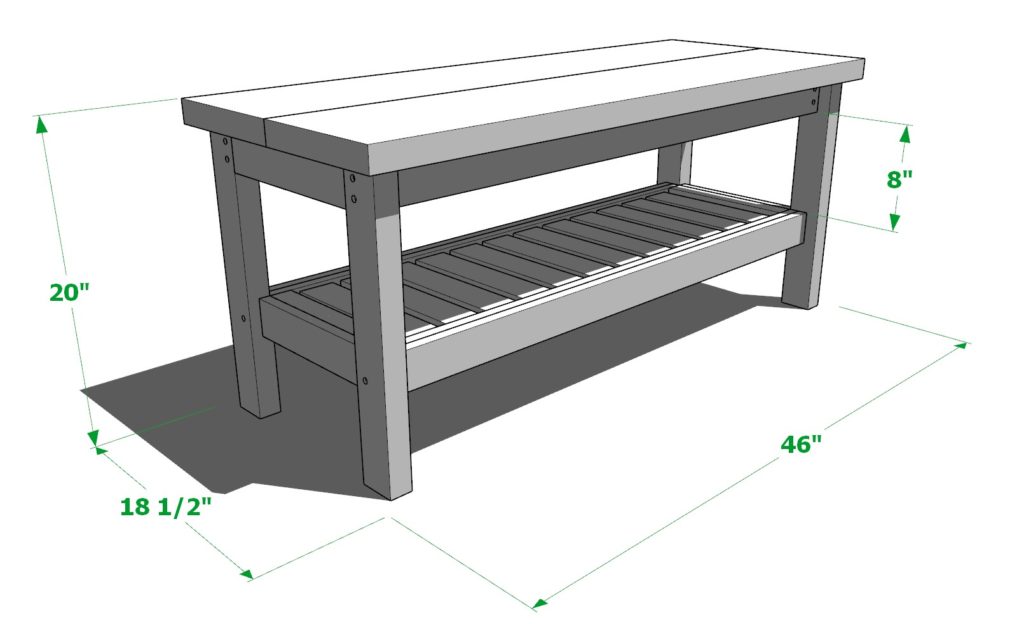
A well-designed entryway bench not only offers practical storage for shoes but also creates an inviting atmosphere in your home. It combines functionality and style, providing a warm welcome for guests and helping you declutter and organize your space. Our DIY entryway bench plan is designed to fit perfectly in any home, regardless of your interior design preferences.
Why Choose Our DIY Entryway Bench Plan?
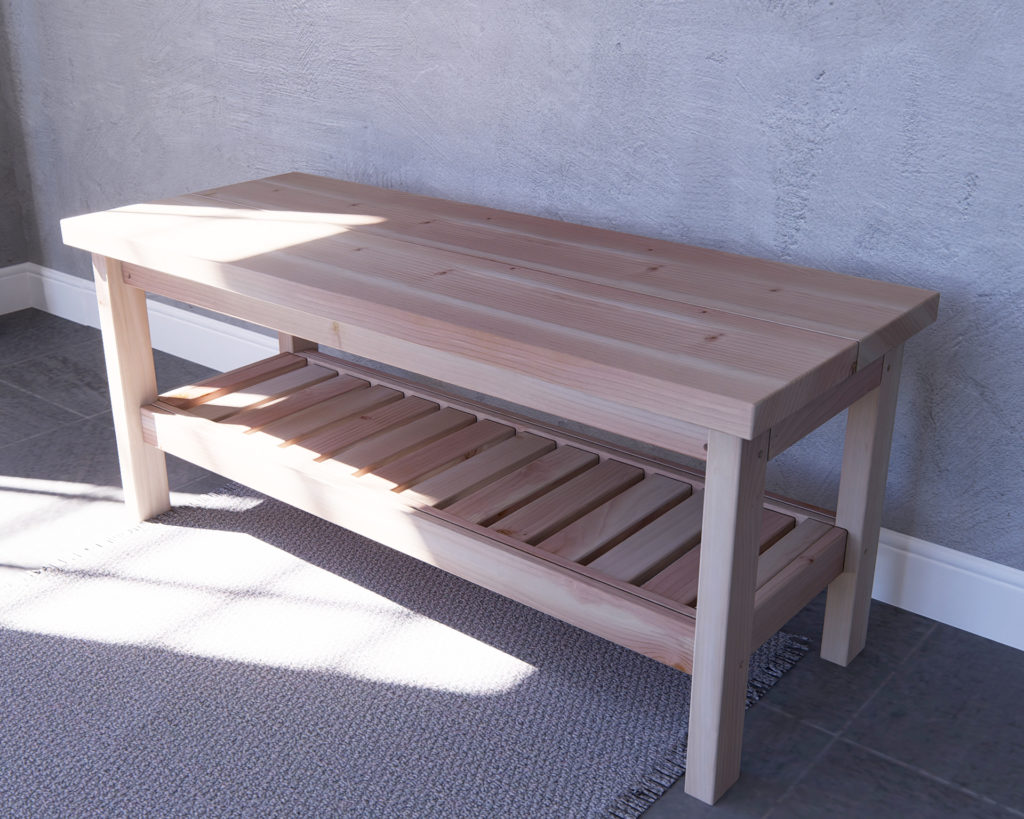
Our beginner-friendly DIY entryway bench plan is perfect for those new to woodworking. We’ve focused on simple construction techniques that don’t require fancy cuts, making the project accessible and enjoyable for novices. Additionally, we’ve chosen to use common construction lumber, which is both affordable and readily available. The timeless design of our entryway bench ensures that it complements any décor, making it a versatile addition to your home.
How Our DIY Entryway Bench Plan Keeps It Simple for Beginners
One of the main goals of our DIY entryway bench plan is to make woodworking accessible to beginners. We achieve this by using simple construction techniques and easy-to-follow instructions. Our plan focuses on straightforward joints and assembly, ensuring that you can build your bench without becoming overwhelmed by complex processes. With our step-by-step guidance, you’ll be able to complete your project with confidence.
Customize Your DIY Entryway Bench for a Personal Touch
While our DIY entryway bench plan is designed with simplicity in mind, there’s still plenty of room for customization. You can personalize your bench by choosing the perfect finish, adding decorative accents, incorporating storage solutions, or creating a cozy seating area. By adding your unique touches, you’ll create a piece of furniture that reflects your style and enhances your home’s aesthetic.
Conclusion
Our DIY entryway bench plan is the perfect project for anyone looking to bring order and style to their home’s entrance. Designed with woodworking beginners in mind, this plan uses simple construction techniques and common construction lumber to create a timeless piece of furniture that you’ll be proud to display in your entryway. With our guidance, you’ll not only improve your woodworking skills but also create a functional, stylish bench that will transform your space. So, what are you waiting for? Dive into the world of woodworking and bring your dream entryway bench to life
Time to build
2 hours
Total cost of build
About $50
Skill level required
Beginner
Download the PDF plans
DIY DIY Entryway Bench plan PDF
What is included in the PDF download?
Easy to read step by step instructions
Material list
Tools needed
3D illustrations
Recommended tools/materials
-Saw
-Drill
-Impact driver with bit for screws
-Sander
-wood countersink drill bit
-Nail gun with 1 inch nails
-1 lb of 2.5 inch screws
-Eight 4 inch screws
-wood glue
Shopping list and cut list
Lumber shopping list:
(1) 2in x 10in x 8ft
(3) 2in x 3in x 8ft
(4) 1in x 3in x 8ft
(1) 2in x 2in x 8ft
2×10 lumber cut list:
(2) 2in x 10in x 46in
2×3 lumber cut list:
(2) 2in x 3in x 41in
(6) 2in x 3in x 11-1/4in
(4) 2in x 3in x 18-1/2in
1×3 lumber cut list:
(4) 1in x 3in x 41in
(2) 1in x 3in x 11-1/4in
(12) 1in x 3in x 11-1/4in (shelf decking pieces)
2×2 lumber cut list:
(2) 2in x 2in x 38in
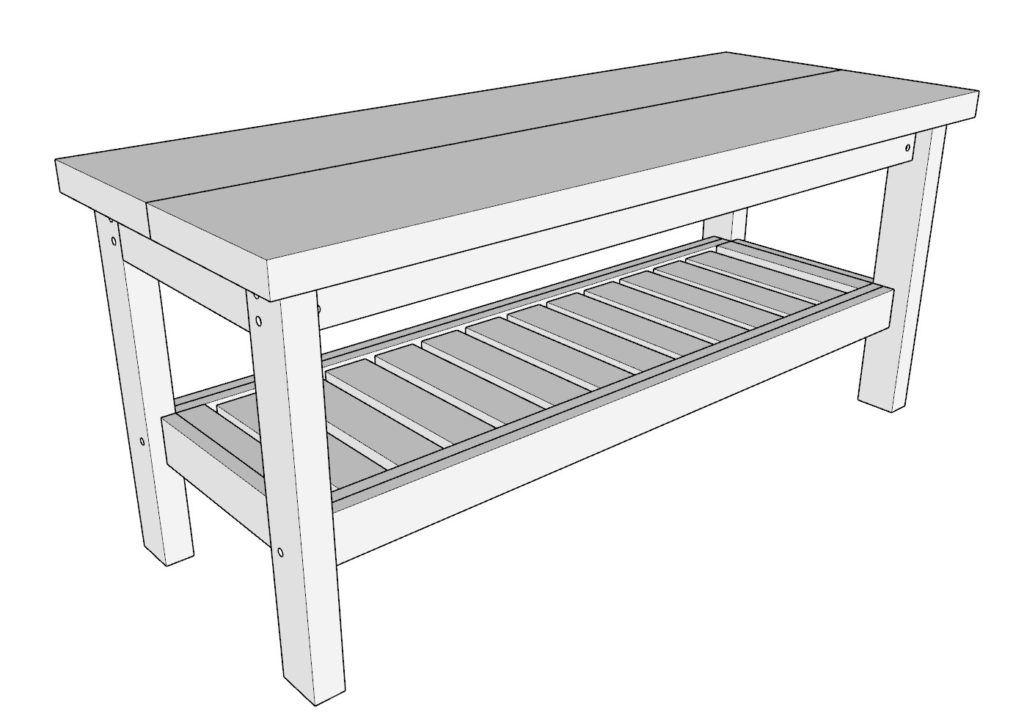
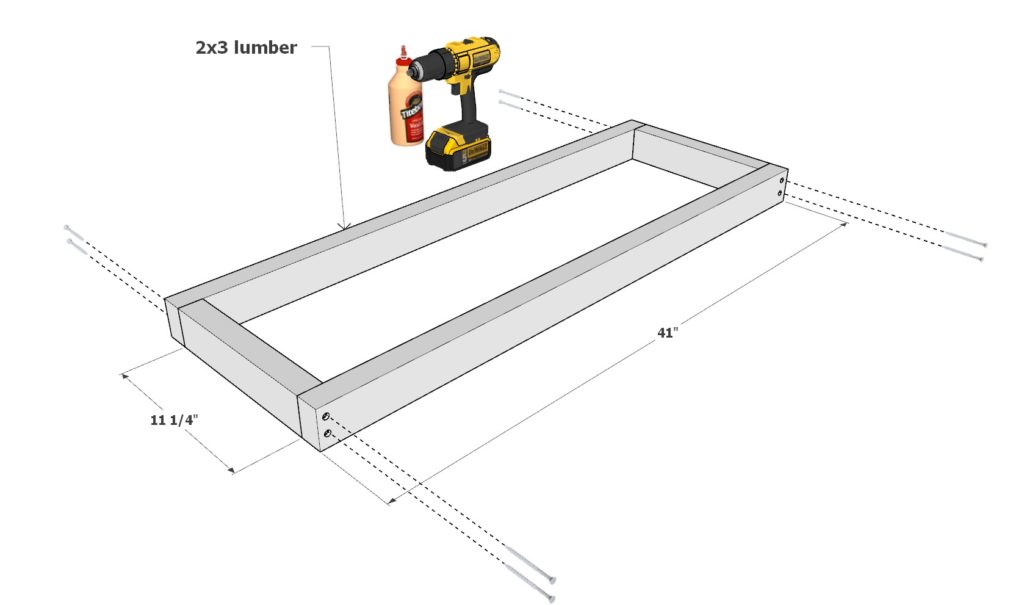
Title: Step 1 - Assemble the Entryway Bench Frame
First, build the seating bench frame.
Take two 41 inch 2×3 lumber pieces and two 11-1/4 inch 2×3 lumber pieces and arrange them as shown below. Join them using 2.5 inch screws and wood glue. Predrill the wood to prevent the wood from splitting.
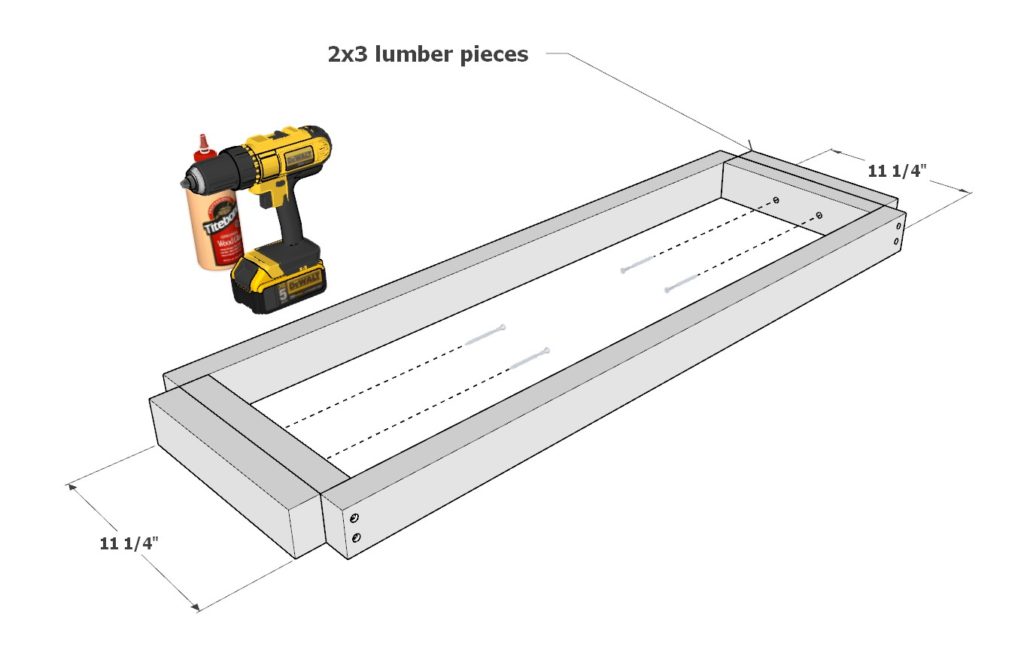
Next, add two 11-1/4 inch 2×3 lumber pieces on either side. Secure these with glue and 2.5 inch screws.
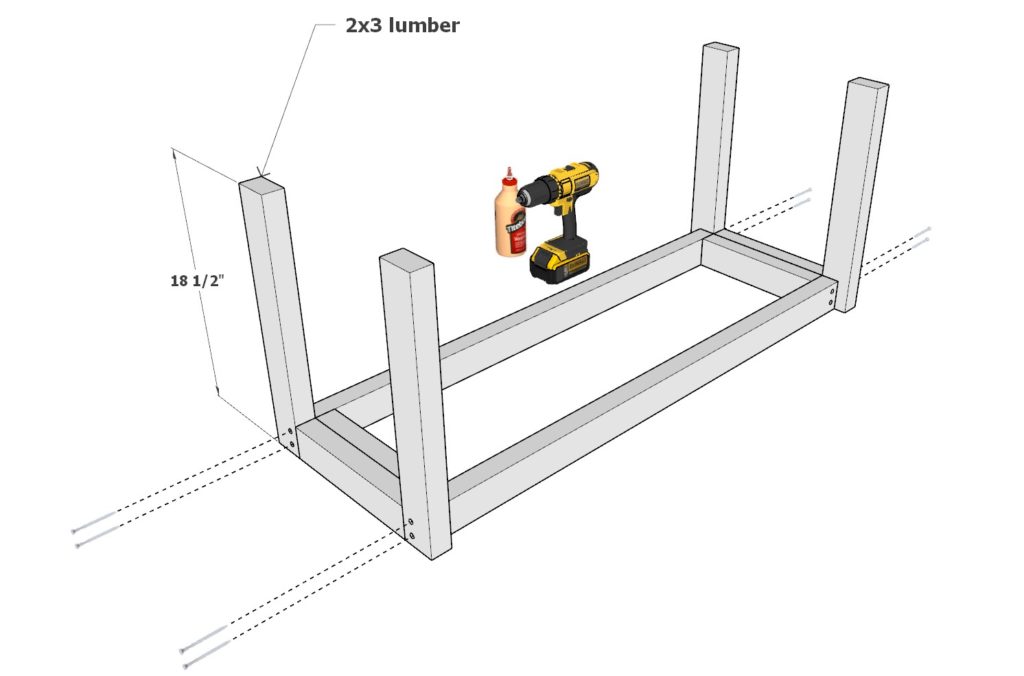
Title: Step 2 - Attach Legs and Bench Top to the Frame
Next, add the legs to the entryway bench.
Take four 18-1/2 inch 2×3 lumber pieces and add them to the bench frame as shown below. Predrill, add glue, and add 2.5 inch screws.
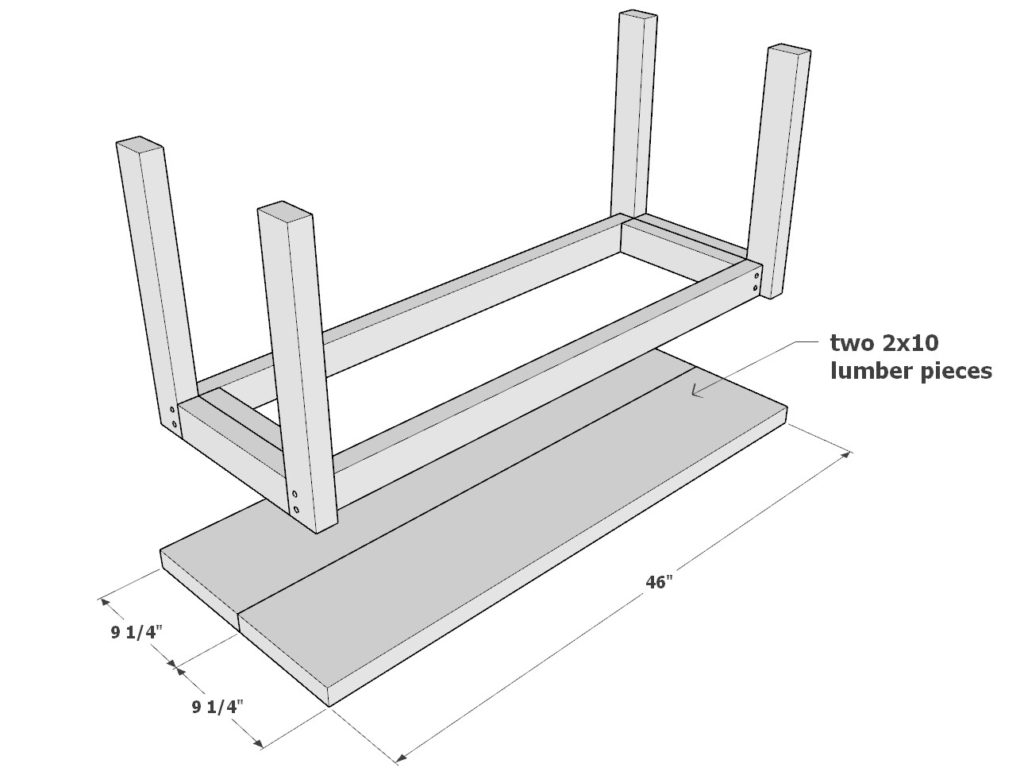
Next, add the bench top. The top is made of two 46 inch long 2×10 lumber pieces.
Attach these bench top pieces with eight 4 inch screws and glue. Make sure to predrill the 2×3 lumber to prevent splitting and splintering.

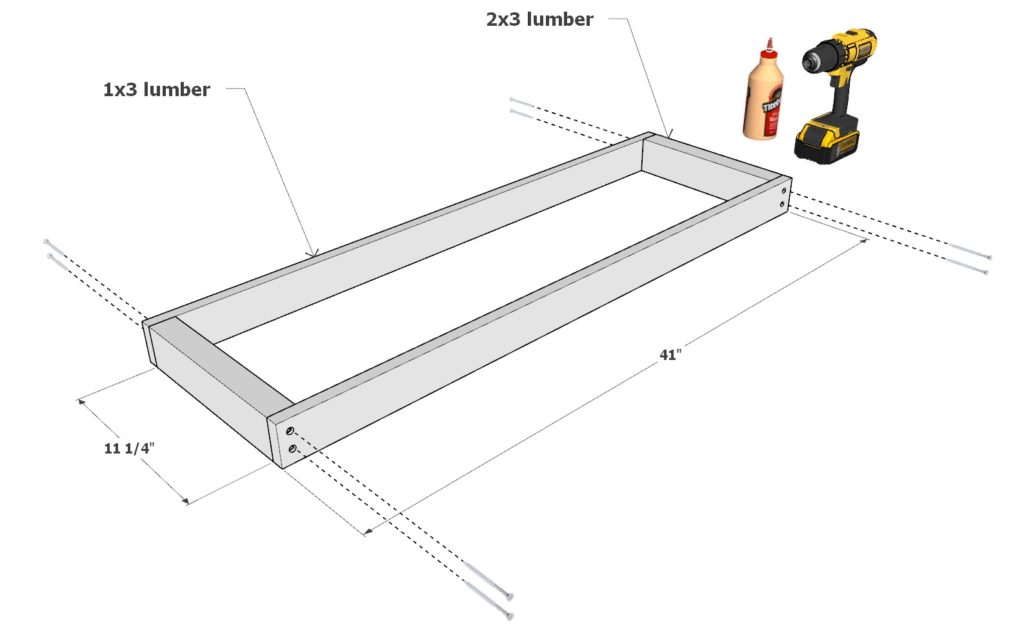
Title: Step 3 - Construct and Attach the Shoe Rack Storage Shelf
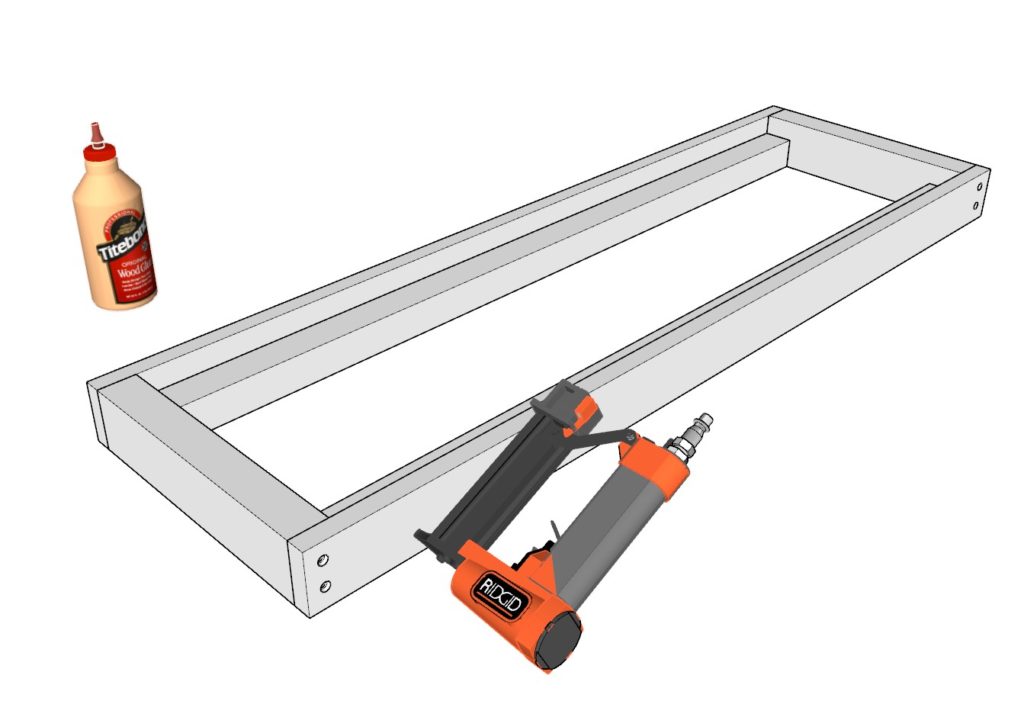
Next, build the shoe rack storage shelf.
Take two 11-1/4 inch 2×3 lumber pieces and two 41 inch 1×3 lumber pieces and join them as shown below. Use glue and 2.5 inch screws.
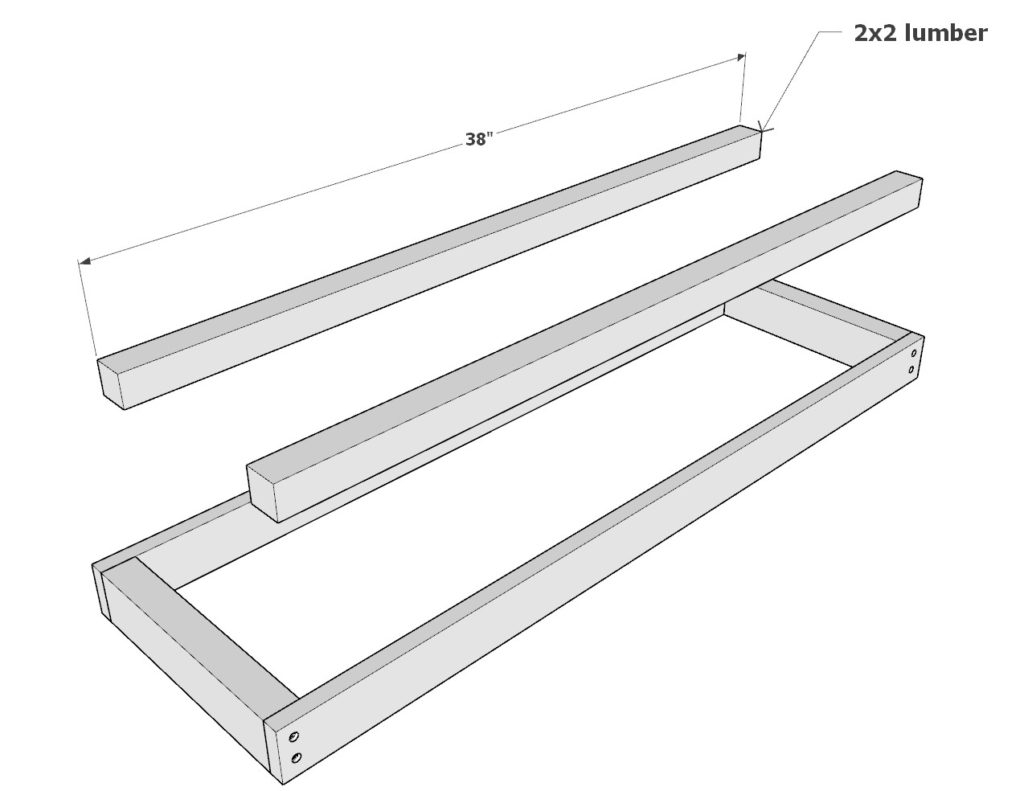
Next, add two 38 inch 2×2 lumber pieces to the inside of the shelf frame. Secure these 2×2 lumber pieces with glue and 1 inch nails from a small nail gun.
Title: Step 4 - Install Shoe Rack Shelf Decking and Trim, then Attach to Entryway Bench Frame
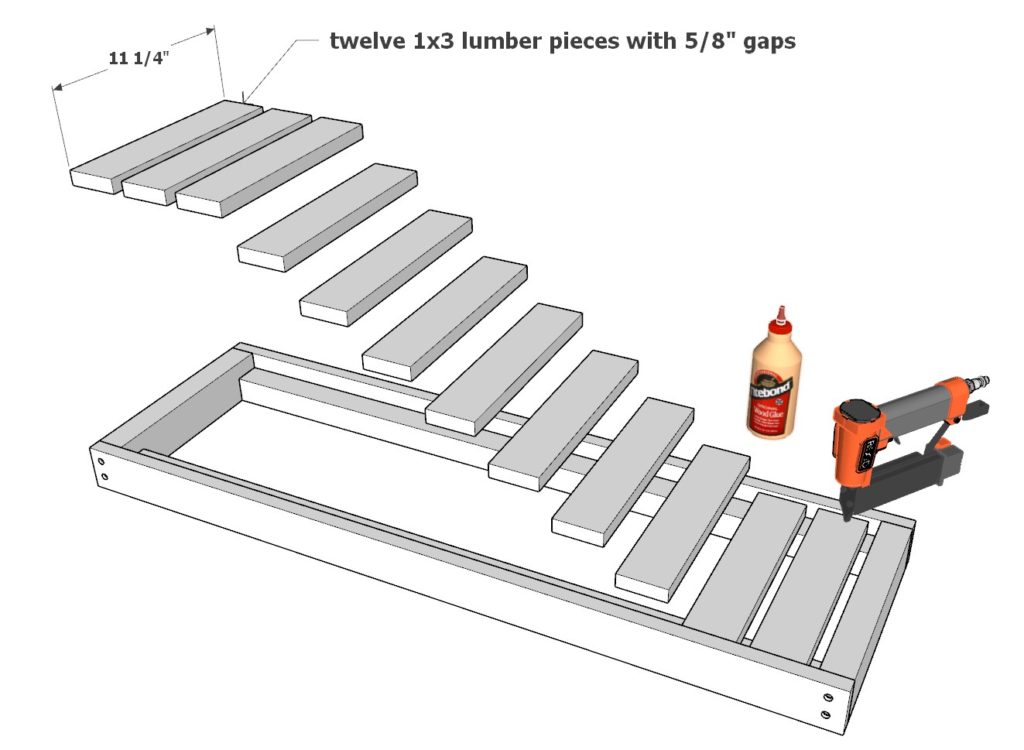
Next, add the show rack shelf decking pieces and add a trim around the shelf.
Take twelve 11-1/4 inch 1×3 lumber pieces and add them to the shelf 5/8 inches apart as shown below. Secure these with glue and 1 inch nail from a small nail gun.
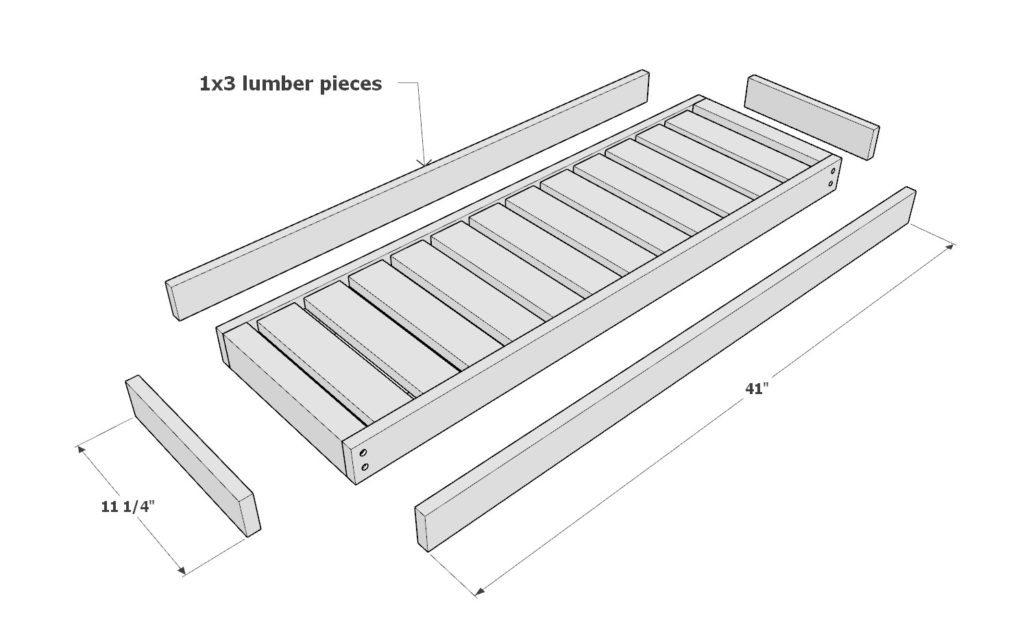
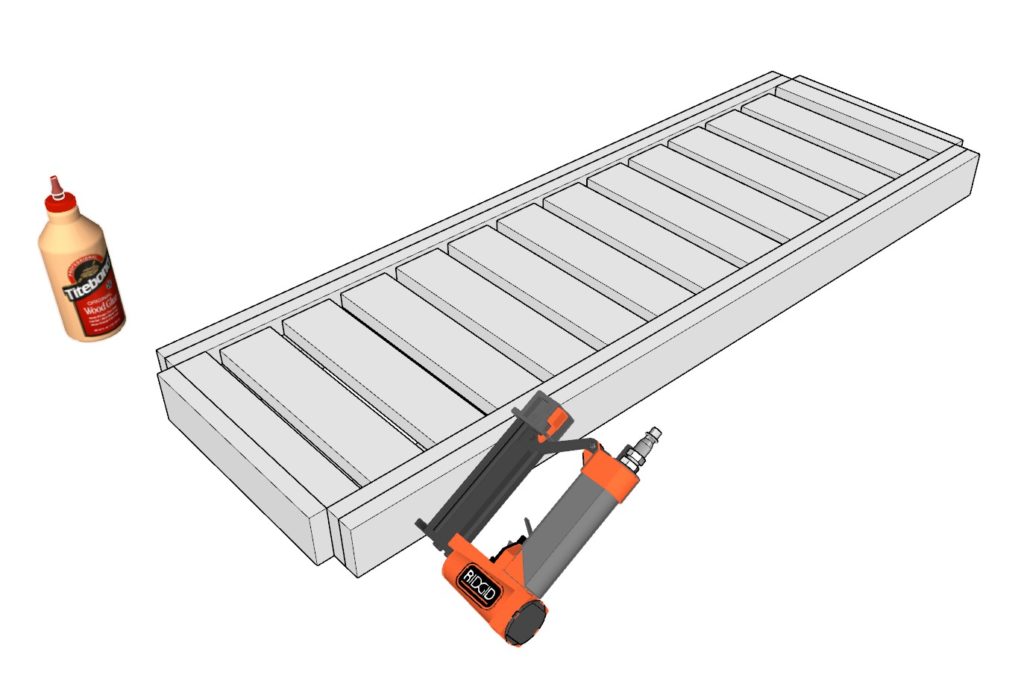
Next, add a 1×3 lumber trim around the perimeter of the shoe shelf. Add two 41 inch 1×3 lumber pieces and two 11-1/4 inch lumber pieces and secure with glue and 1 inch nails from a nail gun.
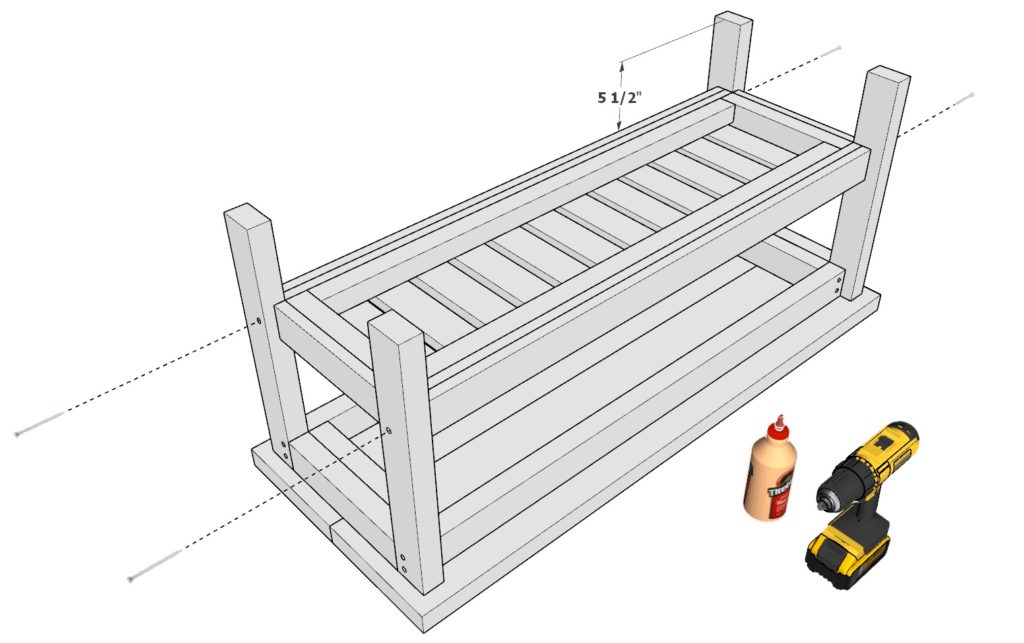
Lastly, add the shoe rack shelf to the entry way bench frame. The shelf should be attached at a height of 5-1/2 inches away from the bottom as shown below.
Secure the shoe shelf with 2.5 inch screws and glue.
Enhance Your DIY Entryway Bench: Tips for Painting, Staining, and Adding the Perfect Finishing Touches
A DIY entryway bench can transform your home’s entrance into a functional and stylish space. After building your bench, adding the right finishing touches can make all the difference in achieving a professional, polished look. In this article, we’ll explore various ways to complete your project, including painting, staining, filling holes, and decorating your bench.
Painting Your Entryway Bench
Painting your bench can add a pop of color and protect the wood from daily wear and tear. Follow these steps for a flawless finish:
- Sand the bench: Start by sanding the entire surface with medium-grit sandpaper to remove any rough edges and prepare the wood for painting.
- Prime the bench: Apply a coat of wood primer, which will help the paint adhere better and result in a more even finish.
- Choose your paint: Select a high-quality, durable paint suitable for wooden furniture. Consider using a semi-gloss or satin finish for a subtle sheen.
- Apply the paint: Apply thin, even coats of paint with a brush or roller, allowing each coat to dry before applying the next. Two or three coats should provide ample coverage.
Staining Your Entryway Bench
Staining can enhance the natural beauty of the wood and provide a more rustic or traditional appearance. Follow these steps for a stunning result:
- Sand the bench: Begin by sanding the entire surface with medium-grit sandpaper, followed by fine-grit sandpaper for a smooth finish.
- Choose your stain: Select a wood stain that complements your home’s decor and the desired look for your bench.
- Apply the stain: Using a brush or clean cloth, apply the stain in even strokes, working with the wood grain. Wipe off any excess stain with a clean cloth.
- Seal the bench: Once the stain has dried, apply a clear wood sealer to protect the wood and enhance the finish.
Filling Holes and Gaps
To achieve a professional appearance, fill any holes or gaps in the wood using wood filler:
- Choose the right wood filler: Select a wood filler that matches the color of your bench or can be painted or stained.
- Apply the wood filler: Fill the holes or gaps with a putty knife, smoothing the surface as you go. Allow the filler to dry according to the manufacturer’s instructions.
- Sand the surface: Once the wood filler has dried, sand the area with fine-grit sandpaper until it’s flush with the surrounding wood.
Decorating Your Entryway Bench
Adding decorative elements can personalize your bench and elevate its appearance. Consider the following ideas:
- Cushions and throw pillows: Add comfort and style with cushions and throw pillows in various colors, patterns, and textures.
- Storage baskets: Place decorative baskets on the shoe rack shelf to store smaller items and maintain a clutter-free entryway.
- Artwork or wall decor: Hang artwork or wall decor above the bench to create a focal point and complete the overall look.