Introduction
Envision a garage where each tool has its place, materials are sorted orderly, and there’s freedom to roam. Our DIY garage shelf plans are designed to make this a reality. These aren’t just shelves; they’re a comprehensive storage solution that transforms your garage into an organized haven, with the flexibility to adjust to your storage needs.

Specifications
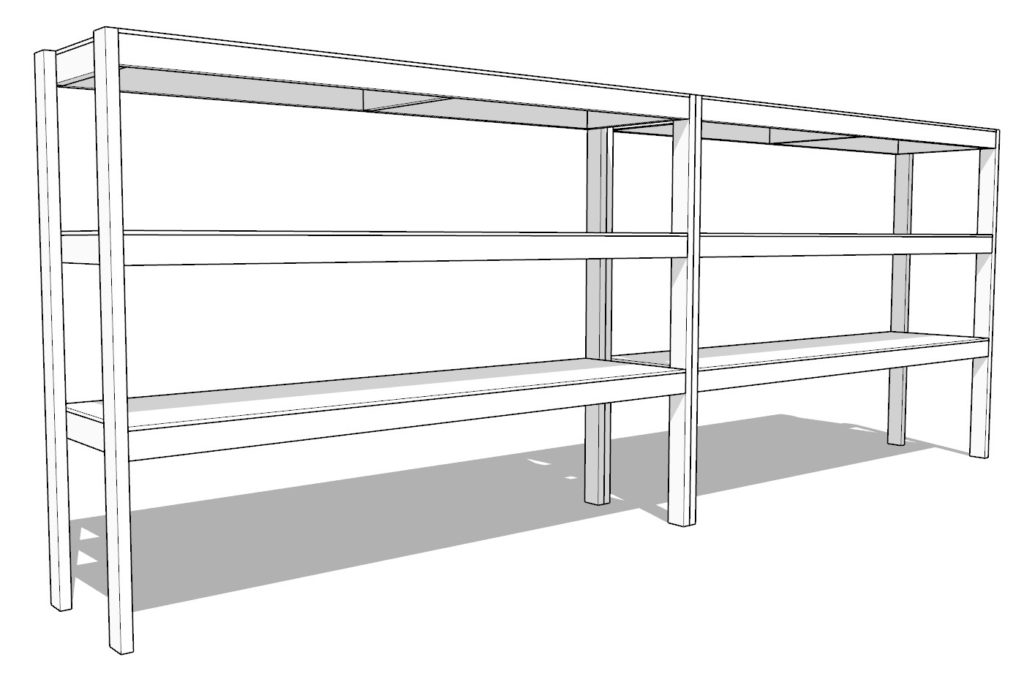
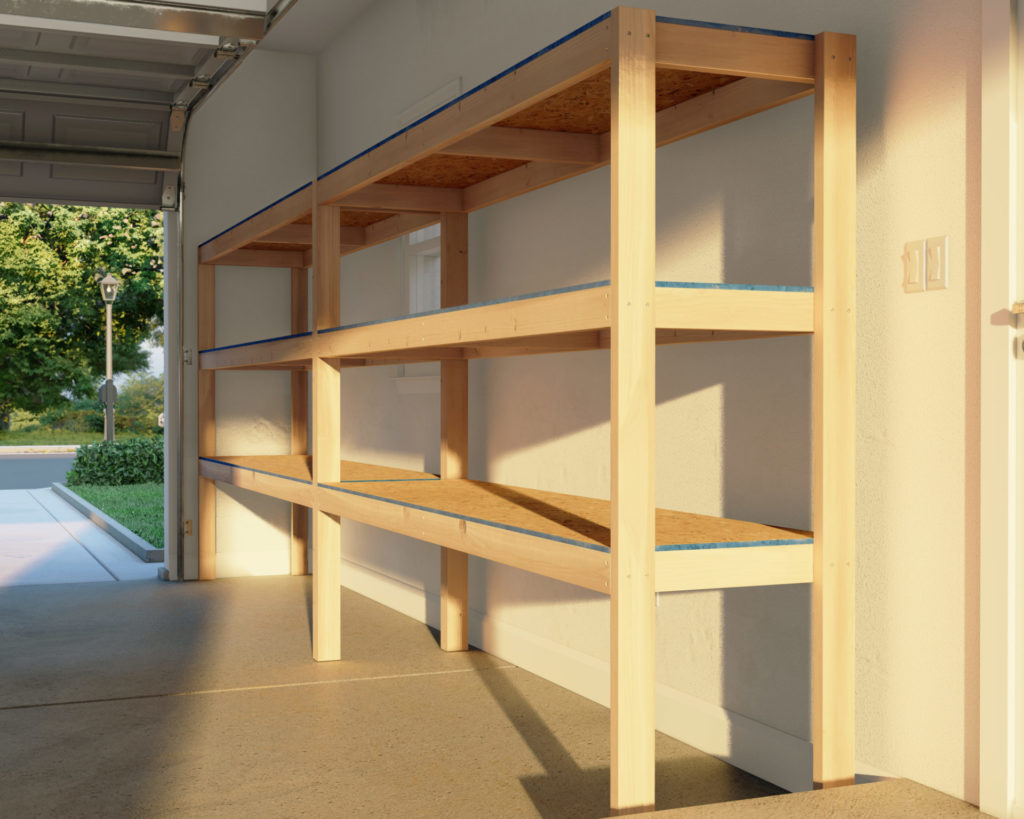
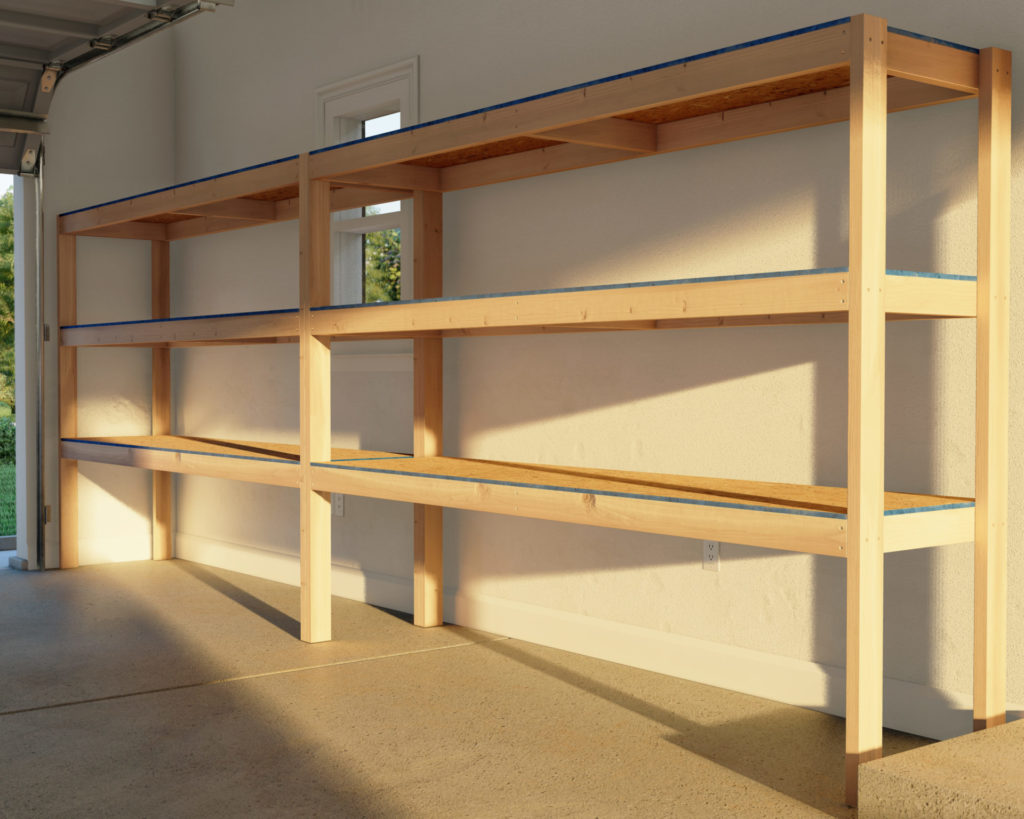
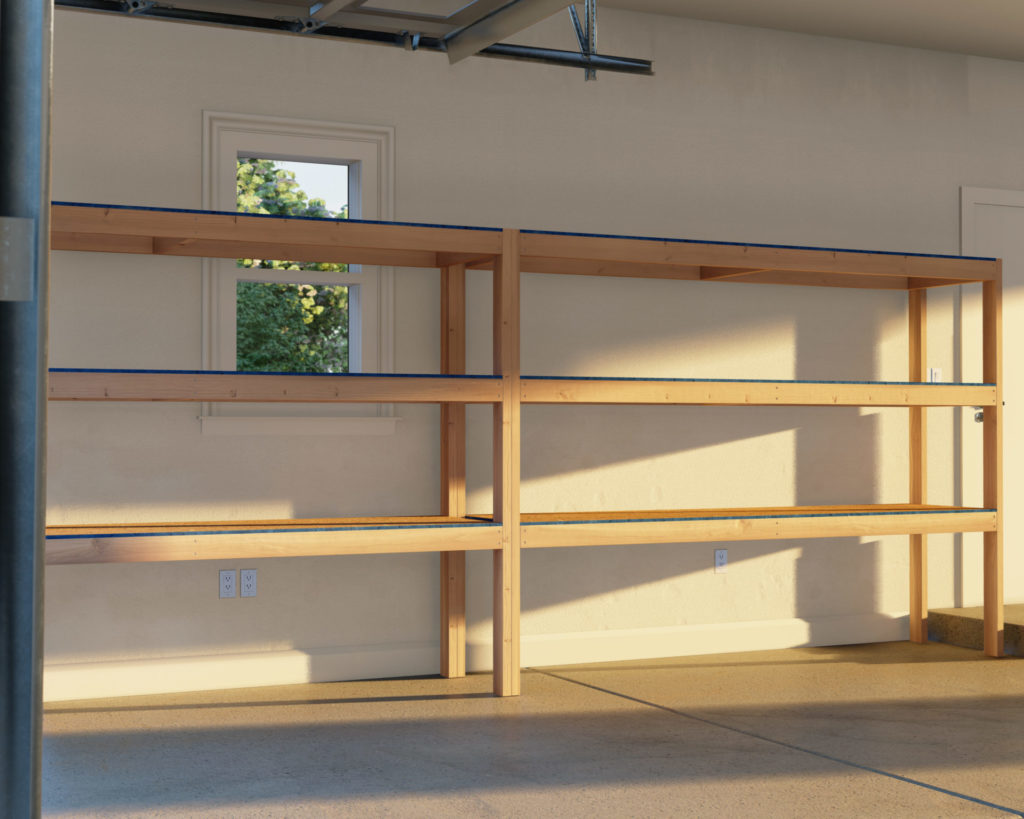
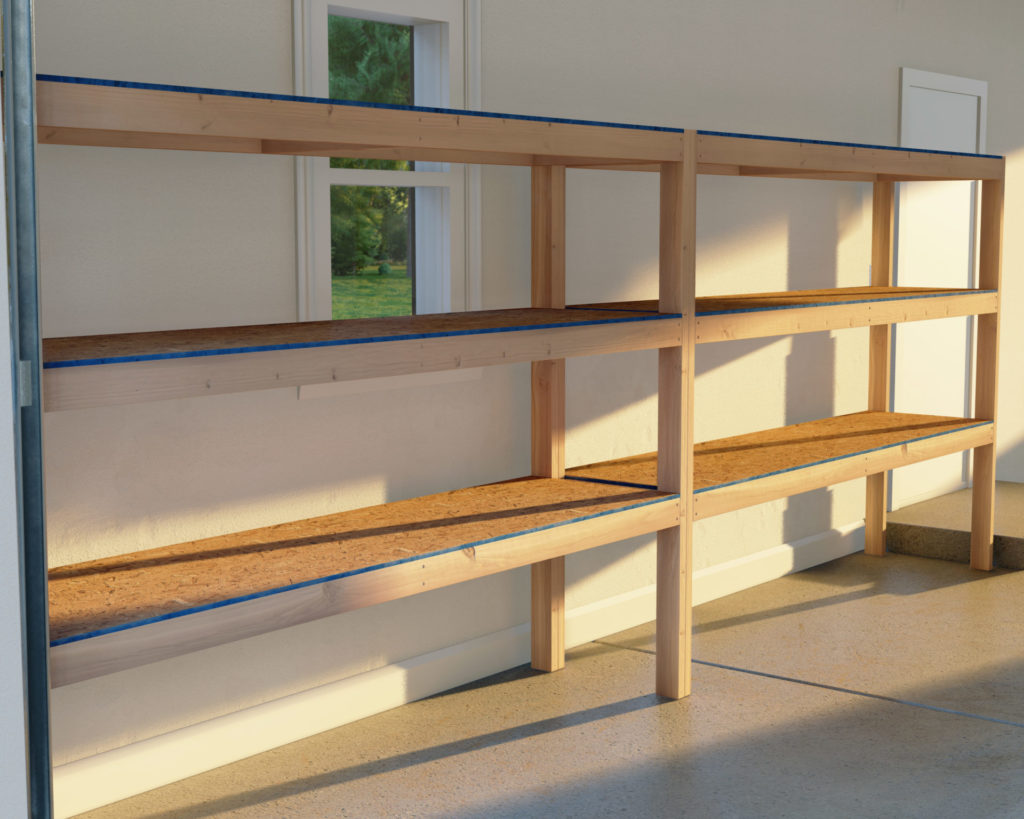
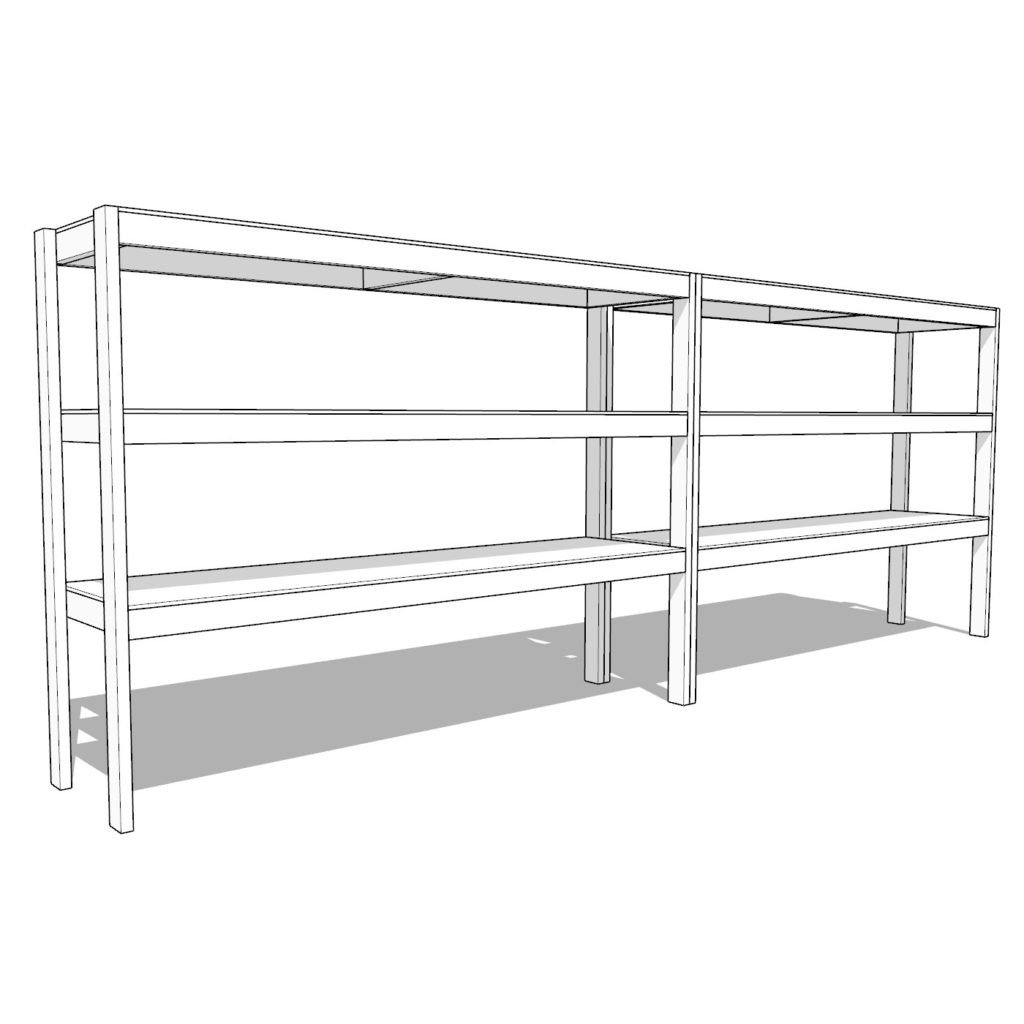
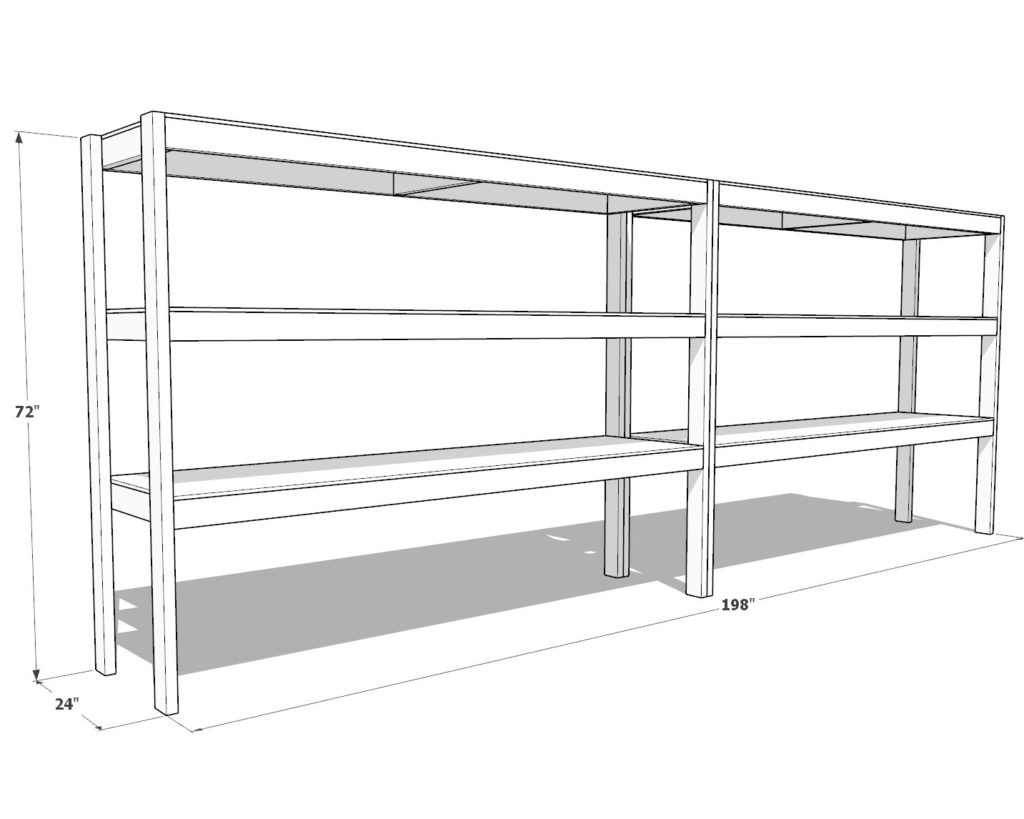
Introducing our expansive garage shelves, extending 198 inches across, with a depth of 24 inches, built to maximize every inch of your garage. Composed of two sturdy units that when combined, offer an extensive storage space. Whether you opt for plywood or composite sheets, these shelves promise to be a durable addition to your space. The design accommodates three adjustable shelves, each 72 inches in height, allowing for customizable storage whether you’re stowing away seasonal gear or everyday tools.
Beginner-Friendly Design: Simple Assembly, Impressive Results
Beginners, take heart! Our DIY plan is tailored for your success, requiring no complex woodworking skills. With easy-to-follow instructions, you’ll find assembly straightforward and satisfying. Plywood or composite, 2x4s, and basic tools are all you need. Our guide ensures that each step, from the first cut to the final screw, is clear and doable, culminating in a set of shelves that look professionally made.
Customization at Its Core: Designed to Fit Your Lifestyle
Our garage shelves are more than a one-size-fits-all; they’re a blank canvas for your unique needs. Adjust the shelving heights to suit what you store—be it tall paint cans or heavy automotive parts. The design empowers you to tailor the workspace and storage areas to suit your workflow, ensuring that your garage works as hard as you do.
Kickstart Your Project Today
Are you ready to reclaim your garage with a DIY project that promises to enhance order and productivity? Our comprehensive, easy-to-download PDF plans are your first step to a decluttered space. Secure your plans now, gather your materials, and relish the fulfillment of crafting a functional masterpiece by hand.
Time
2 hours (varies with experience)
Cost
$150 (Costs may vary based on location and supplier.)
Skill level required
Beginner
DIY Garage Shelf PDF Plan
What is included in the PDF download?
- Easy to read step by step instructions
- Material list
- Tools needed
- Helpful links to materials and tools needed
DIY Garage Shelf Dimensions
Tools Needed for This Project:
Available with the purchase of the DIY plan PDF.
Lumber Shopping & Cut List
Available with the purchase of the DIY plan PDF.
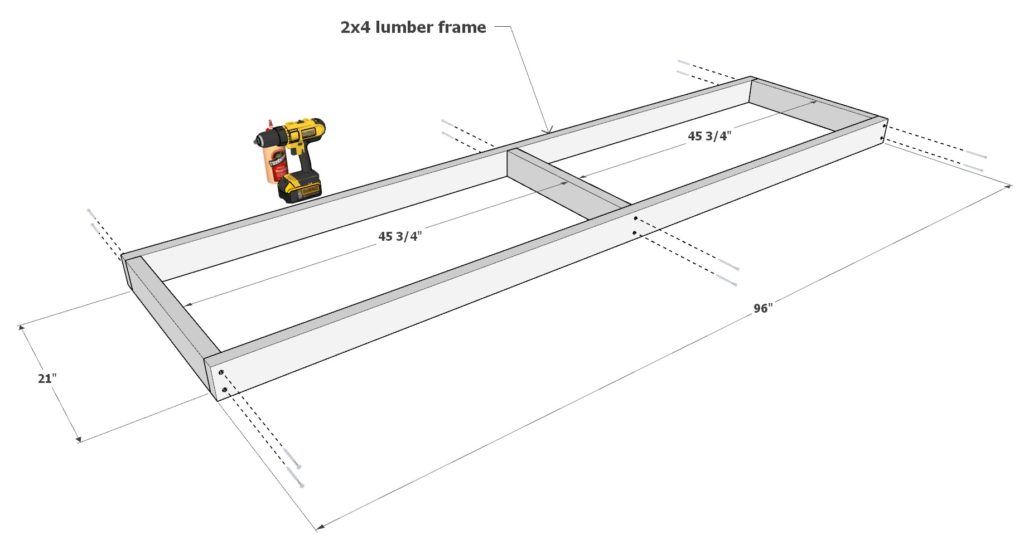
Step 1: Assembling the Shelf Frames
Build the Frame:
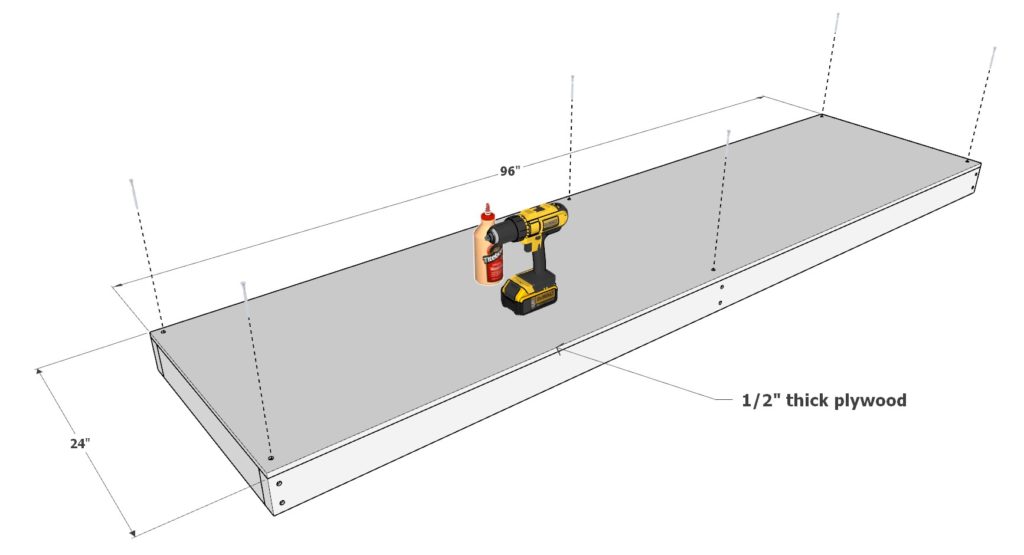
- Take two 96-inch 2×4 lumber pieces and lay them parallel to each other on a flat surface.
- Place three 21-inch 2×4 pieces between them at equal distances to serve as the supports.
- Following the first diagram, apply wood glue to the ends of each support, position them, and then secure with 3.5-inch screws.
Attach the Plywood:
- Spread wood glue on the frame you’ve just created.
- Lay a 96-inch x 24-inch plywood sheet on top, ensuring it’s evenly aligned with the frame.
- Fix the plywood in place by driving 2.5-inch screws into the pre-drilled holes.
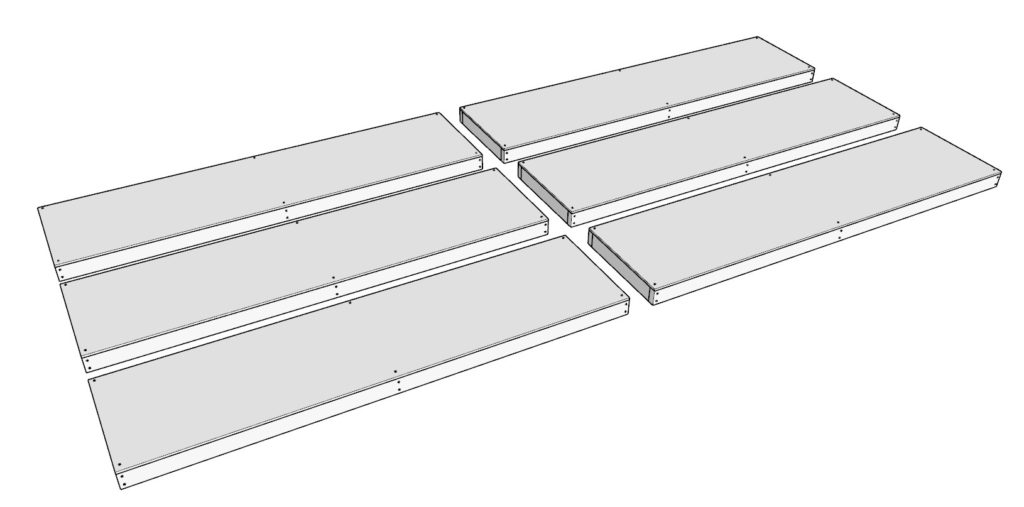
Repeat for More Shelves:
- Repeat the above steps to make a total of six identical shelf frames.
Tips:
- Pre-drill holes to prevent splitting when inserting screws.
- For a smooth finish, countersink the screws so they sit flush with the wood.
- Sand the wood before assembling if you prefer a smoother finish.
- If you’re planning to paint or stain the shelves, do it before assembly for ease and a more consistent look.
Step 2: Attaching the Legs and Joining the Units
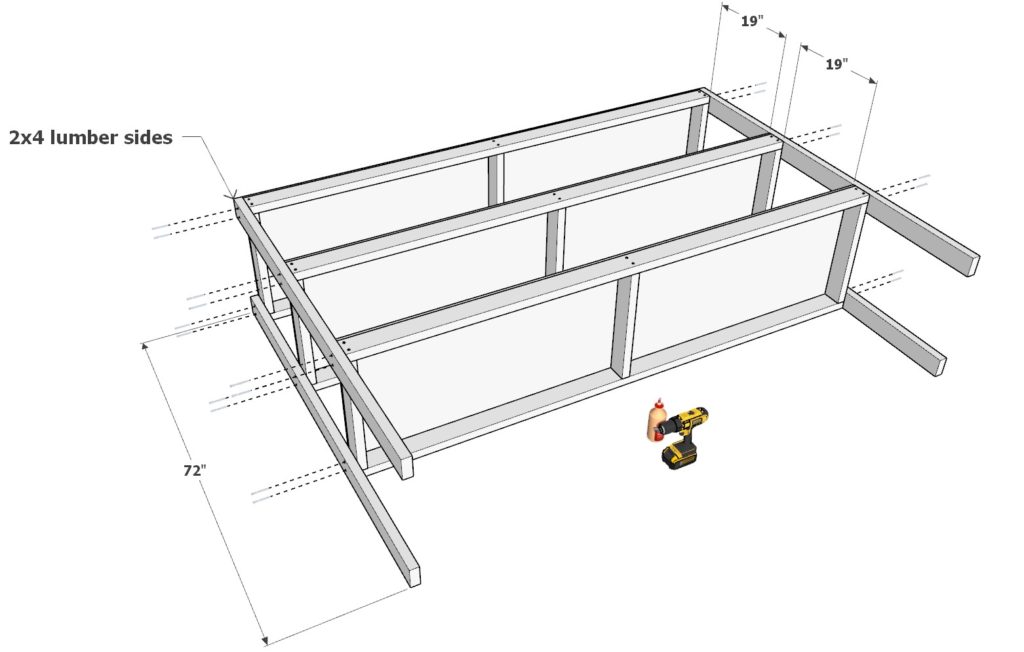
Attach the Legs:
- Add four 72-inch 2×4 lumber pieces upright to act as legs for one shelf unit.
- Glue each leg to the corners of the shelf frame.
- Fasten each leg with 2.5-inch screws to avoid piercing through the wood.
Assemble the Second Unit:
- Follow the same steps to attach legs to the second shelf frame, creating two separate shelf units.
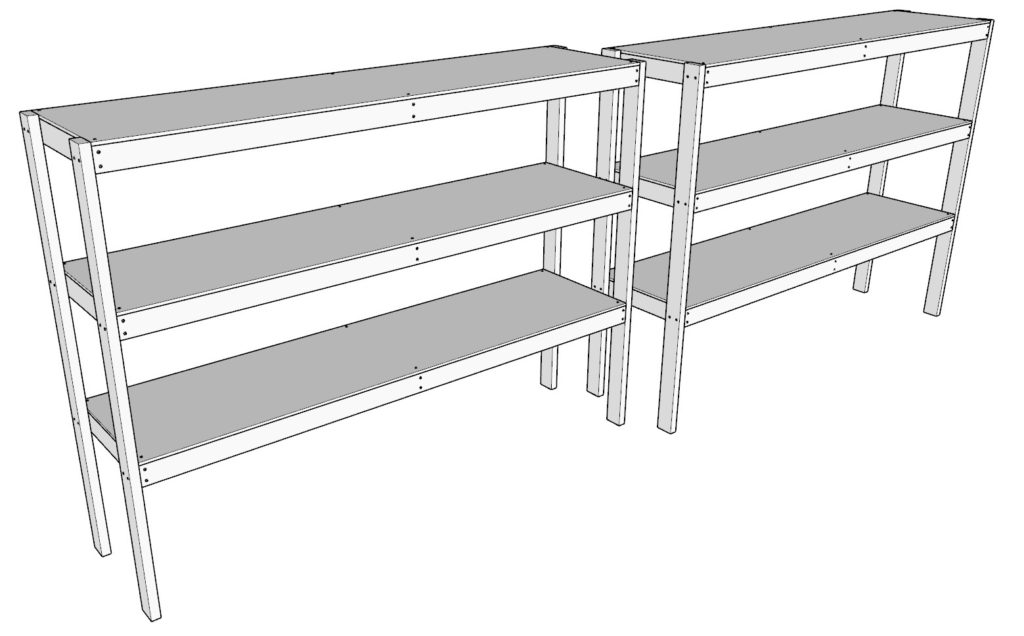
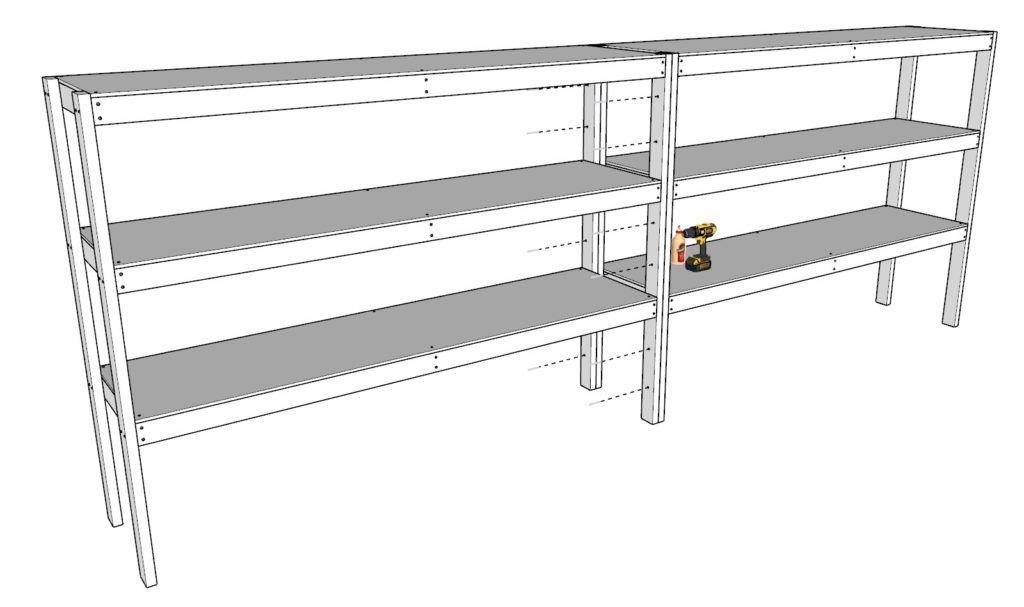
Join the Units:
- Align both shelf units next to each other so the legs are flush.
- Connect the units by screwing them together at the top, middle, and bottom with 2.5-inch screws, ensuring they do not protrude through the other side.
Step 3: Finishing Touches and Secure Mounting
Securing to Wall Studs:
- Locate the studs in your garage wall using a stud finder. Standard spacing is typically 16 inches apart, center to center, but this can vary.
- Once studs are found, mark their location.
- Align the shelving unit with the studs. It’s crucial to ensure the shelves are level before securing them.
- Secure the unit by screwing directly through the 2×4 lumber of the shelf and into the studs. Use screws long enough to anchor into the studs for a firm. 3.5 inch screws should be ok.
Attaching with Brackets:
- For additional support, use L-brackets or heavy-duty shelf brackets.
- Attach the brackets to the studs first, then to the top shelf of the unit.
- Ensure the brackets are level and firmly attached.
Sanding and Prepping for Finish:
- Sand the entire unit with medium-grit sandpaper, followed by fine-grit for a smooth finish.
- Wipe down the wood with a tack cloth to remove all dust.
- If staining, apply a pre-stain wood conditioner, then the stain, following the manufacturer’s instructions. Seal with a clear polyurethane topcoat.
- If painting, apply a primer suitable for the wood, followed by your chosen paint color.
Safe Usage and Organization Tips:
- Always place heavier items on the lower shelves to lower the center of gravity and prevent tipping.
- Keep commonly used items at waist to eye level for easy access.
- Consider labeling shelves to maintain organization.
- Regularly check the unit for any loose screws or signs of wear and tighten or replace as needed for safety.