DIY planter box overview:
DIY Planter Box: A Perfect Addition to Your Garden
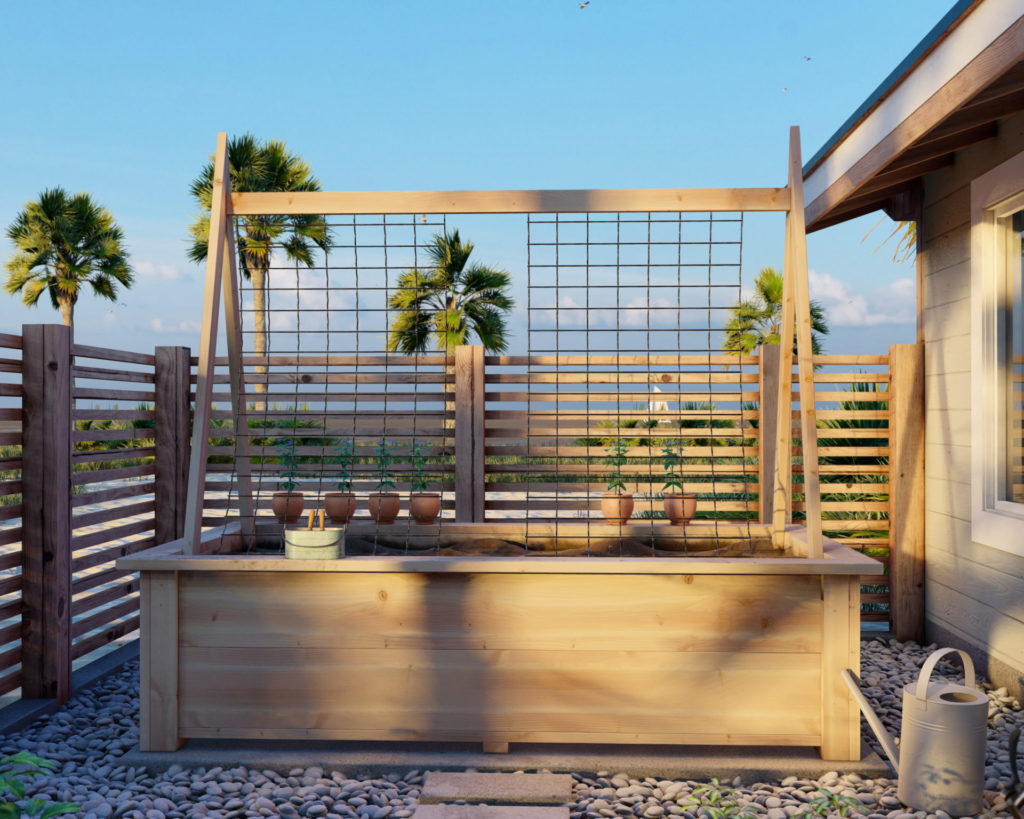
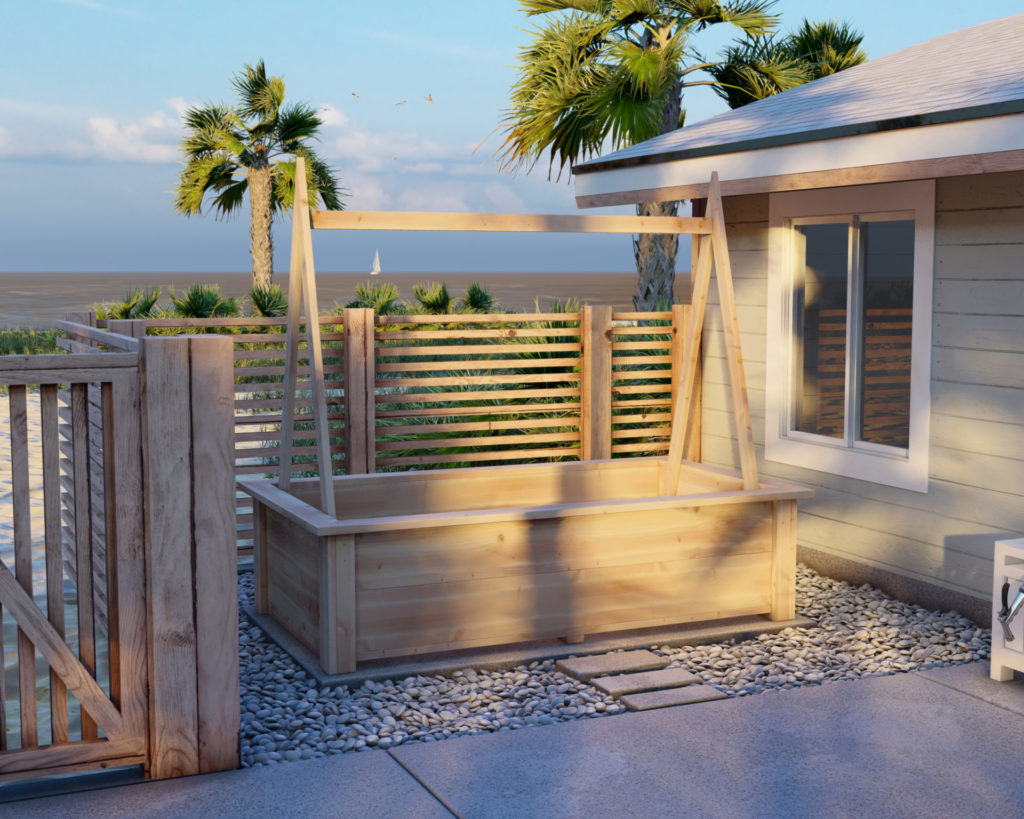
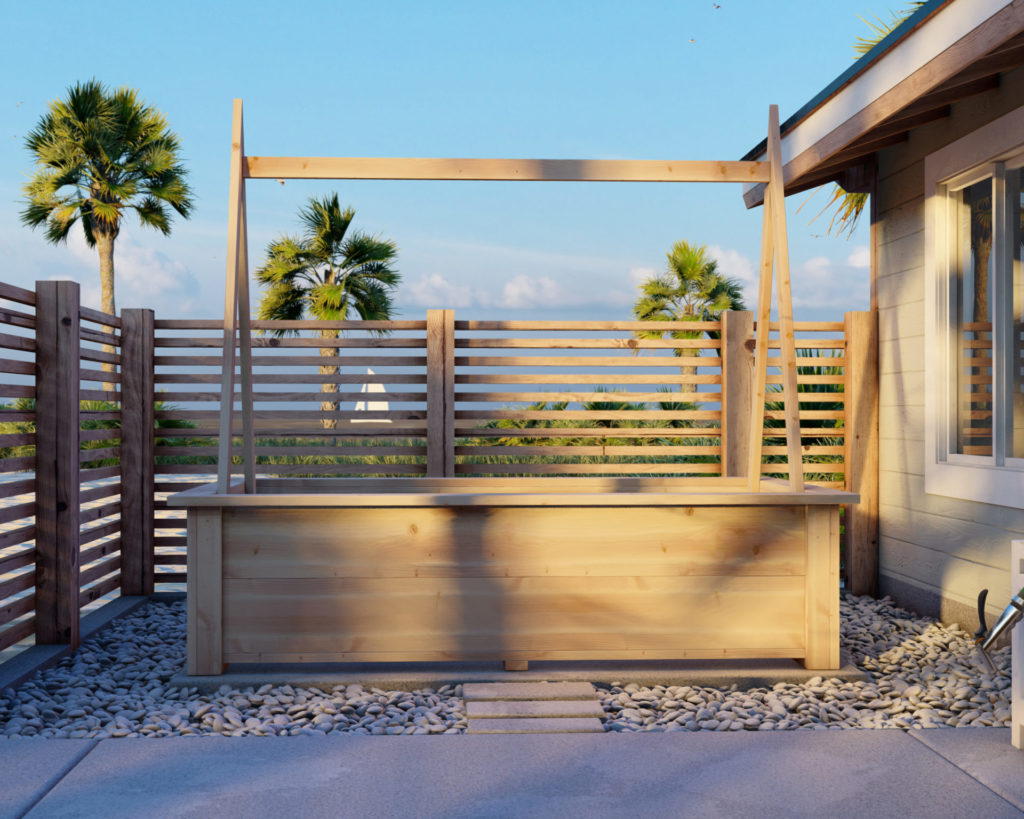
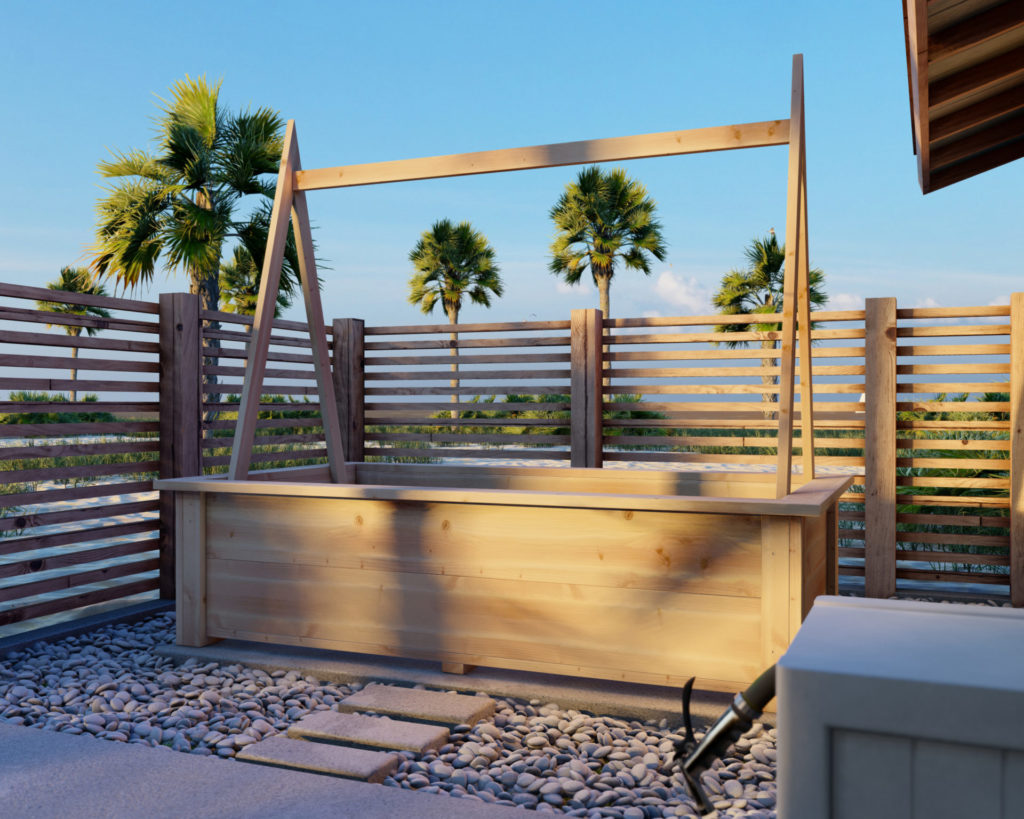
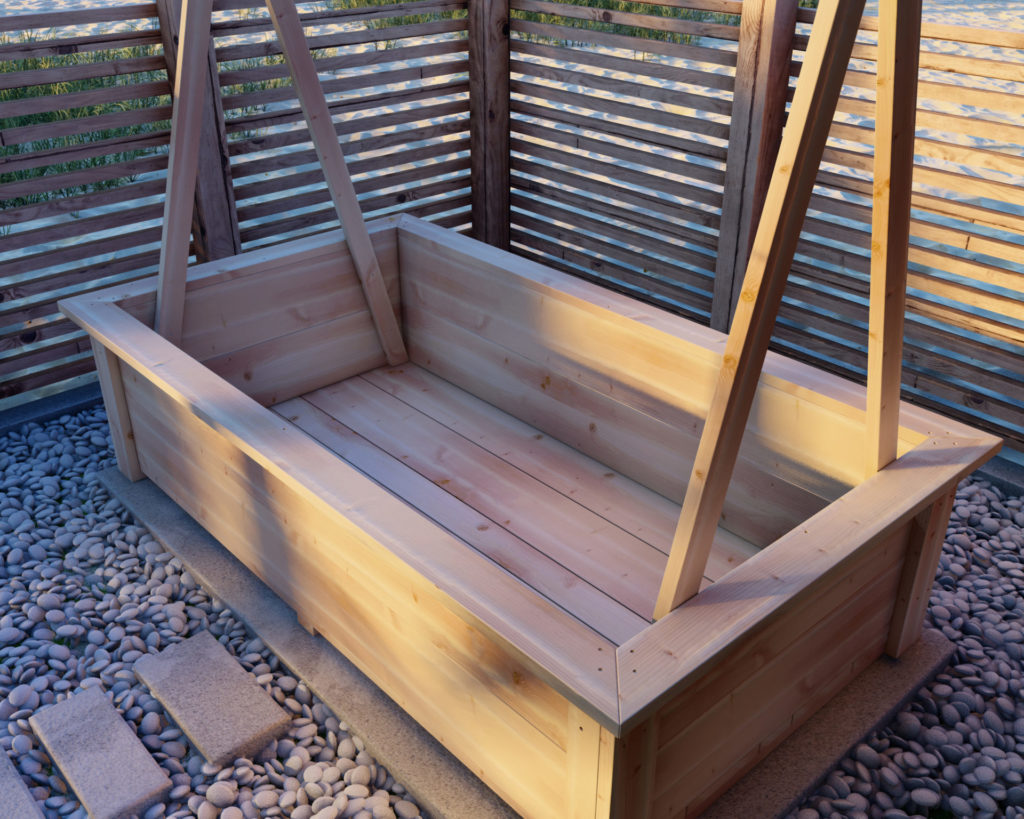
For all the gardening enthusiasts, we bring you a planter box that is not only functional but also aesthetically pleasing. This planter box design is constructed using 2×12 lumber, 2×6 lumber, and 2×4 lumber and is sure to add a touch of charm to your outdoor space.
The planter box features a lip that runs along the edges, providing an extra level of comfort and ease while gardening. The height of the planter box is designed to be ergonomic, making it easy and convenient to tend to your plants. The elevated design of the planter box also ensures that the board underneath receives proper air flow, preventing the wood from rotting.
One of the most important aspects of gardening is proper drainage, and this planter box takes care of that with its 1/8 inch slits. This ensures that your plants receive the right amount of water, without being waterlogged.
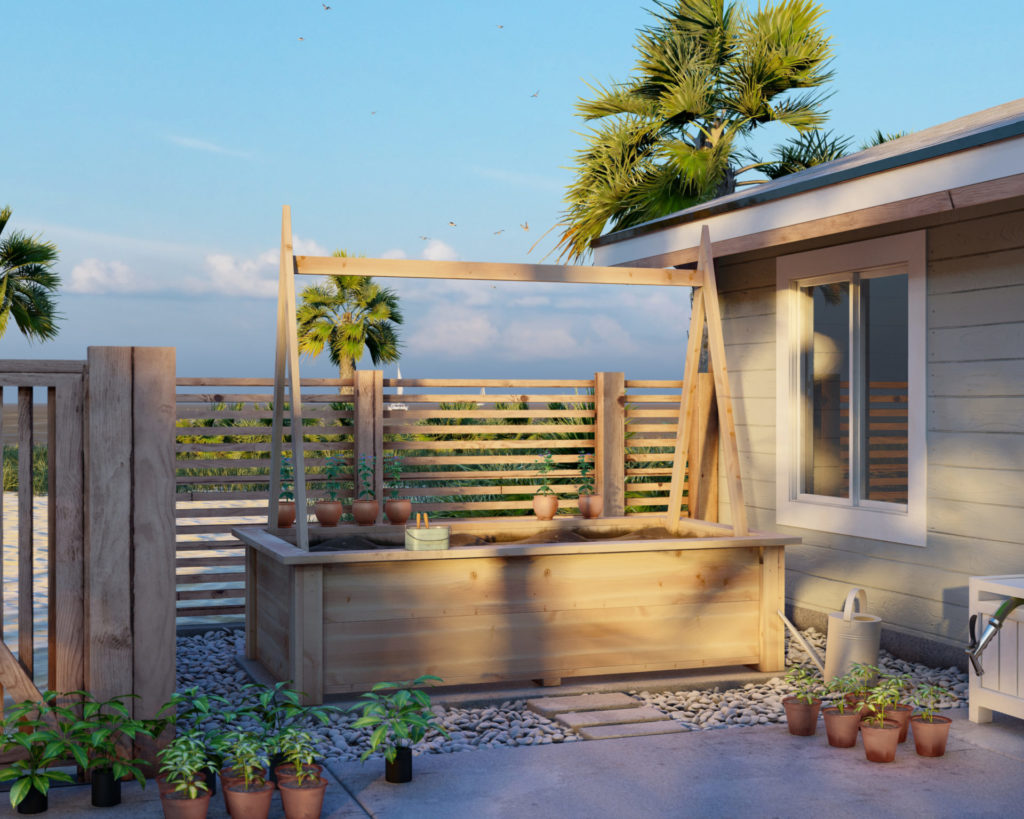
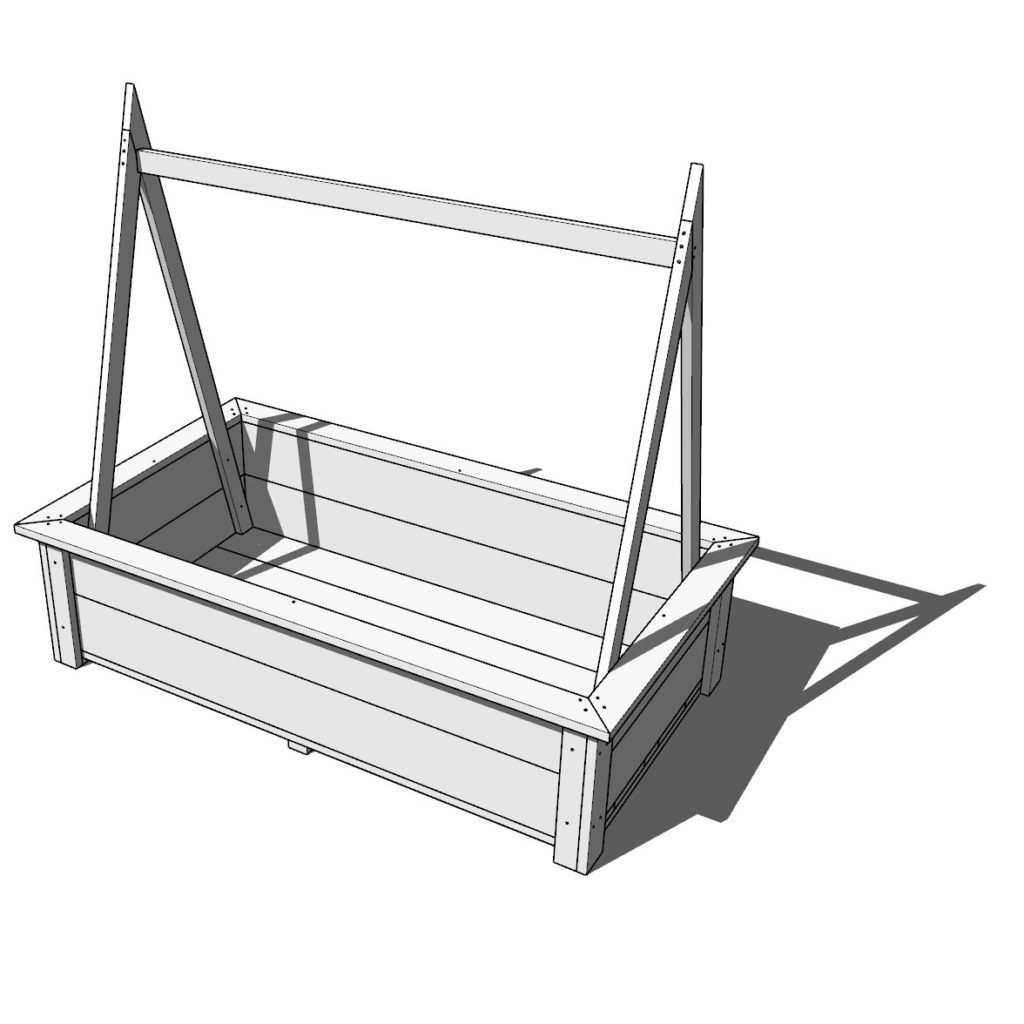
This planter box is designed with versatility in mind, featuring an “A” shaped trellis. This trellis provides support for climbing plants like cucumbers, tomatoes, and pea plants, adding a touch of greenery to your outdoor space.
This DIY planter box is the perfect addition to your garden. With its functional design and aesthetically pleasing features, you will find yourself spending more time in your outdoor space. Get ready to bring your gardening game to the next level with this amazing planter box.
DIY planter perfect for beginners to woodworking
This project is ideal for those who are just starting out in woodworking, as it requires no fancy joints or cuts and features easy step-by-step instructions. The project includes diagrams and a cut list and material list to ensure a stress-free experience.
Time to build
About 3 hours
Total cost of build
$300
Skill level required
Beginner
Download the PDF plans
DIY planter box PDF plans
What is included in the PDF download?
Easy to read step by step instructions
Material list
Tools needed
3D illustrations
Recommended tools/materials
Available with the purchase of the PDF. Thank you for making this website possible with your support.
Shopping list and cut list
Available with the purchase of the PDF. Thank you for making this website possible with your support.
Step 1 (DIY planter box frame construction)
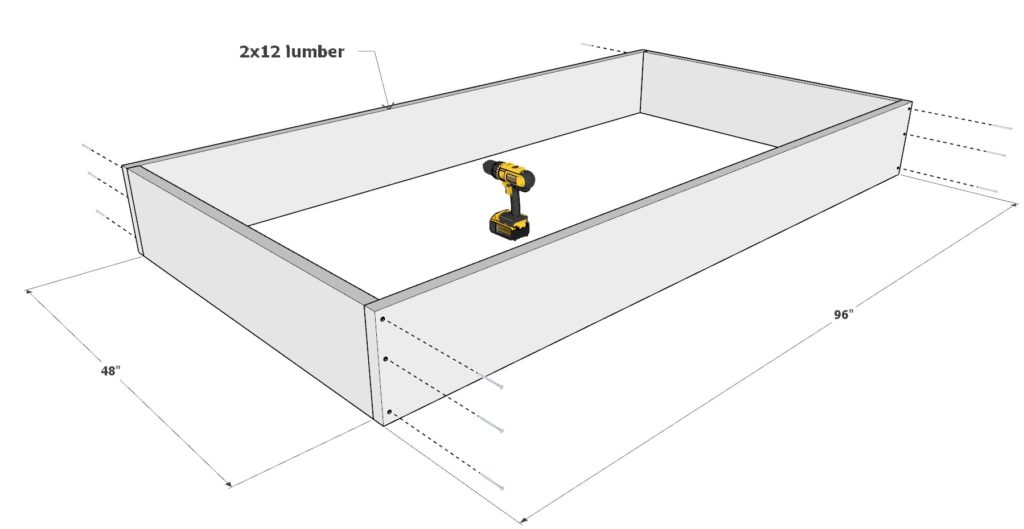
First, build the planter box frame.
Take two 48 inch 2×12 lumber pieces and two 96 inch 2×12 lumber pieces and arrange them as shown below.
Join the corners by predrilling and adding 3.5 inch screws.
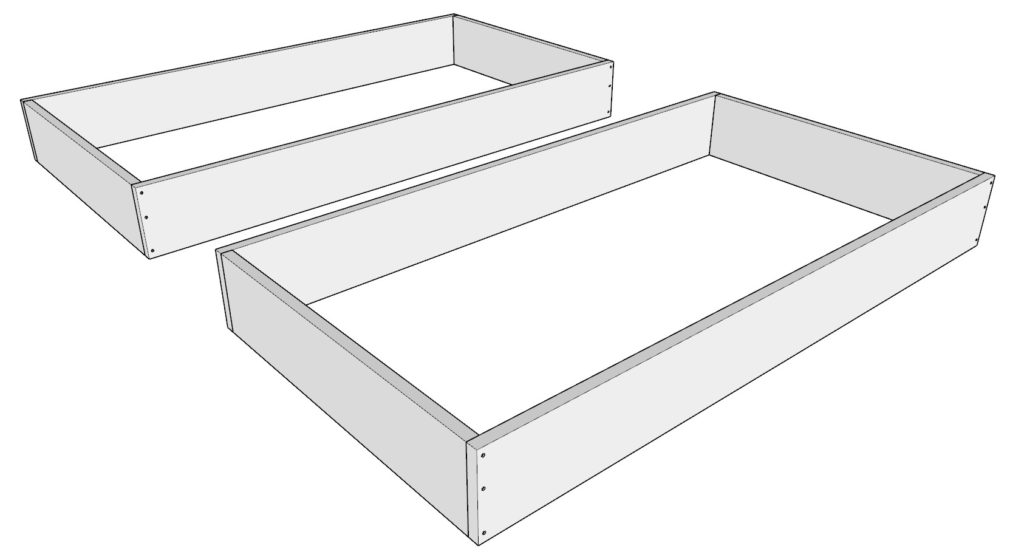
Make a second identical 2×12 frame piece.
Step 2 (DIY planter box frame supports added)
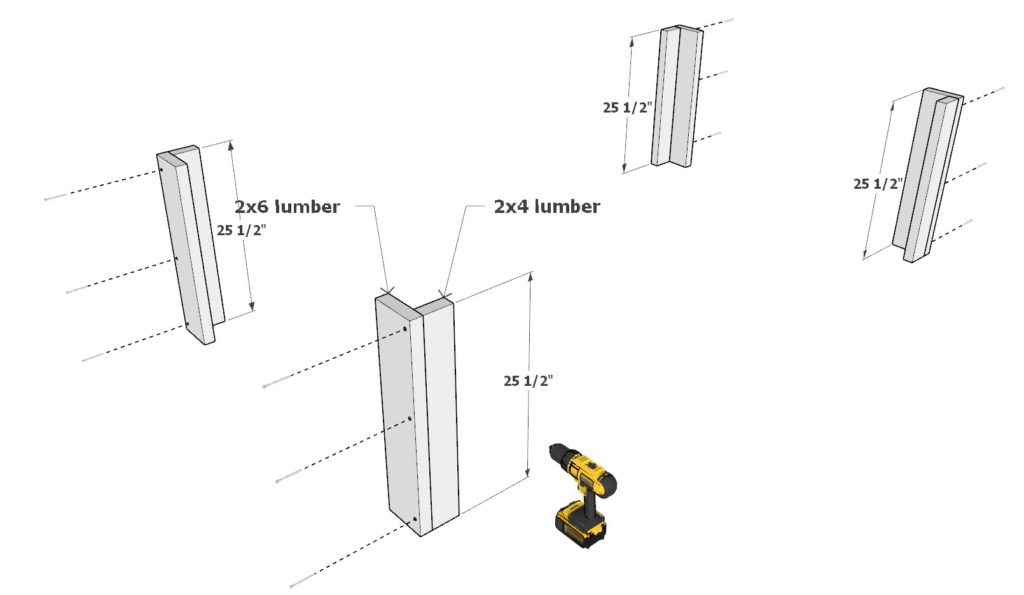
Next, add the garden bed box frame supports.
Take four 25-1/2 inch 2×6 lumber pieces and four 25-1/2 inch 2×6 lumber pieces and arrange them as shown below.
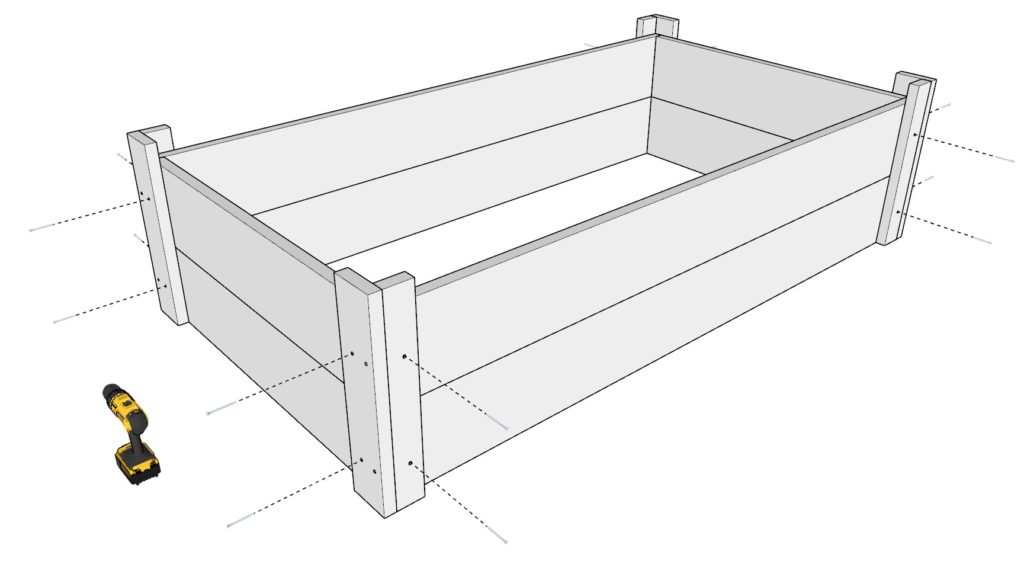
First, join the pieces together by predrilling and using 3.5 inch screws.
Next, secure the supports to the garden box. Use 2.5 inch screws to make sure the screws do not poke though.
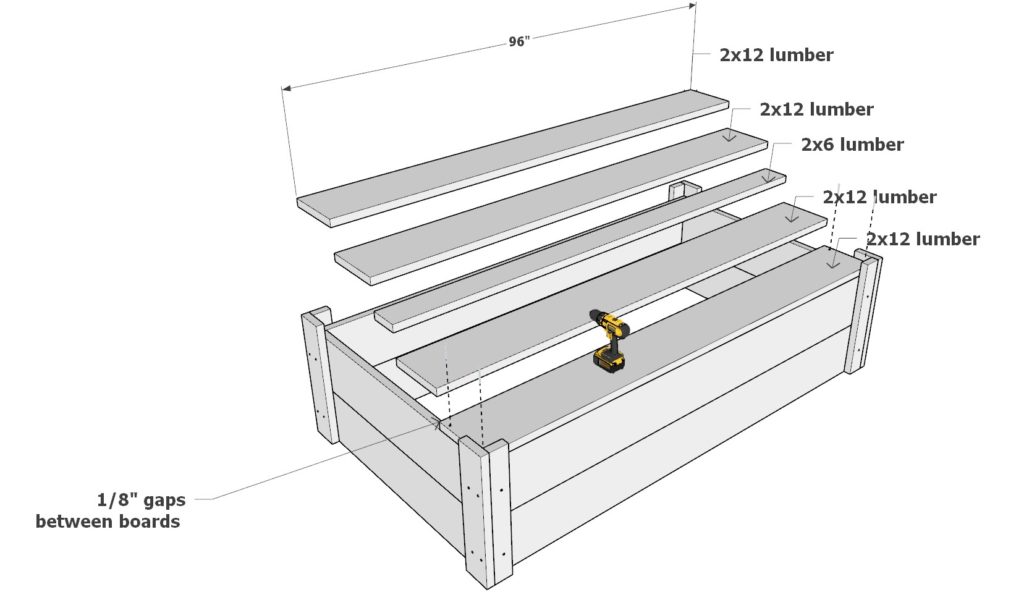
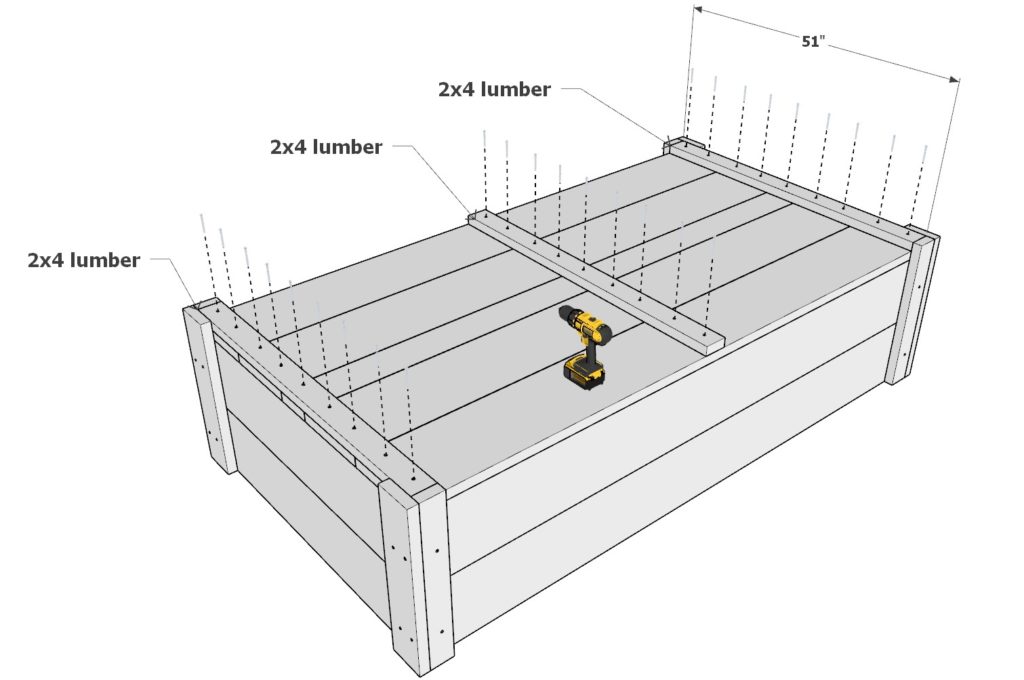
Step 3 (Adding bottom planks to planter box)
Next, add the DIY planter box bottom planks.
Take four 96 inch 2×12 lumber pieces and one 96 inch 2×6 lumber piece and attach them to the bottom of the planter box. Predrill and use 3.5 inch screws. Leave a 1/8 inch gap between the planks to allow for water to drain though.
Next, reinforce the planks with three 51 inch 2×4 lumber pieces as shown below. Add 2.5 inch screws and secure them into place.
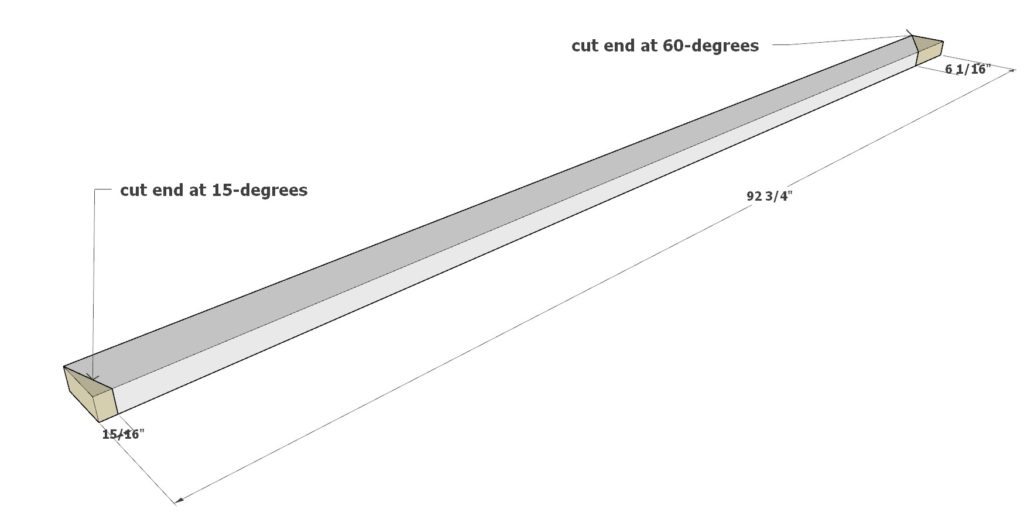
Step 4 (Assembly of DIY planter box trellis)
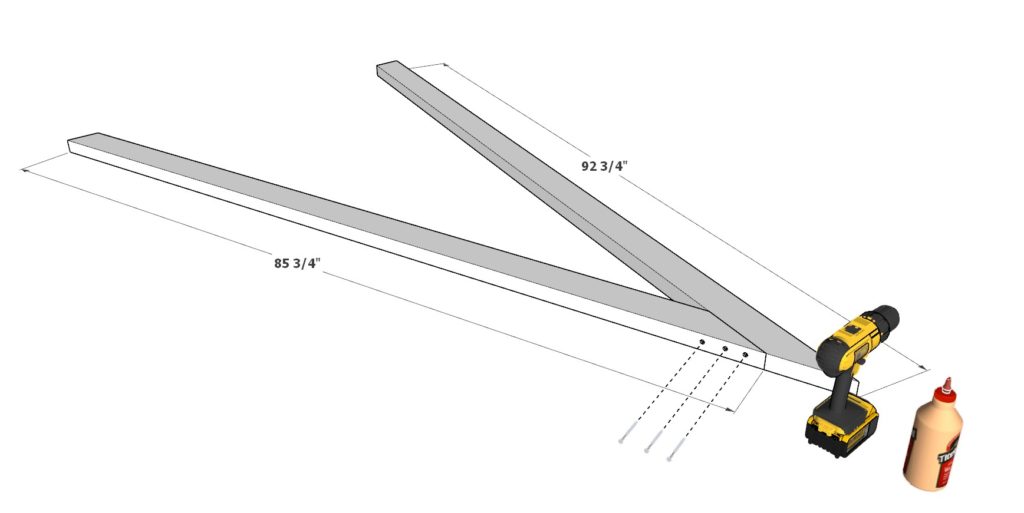
Next, cut and assemble the two “A” framed garden trellis components.
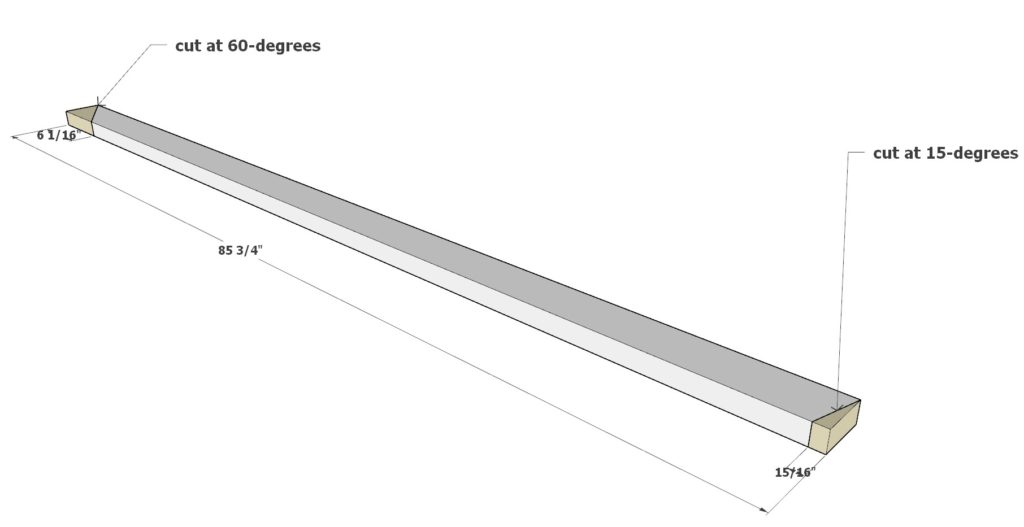
First, take one 92-3/4 inch long 2×4 lumber piece and cut down the ends as indicated in the diagram. Second, take a 85-3/4 inch 2×4 lumber piece and cut down the ends as indicated in the diagram.
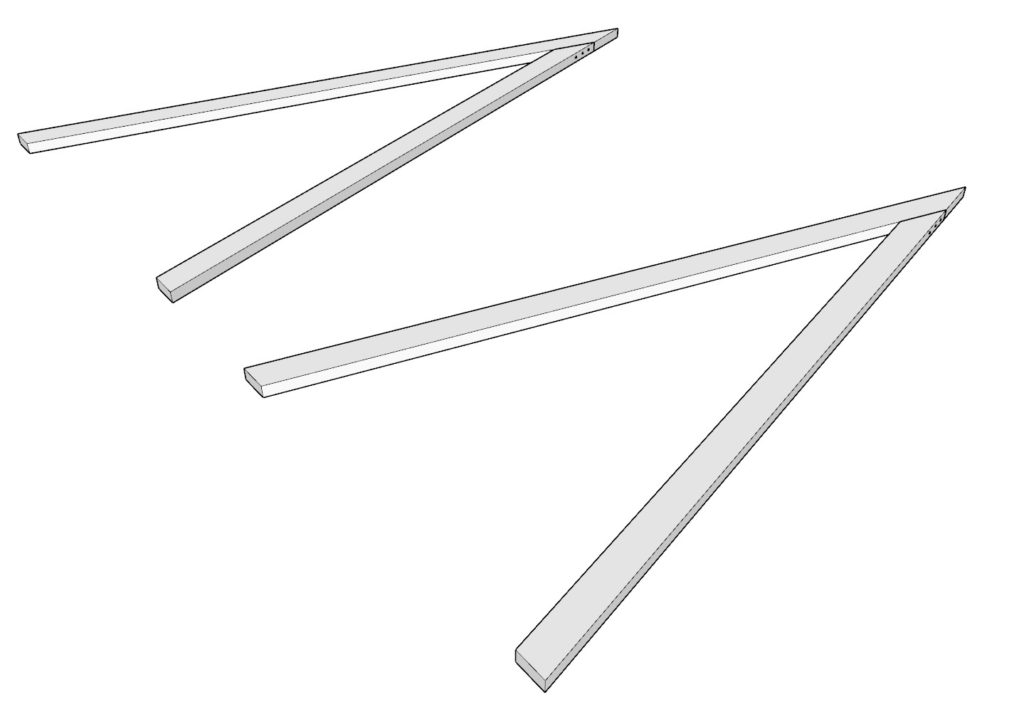
Next, join the two 2×4 pieces to make a letter “A.” Use both 2.5 and 3.5 inch screws and glue. Make sure you predrill well to prevent the trellis from splitting.
Make a second identical trellis component.
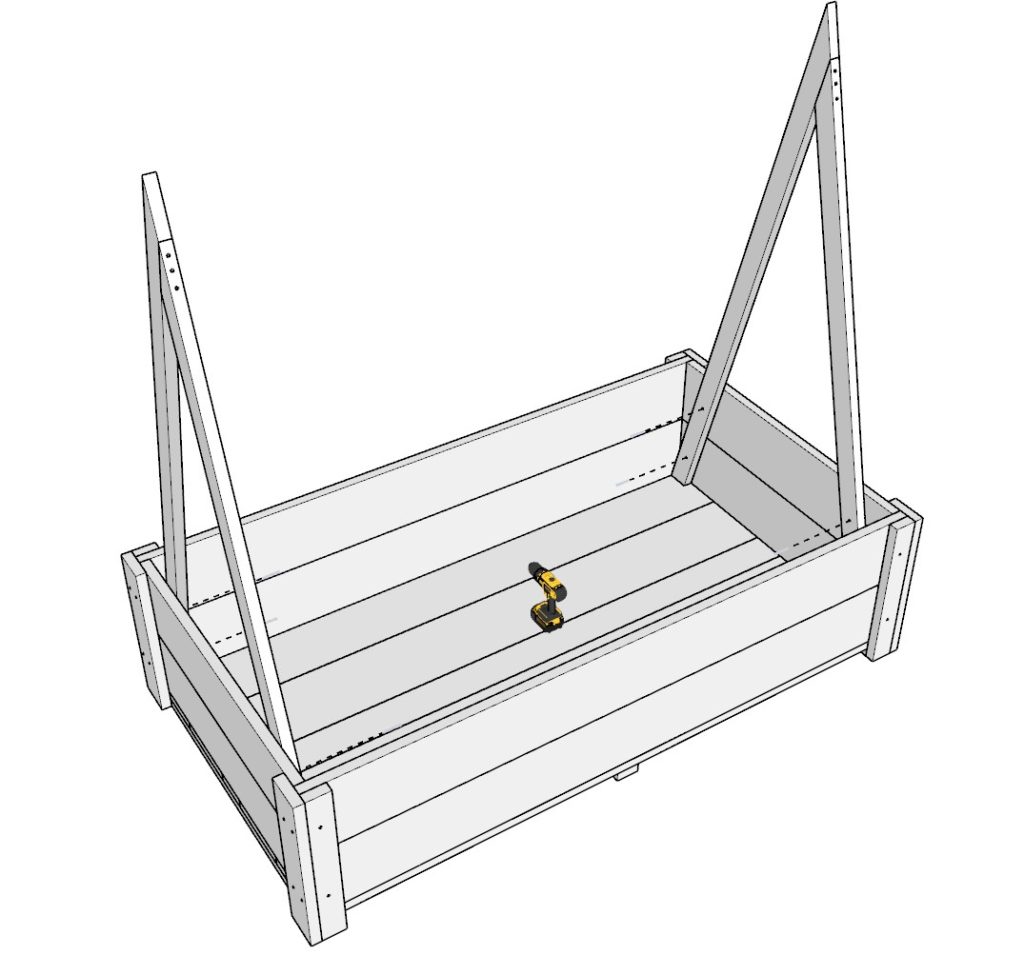
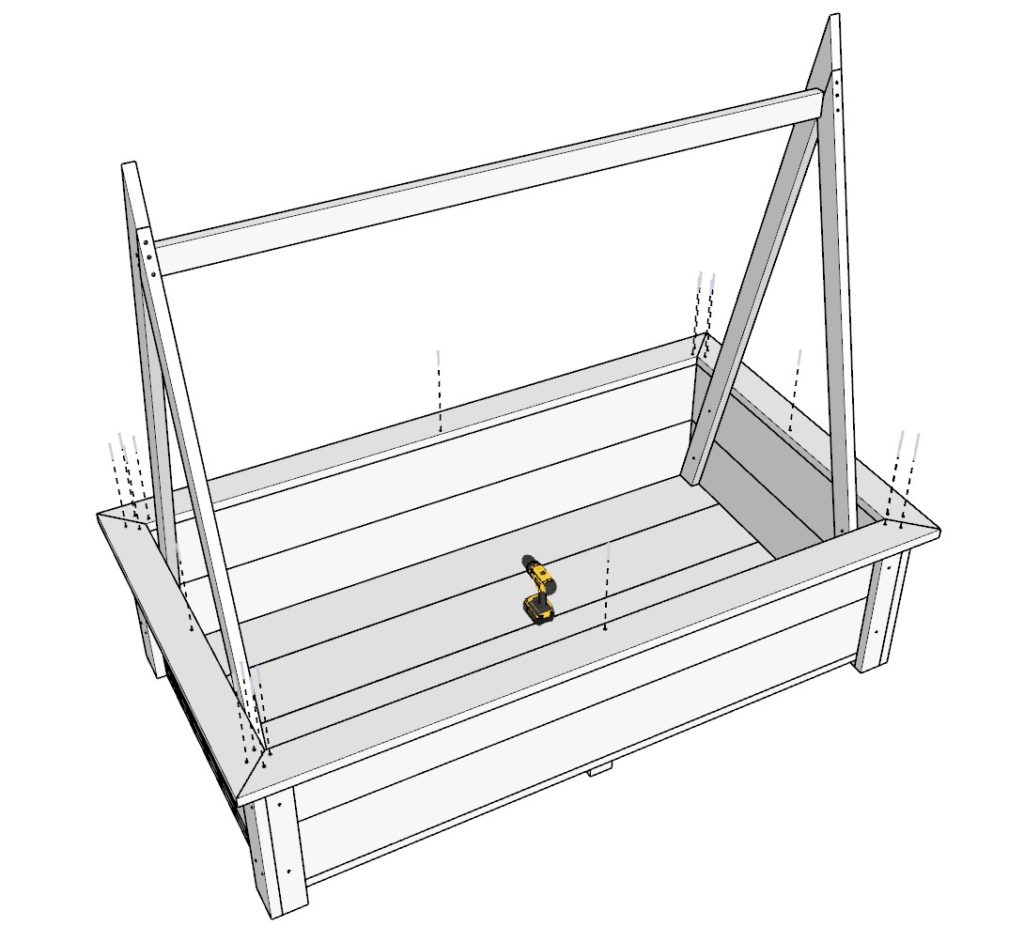
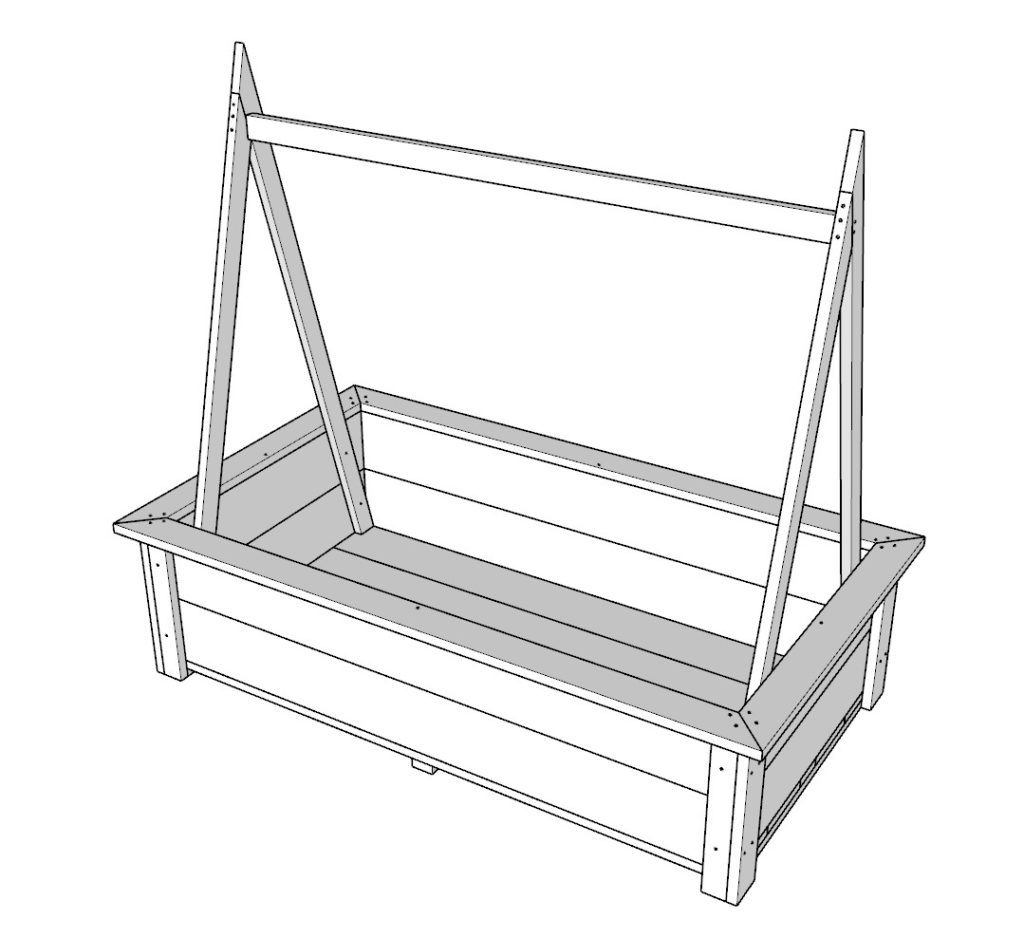
Step 5 (Installing planter trellis)
Next, attach the trellis to the DIY planter box using 2.5 inch screws.
In this step also attach a 90 inch 2×4 lumber cross beam to the trellis. This will serve as an anchor point upon which cucumber vines can climb, where pea plants can be attached, and where tomatoes can be supported.

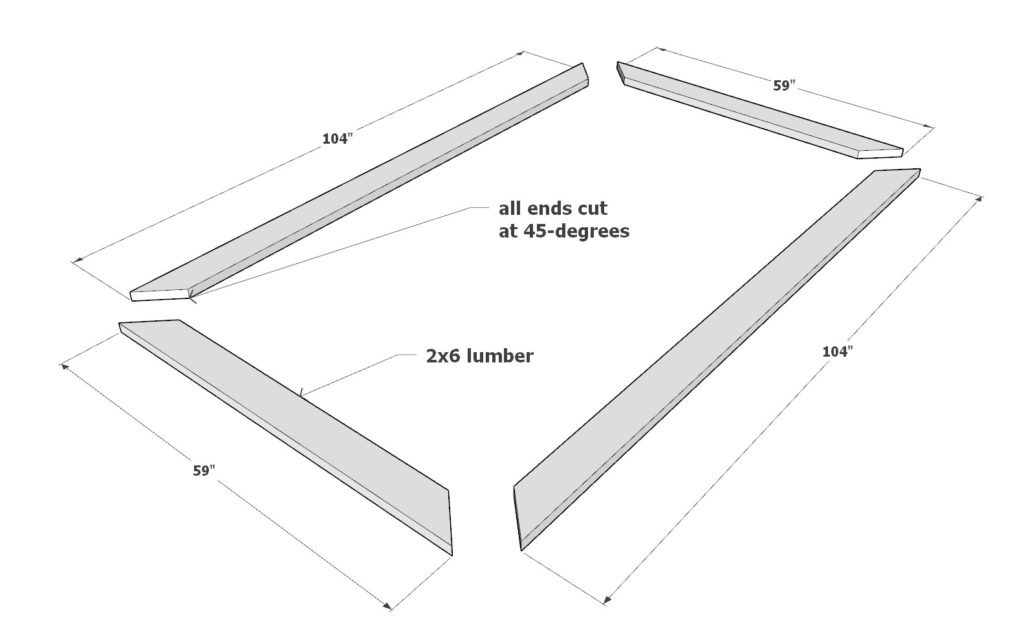
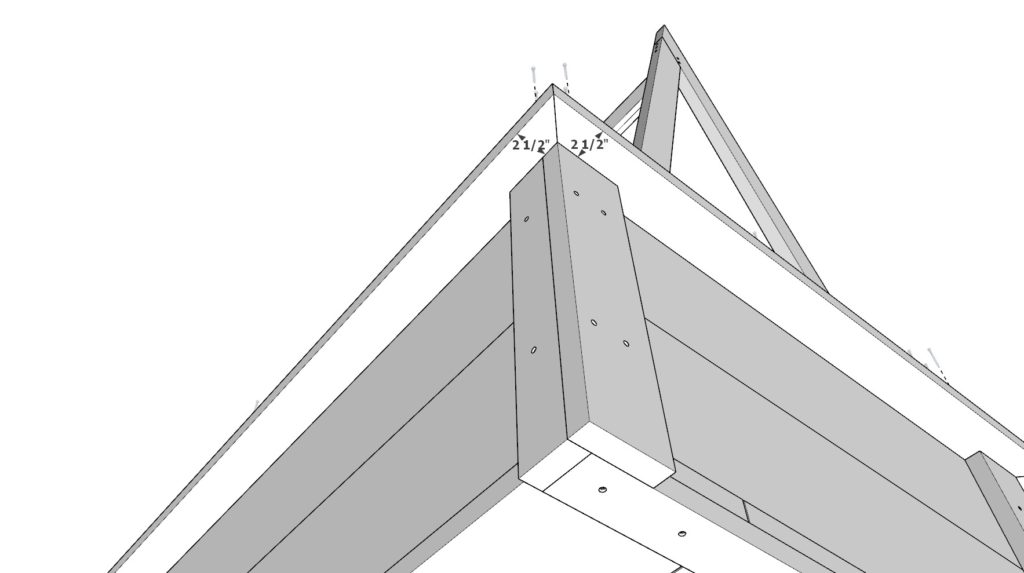
Step 6 (Adding trim/skirt to DIY planter box edges)
Next, add the trim and skit to go around the lip of the planter box.
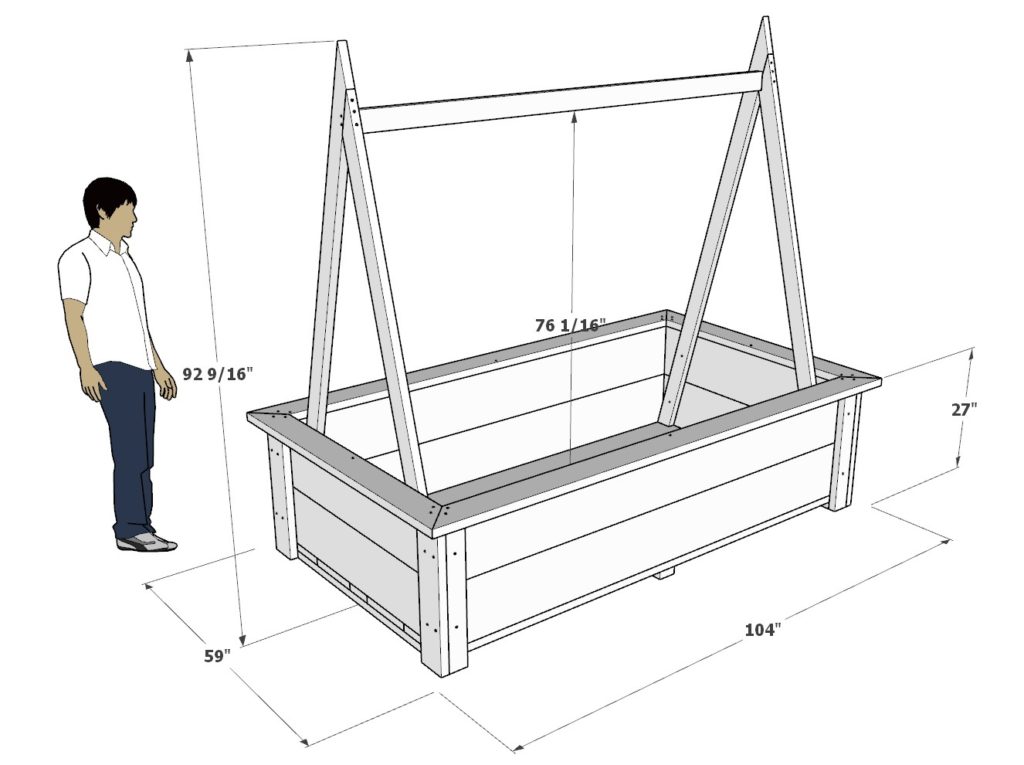
Take two 104 inch 2×6 lumber pieces and two 59 inch 2×6 lumber pieces. All of these lumber pieces need to be cut at 45-degrees on both ends as shown in the diagram.
Install the trim by using 3.5 inch screws and predrilling to secure them in place.
The edges of the trim/skirt need to be 2.5 inches overhanging the edge.
Step 7 (DIY planter box finishing touches)
Sanding the DIY Planter Box
It is important to properly prepare your DIY planter box before planting in order to ensure the safety of those using the garden bed. Sanding down rough edges and corners can prevent planters from accidentally getting poked or cut while tending to the garden.
To sand the planter box, gather the necessary materials: sandpaper (medium grit), sanding block, and protective gear (e.g. gloves, dust mask). Begin by removing any large splinters or rough spots on the wood. Then, using a sanding block and medium grit sandpaper, gently sand the entire surface of the planter box, focusing on any areas with rough edges or corners. Be sure to sand in the direction of the wood grain to avoid creating any noticeable scratches.
Avoid Staining or Painting the Inside of the Planter Box
It is important not to stain or paint the inside of the planter box as this can potentially introduce toxins into the soil, which can be harmful to plants. Instead, opt for a natural or untreated wood finish for the interior of the planter box.
Using a Liner for the Planter Box
For additional protection, you may choose to place a liner inside the planter box. A liner can prevent the soil and roots from coming into direct contact with the wood, which can help to prevent the release of any harmful chemicals.
There are several options for liner material, including:
Heavy-duty plastic: This is a durable option that can last for many years and is easy to clean.
Landscape fabric: This is a permeable option that allows for proper drainage and aeration of the soil.
Cocoa liners: Made from coconut fibers, these biodegradable liners are an eco-friendly option for those who are looking for a more natural solution.
When selecting a liner, consider the weight of the soil and plants that will be in the planter box, as well as the desired level of drainage and aeration. Choose a liner that is thick enough to withstand the weight and wear and tear, and make sure it fits properly inside the planter box, allowing for a small gap around the edges for proper drainage.
Caring for Your Natural Wood Planter Box: Tips for Longevity and Beauty
Maintaining Your Planter Box for Longevity
Taking proper care of your planter box can help to extend its lifespan and keep it looking beautiful for many years. As an all-natural gardener, you may prefer to use natural methods to maintain your planter box rather than relying on chemicals or synthetic products. Here are some tips for keeping your planter box in top condition:
Clean the exterior of the planter box regularly: Dirt and debris can build up on the exterior of the planter box over time, which can lead to decay and unsightly stains. To clean the exterior, use a stiff brush or scraper to remove any loose dirt or debris. You can also rinse the surface with a hose or bucket of water to remove any remaining dirt.
Protect the wood from moisture: Moisture can cause wood to rot, warp, or split, so it’s important to protect the planter box from prolonged exposure to water. To help reduce moisture exposure, make sure the bottom of the planter box is elevated off the ground and that it is not in a low-lying area that may be prone to pooling water.
Apply natural oil to the wood: Natural oils, such as linseed oil or tung oil, can help to nourish and protect the wood, making it less susceptible to rot, decay, and water damage. To apply the oil, clean the surface of the planter box and then use a clean cloth to apply the oil evenly over the surface. Allow the oil to soak into the wood for several hours, and then wipe away any excess oil.
Keep plants trimmed: Overgrown plants can put excessive weight on the planter box, which can lead to warping, splitting, or cracking. Regularly trimming and removing any dead or overgrown plants can help to reduce stress on the planter box and keep it in good condition.
Store the planter box during the winter: If you live in a region with harsh winters, it is a good idea to store the planter box during the colder months to protect it from damage. To store the planter box, clean it thoroughly and let it dry completely. Then, wrap it in a protective cover and store it in a dry, protected area until it is ready to be used again.
By following these tips, you can help to keep your planter box looking beautiful and functioning well for many years to come.